Salted Caramel Syrup You Can Make at Home in Minutes.
Want to make delicious drinks that have that special coffee-shop quality? Then you need to learn to make this Salted Caramel Syrup. It’s easy and fun.
You can make this delicious syrup right at home with just a few ingredients and skipping the expensive bottles altogether.
This simple recipe delivers amazing results without the artificial flavors found in many store-bought versions.
Our guide walks you through every step of the process.
You’ll learn how to master the caramelization technique that gives this treat its rich, deep flavor.
The best part is that you likely have everything you need already in your pantry. The final product rivals what you’d find at popular cafes.
Plus, you get the satisfaction of creating it yourself.
This versatile creation transforms ordinary drinks and desserts into extraordinary treats.
Use it to elevate your morning latte, sweeten iced coffee, or add depth to cocktails and baked goods.
Even if you’ve never worked with sugar cooking before, our friendly instructions will help you succeed.
Key Takeaways
- Create coffee-shop quality flavor in your own kitchen quickly.
- Avoid artificial ingredients found in many store-bought versions.
- Use simple pantry staples you likely already have available.
- Master the caramelization process with easy-to-follow steps.
- Transform various drinks and desserts with this versatile creation.
- Gain the satisfaction of making a special treat from scratch.
- Suitable for beginners with no previous candy-making experience.
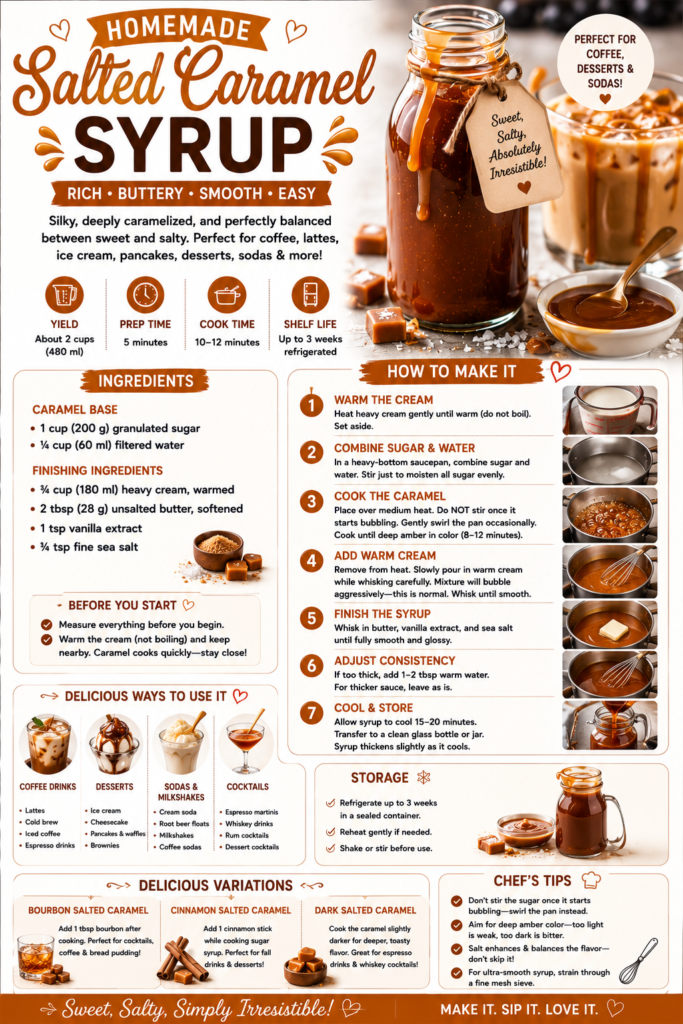
Homemade Salted Caramel Syrup Recipe
Rich • Buttery • Smooth • Perfect for Coffee, Desserts & Sodas
This homemade salted caramel syrup is silky, deeply caramelized, and perfectly balanced between sweet and salty. Unlike many store-bought versions, this recipe creates:
- Real caramel flavor
- Velvety texture
- Controlled sweetness
- A luxurious finish
Perfect for:
- Coffee drinks
- Lattes & cold brew
- Ice cream
- Pancakes
- Cheesecake drizzle
- Cream sodas
- Cocktails & milkshakes
The key to exceptional caramel syrup is:
- Proper caramel color
- Controlled heat
- Warm cream addition
- Balanced salt level
Yield: Approximately 2 cups (480 ml) syrup
INGREDIENTS
Caramel Base
- 1 cup (200 g) granulated sugar
- ¼ cup (60 ml) filtered water
Finishing Ingredients
- ¾ cup (180 ml) heavy cream, warmed
- 2 tbsp (28 g) unsalted butter, softened
- 1 tsp vanilla extract
- ¾ tsp fine sea salt
EQUIPMENT
- Heavy-bottom saucepan
- Heatproof spatula or wooden spoon
- Whisk
- Heatproof measuring cup
- Glass bottle or jar
IMPORTANT BEFORE STARTING
Caramel cooks quickly once it begins coloring.
Before turning on the heat:
- Measure everything
- Warm the cream
- Keep tools nearby
⚠️ Hot caramel is extremely hot and sticky. Work carefully.
PREPARATION & METHOD
1: Warm the Cream
- Heat heavy cream gently until warm but not boiling.
- Set aside.
Warm cream blends more smoothly and reduces splattering.
2: Combine Sugar & Water
In a heavy-bottom saucepan, combine:
- Granulated sugar
- Water
Stir just enough to moisten all sugar evenly.
3: Cook the Caramel
- Place saucepan over medium heat.
- Do NOT stir once the syrup begins bubbling.
Instead:
- Gently swirl the pan occasionally.
Cook until the caramel becomes:
- Deep amber
- Rich golden brown
Timing
Usually:
- 8–12 minutes
⚠️ Watch carefully near the end.
Caramel can burn quickly.
4: Add Warm Cream
- Remove saucepan from heat.
- Slowly pour in warm cream while whisking carefully.
⚠️ The mixture will bubble aggressively. This is normal.
Continue whisking until smooth.
5: Finish the Syrup
Whisk in:
- Butter
- Vanilla extract
- Sea salt
Mix until fully smooth and glossy.
6: Adjust Consistency
If syrup seems too thick:
- Add 1–2 tbsp warm water
For thicker dessert sauce:
- Leave as is
7: Cool
- Allow syrup to cool 15–20 minutes.
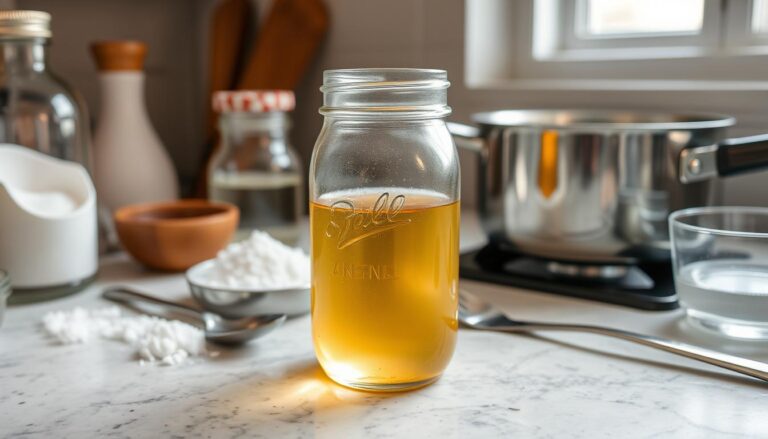
- Transfer to a clean glass bottle or jar.
The syrup thickens slightly as it cools.
STORAGE
- Refrigerate up to 3 weeks
- Reheat gently if needed
- Shake or stir before use
USING SALTED CARAMEL SYRUP IN
Coffee Drinks
Excellent in:
- Lattes
- Cold brew
- Iced coffee
- Espresso drinks
Recommended Amount
- 1–2 tbsp per drink
Desserts
Perfect for:
- Ice cream
- Cheesecake
- Pancakes & waffles
- Brownies
- Soda cakes
Sodas & Milkshakes
Pairs beautifully with:
- Cream soda
- Root beer floats
- Vanilla milkshakes
- Coffee sodas
OPTIONAL VARIATIONS
Bourbon Salted Caramel Syrup
Add:
- 1 tbsp bourbon after cooking
Excellent for:
- Cocktails
- Coffee drinks
- Bread pudding
Cinnamon Salted Caramel
Add:
- 1 cinnamon stick while cooking sugar syrup
Perfect for:
- Fall drinks
- Holiday desserts
- Apple recipes
Dark Salted Caramel
Cook caramel slightly darker for:
- More bitter complexity
- Richer toasted notes
Ideal for:
- Espresso drinks
- Whiskey cocktails
CHEF’S NOTES
Why You Shouldn’t Stir Caramel
Stirring can cause:
- Sugar crystallization
- Grainy caramel
Swirling the pan gently is safer.
Best Caramel Color
Aim for:
- Deep amber
Too light:
- Weak flavor
Too dark:
- Bitter syrup
How Salt Changes Caramel
Salt:
- Balances sweetness
- Intensifies caramel flavor
- Creates a more “finished” taste
For Ultra-Smooth Syrup
Strain through a fine mesh sieve after cooking.
Perfect for:
- Coffee drinks
- Elegant plating
- Cocktail bars
Understanding the Chemistry Behind Caramelization
There’s real science behind why heating sugar creates that wonderful caramel flavor we all love.
This process isn’t just melting, it’s a true chemical transformation.
When you apply heat to sugar, something amazing happens. The molecules break apart and reform into hundreds of new compounds.
This creates the complex flavors and beautiful amber color.
How Sugar Transforms into Caramel
This process differs greatly from making simple syrup. In simple syrup, sugar just dissolves in water.
Caramelization actually changes the sugar molecules themselves.
The transformation begins around 320°F (160°C). You don’t need a thermometer though. Visual cues will guide you perfectly.
Watch for the color change from clear to golden to deep amber. This signals the chemical reactions are complete.
The rich, complex flavor develops during this stage.
Patience is key here. Your mixture may stay clear for 15-20 minutes.
Then the color changes dramatically in just seconds.
Understanding this chemistry helps you know what to watch for.
You’ll achieve perfect results without burning when you recognize these signs.

Managing Heat and Timing
Mastering temperature control is the secret to perfect caramelization every time. Your stove’s heat setting directly impacts how your mixture transforms.
Different cooktops behave uniquely. Gas stoves offer precise adjustments while electric models maintain consistent warmth.
Boiling and Caramelizing: What to Watch For
Start with medium-high heat to reach a rolling boil. Then adjust to maintain steady bubbles breaking the surface.
Around ten minutes in, the liquid thickens. You might need slightly more heat to keep it bubbling actively.
Timing varies significantly between batches. Some take fifteen minutes while others need forty-five.
Watch for visual changes rather than counting minutes.
The color shift happens rapidly in the final stage. Clear liquid turns light golden amber in under sixty seconds.
Remove the pan immediately when you see the perfect hue. Residual heat continues cooking even off the burner.
Trust your eyes over the clock.
That beautiful amber color signals your creation is ready for the next step.

Safety Tips When Making Caramel Syrup
Safety is the most important ingredient when working with extremely hot sugar mixtures. The liquid reaches temperatures much higher than boiling water alone.
Contact with skin can cause serious burns that require medical attention.
Always wear oven mitts during the entire process, especially when adding the second portion of water.
This is the most dangerous moment in the recipe. The temperature difference causes immediate, violent splattering.
Heat your water before adding it to the hot mixture. Use your microwave with a glass measuring cup or a small pan on another burner.
Hot water minimizes splattering and prevents the sugar from hardening into a solid mass.
Keep children and pets out of the kitchen during preparation. Position your saucepan handle away from the front of the stove to prevent accidental bumps.
Have a damp towel ready to clean any spills after they cool.
These simple precautions ensure your cooking experience remains enjoyable and injury-free.
Your safety allows you to focus on creating that perfect, flavorful result.
Adding the Final Flavors: Vanilla and Salt
The exciting part is over. Your mixture has calmed down after adding the hot water. Now it’s time for the finishing touches.
These two ingredients transform a simple sugar base into a complex treat.
This is where your personal taste truly shines. You get to decide the final character of your creation.
Incorporating Vanilla Extract for Depth
Start by stirring in two teaspoons of vanilla extract. This amount is perfect for a standard batch. Use half a teaspoon if you made a smaller portion.
The vanilla does more than add its own flavor. It rounds out the sharp edges of the cooked sugar. This creates a smoother, more sophisticated taste profile.
For an even richer experience, consider using caramel extract. You can use it instead of or along with the vanilla.
Adjusting Salt Levels to Suit Your Taste
This step elevates your creation to the trendy salted version. The salt provides a wonderful contrast to the sweetness.
Begin with a quarter teaspoon of sea salt. Stir it in while the liquid is still warm. This ensures it dissolves completely.
Always taste your mixture before adding more. Some people love a strong salty kick. Others prefer just a subtle hint.
Here is a quick guide to help you decide on your salt level:
| Salt Preference | Recommended Amount | Final Flavor Profile |
|---|---|---|
| Subtle Hint | ¼ teaspoon | Sweet with a slight savory enhancement |
| Classic Balance | ½ teaspoon | Pronounced sweet and salty contrast |
| Bold & Salty | ¾ – 1 teaspoon | Strong savory notes that dominate |
Experiment to find your perfect balance. Your creation is now ready to enjoy or store for later use.
Creative Ways to Use Your Caramel Syrup
Now comes the fun part, discovering all the delicious ways to use your freshly made creation. This versatile preparation transforms ordinary items into extraordinary treats.
Drinks and Beverages
Elevate your daily coffee routine with this golden delight. It works beautifully in hot lattes, iced coffee, and cold brew.
Beyond coffee, try it in hot chocolate for a rich twist. The preparation adds wonderful depth to tea, especially chai blends.
For evening enjoyment, mix it into bourbon cocktails or apple cider. Even simple warm milk becomes a special treat with a spoonful stirred in.
| Beverage Type | Best Applications | Flavor Result |
|---|---|---|
| Hot Coffee Drinks | Lattes, cortados, drip coffee | Rich, cafe-style flavor |
| Cold Coffee | Iced coffee, cold brew, macchiatos | Sweet, balanced refreshment |
| Non-Coffee Options | Hot chocolate, tea, milk | Comforting, indulgent taste |
| Alcoholic Creations | Whiskey cocktails, spiked cider | Sophisticated, complex notes |
Desserts and Beyond
Drizzle your creation over vanilla ice cream for an instant upgrade. It pairs wonderfully with yogurt and granola for breakfast.
Brush it on cake layers for extra moisture and flavor. The preparation enhances pancakes, French toast, and fresh berries beautifully.
Your kitchen creation works with any milk preference – dairy, oat, almond, or coconut. This makes it perfect for all dietary needs.
Storing and Serving Your Homemade Syrup
Proper storage ensures your kitchen creation maintains its quality and flavor. Following these simple steps will keep your preparation fresh and ready whenever you need it.
Let your mixture cool on the stovetop for about thirty minutes. This allows it to reach room temperature safely before you transfer it to storage.
Best Storage Practices
Choose a clean, airtight container for preservation. Mason jars work perfectly to prevent air exposure. This keeps your preparation fresh in the refrigerator.
Your creation will stay good in the fridge for up to one month. Some sources recommend two weeks for peak quality.
Always check your mixture before use.
Refrigeration is essential because homemade versions lack preservatives. Leaving them at room temperature for more than a day risks spoilage.
The cold environment prevents crystallization.
You can use your preparation immediately if needed. Remember it will warm iced drinks.
Mix it with milk or espresso first before adding ice.
Label your container with the date made. This helps you track freshness over time.
Your delicious treat becomes a regular part of your home beverage routine.

User Tips and Troubleshooting
Even experienced cooks can encounter a few hurdles when working with hot sugar.
This guide helps you navigate common issues and adapt the process to your kitchen setup for perfect results every time.
Common Mistakes and How to Avoid Them
The final five to ten minutes of cooking are critical. The color change from clear to amber happens very fast.
If you look away, you might miss the perfect moment to remove heat.
Stirring too much after the boil starts is another common error. This can cause sugar crystals to form, giving your final product a grainy texture.
Once boiling, let it be.
Always use hot water when adding it to the cooked sugar. Cold water causes the mixture to harden instantly and splatter dangerously.
If it hardens, just return the pan to low heat and stir until it dissolves.
If your creation turns dark brown or smells burnt, it’s best to start over. The bitter flavor cannot be fixed.
Removing the pan from the burner at the right amber color is essential.
Adapting the Recipe to Your Equipment
Your cooking tools affect the outcome. A light-colored stainless steel pan makes it easier to see the color change.
Dark pans can hide the crucial amber hue.
Electric stoves hold heat longer than gas ones. You may need to adjust the temperature down slightly sooner on an electric range to prevent overcooking.
If the sugar and water mixture takes more than 20 minutes to change color, your heat is likely too low.
Increase it to maintain a steady, active boil.
Remember, this recipe creates a thin syrup for drinks. A thick caramel sauce includes butter and cream for drizzling on desserts.
Don’t try to double the recipe until you’ve mastered a single batch first.
If your finished product is too thick, gently warm it and whisk in a little more water to reach your desired consistency.
Exceptional Flavor with Basic Pantry Staples
Your journey into gourmet beverage creation has reached its delicious conclusion. You now possess the knowledge to craft exceptional flavors using basic pantry staples.
Remember the simple process: sugar and water transform into that beautiful amber hue through careful heat management.
Adding vanilla and sea salt creates the perfect balance.
This versatile preparation elevates everything from morning coffee to evening cocktails. Store it properly in the fridge for weeks of enjoyment.
While this recipe demands attention, the reward is worth every minute. You’ve mastered a skill that brings coffee-shop quality to your home kitchen.
Keep experimenting and enjoy your delicious creations!
Want another delicious syrup recipe?
Then check out our recipe for making the perfect brown sugar syrup.