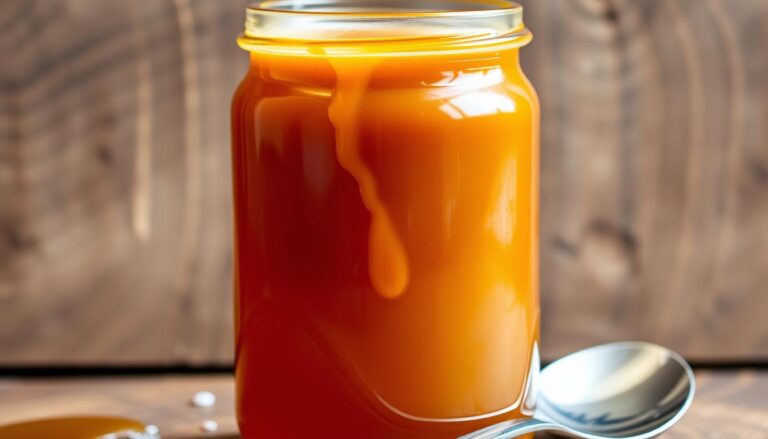
Brown Sugar Syrup: Perfect for Coffee, Cocktails, and Sodas
Want to recreate that rich, caramel-like sweetness from your favorite coffee shop drinks at home? Well, you can with this amazing brown sugar syrup.
This guide unlocks the secret to a versatile homemade sweetener that rivals even the most popular commercial versions.
Imagine whipping up a batch of this flavorful syrup in just five minutes with ingredients you already have.
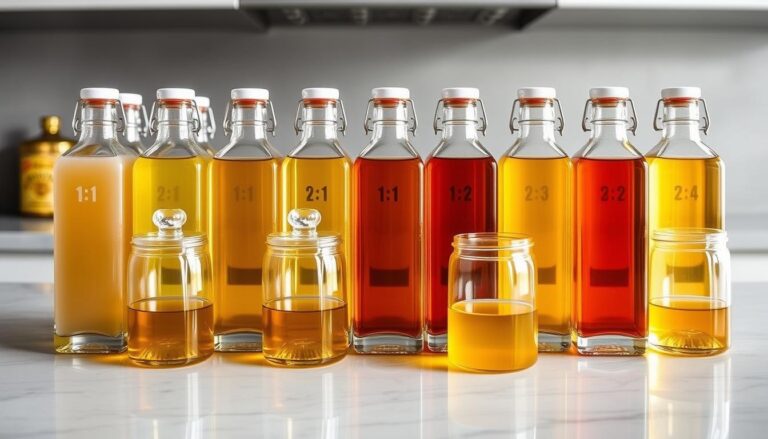
The basic formula is a straightforward one-to-one ratio, making it easy to remember and scale for any occasion.
This simple syrup adds a warm, complex flavor to everything it touches.
Creating your own version is not only quick but incredibly economical. You can make a full bottle for less than a dollar, saving significantly compared to store-bought options.
This recipe empowers you to control the ingredients and customize the flavor to your exact preference.
Whether you’re sweetening your morning latte, crafting an evening cocktail, or baking a delicious dessert, this all-purpose ingredient is your new kitchen staple.
Let’s dive in and discover how easy it is to make this delightful addition to your home bar and pantry.
Key Takeaways
- You can make a rich, caramel-flavored sweetener at home in just five minutes.
- The recipe uses a simple 1:1 ratio of two common pantry ingredients.
- Homemade versions cost a fraction of what you pay for store-bought syrups.
- This versatile syrup enhances coffee, cocktails, sodas, and baked goods.
- You can choose from three easy preparation methods to fit your needs.
- Making it yourself allows for complete customization of flavor and sweetness.
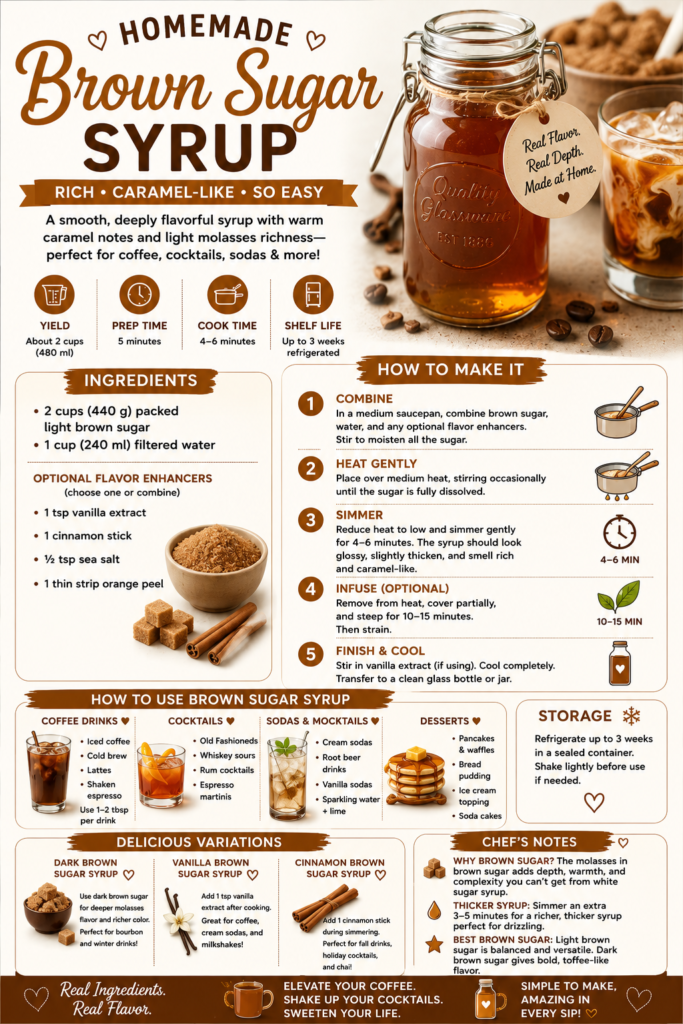
Homemade Brown Sugar Syrup Recipe
Rich • Caramel-Like • Perfect for Coffee, Cocktails & Sodas
This homemade brown sugar syrup is smooth, deeply flavorful, and incredibly versatile. Unlike plain simple syrup, brown sugar syrup delivers:
- Warm caramel notes
- Light molasses richness
- Smooth sweetness
- Bakery-style depth
Perfect for:
- Iced coffee & lattes
- Old Fashioneds & whiskey cocktails
- Cream sodas
- Cold brew
- Milk tea
- Pancakes & desserts
Yield: Approximately 2 cups (480 ml) syrup
INGREDIENTS
- 2 cups (440 g) packed light brown sugar
- 1 cup (240 ml) filtered water
Optional Flavor Enhancers
Choose one or combine lightly:
- 1 tsp vanilla extract
- 1 cinnamon stick
- ½ tsp sea salt
- 1 thin strip orange peel
EQUIPMENT
- Medium saucepan
- Wooden spoon or silicone spatula
- Fine mesh strainer (if using spices)
- Glass bottle or jar with lid
PREPARATION & METHOD
1: Combine Ingredients
In a medium saucepan, combine:
- Brown sugar
- Water
- Optional flavor enhancers (if using)
Stir gently to moisten all the sugar.
2: Heat Gently
- Place saucepan over medium heat.
- Stir occasionally until sugar fully dissolves.
⚠️ Avoid aggressive boiling.
High heat can create bitterness and overly thick syrup.
3: Simmer
Once sugar dissolves:
- Reduce heat to low.
- Simmer gently for:
- 4–6 minutes
The syrup should:
- Look glossy
- Slightly thicken
- Smell rich and caramel-like
4: Infuse (Optional)
If using cinnamon or orange peel:
- Remove saucepan from heat.
- Cover partially.
- Allow syrup to steep:
- 10–15 minutes
Then strain.
5: Finish & Cool
- Stir in vanilla extract (if using).
- Cool syrup completely.
- Transfer to a clean glass bottle or jar.
STORAGE
- Refrigerate up to 3 weeks
- Keep tightly sealed
- Shake lightly before use if needed
USING BROWN SUGAR SYRUP IN
Coffee Drinks
- Iced coffee
- Cold brew
- Lattes
- Shaken espresso drinks
Recommended Amount
- 1–2 tbsp per drink
Cocktails
Excellent in:
- Old Fashioneds
- Whiskey sours
- Rum cocktails
- Espresso martinis
Sodas & Mocktails
Pairs beautifully with:
- Cream soda
- Root beer drinks
- Vanilla sodas
- Sparkling water + lime
Desserts
- Pancakes & waffles
- Bread pudding
- Ice cream topping
- Brown sugar soda cakes
BROWN SUGAR OPTIONAL VARIATIONS
Dark Brown Sugar Syrup
Replace light brown sugar with:
- Dark brown sugar
Result:
- Deeper molasses flavor
- Richer color
- More “toffee-like”
Perfect for:
- Bourbon drinks
- Winter coffee drinks
Vanilla Brown Sugar Syrup
Add:
- 1 tsp vanilla extract after cooking
Excellent for:
- Coffee
- Cream sodas
- Milkshakes
Cinnamon Brown Sugar Syrup
Add:
- 1 cinnamon stick during simmering
Perfect for:
- Fall drinks
- Holiday cocktails
- Chai beverages
CHEF’S NOTES
Why Brown Sugar Works So Well
Brown sugar contains molasses, which adds:
- Depth
- Warmth
- Complexity
This creates a syrup that tastes more “finished” than white sugar syrup.
For a Thicker Dessert Syrup
Simmer an additional:
- 3–5 minutes
Ideal for:
- Pancakes
- Cheesecake drizzle
- Ice cream
Best Brown Sugar Type
For balanced everyday use:
- Light brown sugar
For bold winter drinks:
- Dark brown sugar
Introduction to Brown Sugar Syrup
Imagine having access to that deep, molasses-kissed sweetener that transforms ordinary drinks into something extraordinary.
This homemade version brings coffee shop quality right to your kitchen counter.
Why You Should Make It at Home
Creating your own sweetener offers incredible advantages. You save significant money compared to buying specialty coffee drinks.
A single latte can cost $7 or more at popular chains.
Store-bought versions are surprisingly hard to find. When you do locate them, they often come in large bottles that might expire before you finish them.
Homemade batches let you control the quantity perfectly.
The rich, complex profile of this sweetener surpasses standard options. It delivers warm vanilla and molasses notes that enhance any beverage.
You can adjust the intensity to match your personal taste preferences.
Preparation takes just five minutes using simple methods.
Whether you prefer stovetop, microwave, or no-heat techniques, this recipe adapts to your kitchen setup.
Even beginners can achieve perfect results every time.
Essential Ingredients & Tools for Your Homemade Syrup
Before you start mixing, let’s explore what you’ll need to craft this versatile kitchen staple.
Having the right components ensures your creation turns out perfectly every time.
Choosing the Right Brown Sugar and Water
Your main ingredients are simple but important. Dark varieties offer intense molasses flavor, while lighter options provide milder caramel notes.
Water quality matters for clean taste. Filtered or bottled water works best. Boiling tap water removes chlorine for better results.
Consider alternative sweeteners like muscovado for rich flavor or turbinado for lighter profiles.
Optional additions like vanilla extract add depth without overwhelming the taste.
Must-Have Kitchen Gadgets and Containers
You need basic equipment for success.
A small saucepan handles heating perfectly. A spoon or spatula helps with stirring.
Storage is crucial for freshness.
Mason jars withstand heat and seal well while bottles with pour spouts make serving convenient.
Your ingredient measurements are straightforward. Use equal parts sweetener and liquid.
Optional enhancers like salt or maple syrup can customize your creation.
The Science Behind Simple Syrups and Brown Sugar Variations
Understanding the science behind your sweetener can transform how you make and use it. Knowing why recipes work helps you troubleshoot and customize with confidence.
Sugar’s Dissolving Process Explained
Molecules of sugar naturally attract water molecules. This attraction allows dissolution without any heat or agitation.
The process just happens slower at room temperature.
Warming your mixture speeds up molecular movement. This helps create your sugar water solution faster.
Shaking has a similar effect through mechanical action.
This explains why no-heat methods create cloudy syrup initially. Given time, the sugar fully incorporates into the water.
Your final product becomes perfectly clear and stable.
The molasses in darker varieties adds complexity. It affects both flavor profile and viscosity.
This natural component makes your creation unique from white sugar versions.
Sugar acts as a natural preservative by binding water molecules. This inhibits microbial growth in your finished product.
A richer 2:1 ratio extends refrigerator life to several months.

Step-by-Step Guide on Making Brown Sugar Syrup
Follow these simple methods to create your own batch in just minutes.
You have two excellent options depending on your kitchen setup.
Stovetop Method for a Rich Syrup
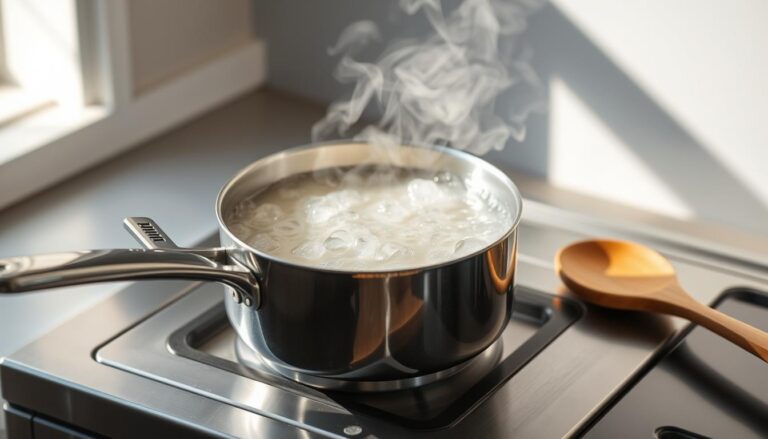
Grab a small saucepan and combine one cup of your chosen sweetener with one cup of water. Set the heat to medium-low.
Your goal is gentle warmth, not a rapid bubble.
Stir the mixture often as it heats. This helps the granules dissolve completely. The process typically takes about five minutes.
Avoid letting the liquid simmer or boil. Excessive heat evaporates water and can caramelize the sugars.
This changes the texture from a pourable syrup to a thick candy. Once dissolved, remove it from the heat source.
For added flavor, stir in half a teaspoon of vanilla extract.
Let everything cool to room temperature before you use or bottle it.
Using a Microwave for a Quick Fix
This technique is perfect when you need a fast result. Combine one cup of your main ingredient with one cup of water in a microwave-safe glass. Give it a good stir.
Heat the mixture for 60 seconds. Carefully remove it and stir again. If any crystals remain, continue heating in 30-second bursts until fully dissolved.
Just like the stovetop version, prevent the liquid from boiling. After the final heating, add your vanilla if desired. Allow it to cool completely.
Both approaches yield fantastic results. You can choose based on your preference for equipment and speed.
No-Heat and Alternative Methods: The Shake It Up Approach
Want to make syrup without turning on a single appliance?
This no-cook technique is perfect for hot days or when you want to avoid extra cleanup. It’s incredibly straightforward and requires minimal equipment.
You only need a glass container with a secure lid. This method is safe for all ages, making it a fun kitchen project.
How to Create Syrup Without Heat
Grab your favorite jar or bottle. Add one cup of your chosen sweetener directly into it. Pour in one cup of room-temperature water.
For extra flavor, include half a teaspoon of vanilla extract. Seal the lid tightly. Now, shake it vigorously for about three to five minutes.
You will feel the granules dissolve. The mixture might look cloudy at first. Don’t worry, it will clear up after it sits for a short time.
This approach creates a fresh batch in minutes. It’s ideal for making small quantities exactly when you need them.
Remember, this version lasts up to two weeks in the fridge.

Brown Sugar Syrup: Your Versatile Sweetener
Your homemade sweetener becomes a blank canvas for endless flavor possibilities. The basic recipe serves as a perfect foundation for creative customization.
Enhancing Drinks with Additional Flavors
Create a richer version by doubling the sweetener amount. This 2:1 ratio yields a more viscous syrup perfect for cocktails.
Related: Making rich Demerara syrup.
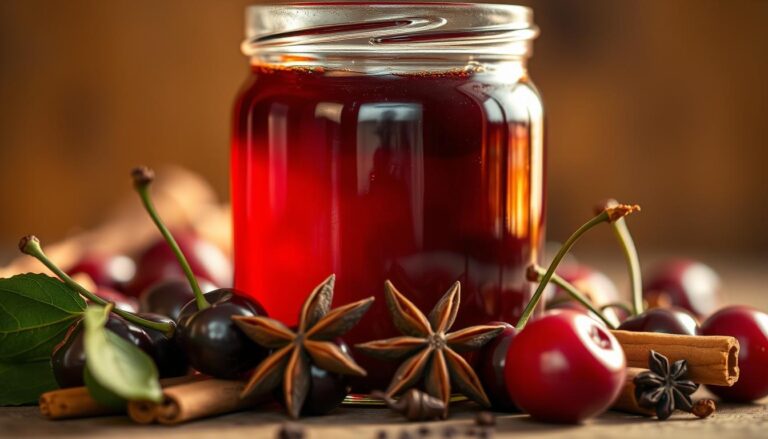
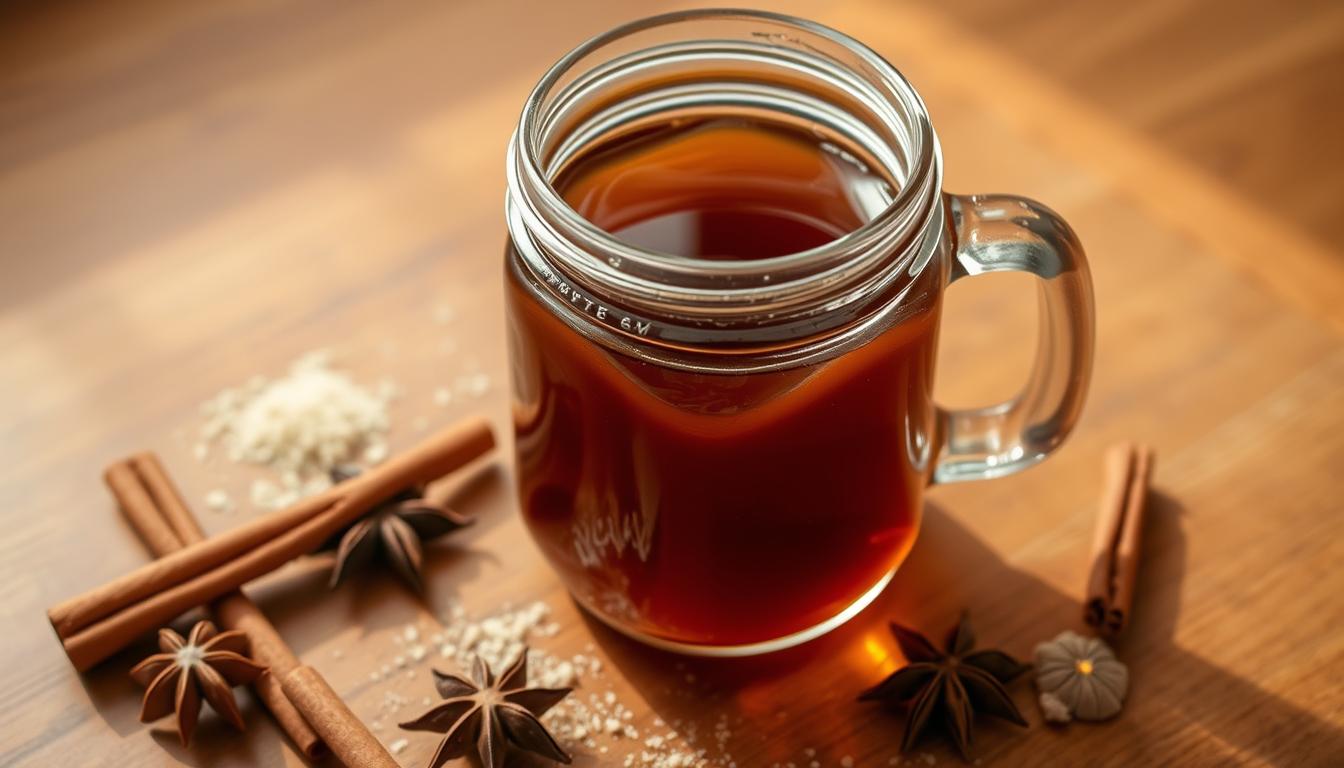
Add 2-3 cinnamon sticks during heating for a warm spice infusion. Let them steep for 15 minutes before removing.
Experiment with whole spices like clove or star anise. These create complex flavor profiles reminiscent of pumpkin spice.
Optional Add-ins: Vanilla, Maple Syrup, & Spices
Vanilla extract adds subtle depth without overpowering the base flavor. Use about half a teaspoon per cup of syrup.
Related: Making Rich Vanilla Bean Syrup
Maple syrup contributes extra richness when stirred in. A couple tablespoons enhance the caramel notes beautifully.
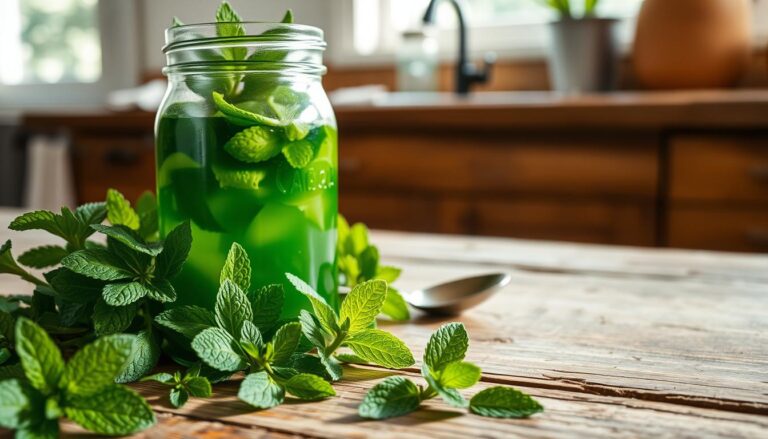
For unique twists, try steeping apple peels or tea bags. A pinch of flaky sea salt also brightens the overall flavor.
Remember that heated methods allow quick 15-minute infusions. No-heat versions need several days for full flavor development.
Brewing the Perfect Coffee with Brown Sugar Syrup
Now that you have your homemade sweetener, it’s time to explore its star role in your daily coffee ritual.
This caramel-flavored syrup dissolves instantly, even in iced beverages, eliminating the gritty texture of granulated crystals.
It’s the secret to replicating cafe-quality drinks like the famous Starbucks Iced Brown Sugar Oatmilk Shaken Espresso.
Your homemade version gives you complete control over sweetness and quality.
Related: Coffee syrups to make in 15 minutes or less.
Elevate Your Iced Coffee or Latte
This liquid sweetener pairs beautifully with plant-based milks. Oat milk, in particular, becomes wonderfully creamy and frothy when combined with it.
Start with about two tablespoons of syrup per drink. You can always adjust to your taste. For a luxurious finish, use a cordless milk frother to blend the syrup and milk until foamy.
Here’s how to make a shaken espresso at home:
- Fill a cocktail shaker with ice.
- Add a double shot of espresso and your desired amount of syrup.
- Shake vigorously for 10-15 seconds until chilled and frothy.
- Strain into a glass and top with creamy oat milk.
The rich, molasses-like notes of your homemade creation perfectly balance the bitterness of espresso. It also works wonders in a hot latte or an innovative iced coffee soda.

Using Homemade Syrup in Cocktails and Sodas
Your homemade creation isn’t just for coffee. It’s a secret weapon for crafting unforgettable drinks.
This versatile sweetener brings warmth and complexity to both alcoholic and non-alcoholic beverages.
The rich, caramel-like notes of your homemade brown sugar syrup pair beautifully with darker spirits.
Whiskey, bourbon, and spiced rum create particularly harmonious combinations.
Related: 5 Essential Syrups for Your DIY Italian Soda Bar
Mixology Tips for Unique Drink Creations
Substitute this syrup anywhere a recipe calls for regular simple syrup. It instantly adds depth and warmth to any drink.
Start with less than you think you’ll need, then adjust to taste.
Try these classic applications:
- Old Fashioned cocktails with an extra layer of molasses complexity
- Espresso martinis made with homemade Baileys for luxurious warmth
- Autumn-inspired drinks featuring cinnamon, apple, or warming spices
For non-alcoholic options, this syrup creates sophisticated sodas and mocktails, like:
- iced brown sugar oatmilk latte.
- sparkling citrus iced tea.
- apple cinnamon iced tea.
- brown sugar boba milk tea (right).
The distinctive flavor elevates simple sparkling water into something special.
Extend your syrup’s shelf life by adding a small amount of alcohol. Vodka provides neutral preservation, while whiskey or spiced rum adds complementary warmth.

Storing, Shelf Life, and Batch-Sizing Your Syrup
Keeping your homemade liquid sweetener at peak quality requires just a few simple storage strategies.
Proper preservation ensures your creation stays fresh and ready for daily use.
Best Containers and Refrigeration Practices
Always store your sweetener in an airtight container in the refrigerator. Glass mason jars work perfectly for this purpose.
They handle heat well if you transfer your creation while warm.
Decorative bottles with pour spouts make serving convenient. Remember to let your mixture cool completely before using these containers.
This prevents damage from thermal shock.
Here’s how different preparation methods affect your syrup’s longevity:
| Preparation Method | Recommended Container | Shelf Life | Special Notes |
|---|---|---|---|
| No-Heat Shaking | Any glass jar with lid | 2 weeks | Cloudy appearance initially clears |
| Stovetop/Microwave | Mason jar or heat-safe bottle | 4 weeks | Heat kills bacteria for longer freshness |
| Rich 2:1 Ratio | Airtight glass container | 3-6 months | Higher sugar acts as natural preservative |
Extending the Shelf Life with Rich Syrup Variations
Your homemade brown syrup lasts longer when you use heated preparation methods. The warmth eliminates bacteria that cause spoilage.
For even longer preservation, try a rich version with double the sweetener. This concentrated recipe can last several months.
Adding a small amount of alcohol also extends freshness.
Flavored versions with vanilla or spices should be used within 1-2 weeks. Watch for cloudy spots, which indicate it’s time to make a fresh batch.
Advanced Techniques and Flavor Customizations
Ready to elevate your syrup game beyond the basics with creative flavor infusions?
Your homemade creation becomes a canvas for seasonal specialties and unique drink combinations.
Infusing with Spices or Fruit Elements
Start with warm spices for autumn-inspired creations. Add 2-3 cinnamon sticks during heating methods.
Let them steep for 15 minutes after removing from heat.
For no-heat versions, patience rewards you with deeper flavor. Cinnamon sticks need several days to fully infuse.
Whole spices like clove and star anise create complex profiles.
Experiment with fruit elements for refreshing twists. Apple peels steeped in warm syrup create cider-like flavor. A pinch of cayenne adds spicy-sweet excitement.
Vanilla options range from convenient extract to luxurious beans.
Pure extract offers consistent results while vanilla paste provides more intense flavor for special occasions.
Remember that heated methods extract flavor quickly.
No-heat infusions require longer steeping times. Dark brown varieties work beautifully as your base for rich, complex results.
Troubleshooting Common Syrup-Making Issues
Even the most careful cooks can encounter a few hiccups when making their sweetener.
Don’t worry, most problems have simple solutions.
This guide helps you identify and fix common issues quickly.
Avoiding Crystallization and Overheating
Never let your mixture boil continuously. Excessive heat causes water to evaporate. The sugar can caramelize, turning your liquid into thick candy.
Watch for crystallization where sugar molecules reform into crystals. This happens when the mixture cools too quickly.
Gentle, consistent heating prevents this issue.
Cloudy spots appearing later indicate spoilage. Initial cloudiness in no-heat methods is normal.
If spots develop after storage, discard your batch.
If your creation becomes too thick, gently reheat it with extra water. Stir until you restore the proper consistency. The 1:1 ratio makes scaling easy for any quantity.
Remember that this sweetener is inexpensive to make. If something goes wrong, you can always start fresh without significant loss.
Original, flavorful sweetening.
You now possess the key to effortless, flavorful sweetening for your daily beverages.
This homemade creation proves that quality ingredients don’t require complicated steps or expensive purchases.
Keep a jar of this versatile liquid gold on hand for spontaneous creativity. The straightforward 1:1 ratio makes this recipe impossible to forget.
Your morning coffee transforms into a cafe-quality experience without the premium price tag.
Evening cocktails gain sophisticated depth with just a splash of your homemade simple syrup.
This entire post demonstrates how small kitchen projects can yield big rewards. Embrace the satisfaction of creating something wonderful with your own two hands.
Let this be your starting point for endless culinary exploration.
And remember, the perfect balance of sweetness awaits in every bottle you create.
Want to learn to make another delicious, classical syrup? Then check out our recipe for making Agave Syrup, perfect for desserts and sodas.