7 Simple Syrup Mistakes and How to Avoid Them.
Having trouble getting your simple syrup just right? Not to worry, in this guide you’ll discover 7 common mistakes and how to fix them, easily.
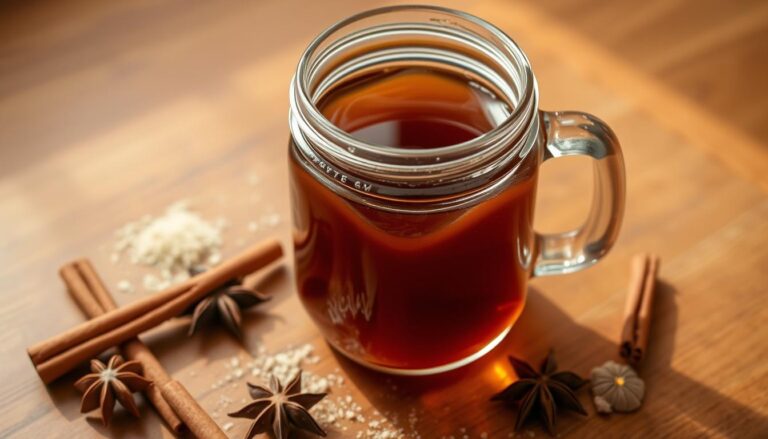
That versatile sweetener you use in your favorite cocktails, iced coffees, and desserts is a kitchen essential.
But simple, doesn’t necessarily mean easy.
While the process of combining just two primary components seems straightforward. It’s surprisingly easy to encounter pitfalls that affect the final product’s:
- texture,
- sweetness,
- shelf life.
A small error in your technique can lead to a batch that crystallizes or spoils quickly.
This guide will walk you through the most frequent errors people encounter.
You will learn how to sidestep these issues to create a perfect, professional-quality sweetener every time.
Your drinks and desserts will consistently achieve that ideal balance you’re looking for.
So, what do you say we get into it?
Key Takeaways
- Homemade syrup allows for better control over ingredient quality and customization.
- Creating your own version can be more economical and reduce packaging waste.
- Proper technique is crucial for achieving the right consistency and preventing spoilage.
- Avoiding typical preparation errors ensures your syrup enhances rather than ruins recipes.
- Mastering this fundamental recipe leads to consistently better cocktails, coffees, and desserts.

On Simple Syrup
The secret to perfectly balanced drinks lies in understanding this essential ingredient.
Whether you’re crafting cocktails or sweetening iced coffee, getting this foundation right makes all the difference.
What is Simple Syrup?
This liquid sweetener is created by dissolving sugar in water. It blends smoothly into beverages without leaving gritty crystals at the bottom.
Unlike granulated sugar that can settle unevenly, this mixture distributes sweetness consistently throughout your drink.
Your cocktails and iced teas will have uniform flavor in every sip.
Why Homemade Syrup Beats Store-Bought
Creating your own version gives you complete control over ingredient quality. You choose the sugar and water that match your taste preferences.
Homemade preparations avoid preservatives found in commercial products. You can also customize the sweetness level to suit your specific needs.
This approach is more economical and environmentally friendly. You reduce packaging waste while achieving superior results in your beverages.
The Fundamentals of Simple Syrup
Creating perfect homemade sweetener starts with getting the fundamentals right. This basic knowledge forms the foundation for all your future creations.
Before we explore specific techniques, let’s examine the core components that make up this essential kitchen staple.
Understanding Basic Ingredients
Your homemade sweetener requires just two primary ingredients. The combination of granulated sweetener and liquid creates the base for all variations.
The standard formula uses equal measures of each component. This 1:1 proportion yields a medium-thickness product with versatile sweetness.
For richer, more concentrated results, try a 2:1 proportion. This creates a thicker consistency that works well in specific recipes.
| Ratio Type | Sweetener to Liquid | Consistency | Best Uses | Shelf Life |
|---|---|---|---|---|
| Standard | 1:1 | Medium thickness | Cocktails, iced tea, coffee | 2-3 weeks |
| Rich | 2:1 | Thick texture | Desserts, specific cocktails | 4-6 weeks |
You can use various sweetener types to achieve different flavor profiles. White granulated sweetener creates a neutral base, while brown varieties add depth.
Related: Making brown sugar syrup for coffee, cocktails, and sodas.
The quality of your liquid matters significantly. Since it constitutes half of your mixture, filtered water often yields better results than tap water.
Understanding these basic elements prepares you for successful preparation. You’ll avoid fundamental errors that affect texture and taste.
Essential Equipment and Safety Precautions
You don’t need a professional bar setup to achieve excellent results with your homemade concoction. The right gear simplifies the process and ensures safety.
For small batches, a mason jar is your best friend. You can combine ingredients directly in this versatile container.
Securing the lid allows you to shake until everything dissolves, saving time on cleanup.
Larger quantities require a saucepan for gentle heating. Always use low to medium heat to avoid caramelization or dangerous splatters. Patience here is key for a smooth final product.
Gather your essential tools before you begin. You will need measuring cups, a stirring spoon, and a funnel for transferring the liquid into a storage bottle.
Sterilizing your equipment is a critical step. Clean your jar, funnel, and spoon thoroughly to prevent contamination.
This practice extends the shelf life of your creation significantly.
Glass containers are superior to plastic or metal for storage. They don’t impart flavors and are easy to keep clean.
Proper preparation with the right equipment sets you up for success from the start.
Common Simple Syrup Mistakes and How to Avoid Them
Many enthusiastic mixologists encounter unexpected challenges when crafting their own sweet concoction.
What seems like a basic recipe actually has several critical points where things can go wrong.
Your preparation method directly impacts the final quality of your liquid sweetener. Small errors in technique can lead to big problems with texture and flavor.
We’ll explore seven frequent preparation errors that compromise your homemade creation. Understanding these pitfalls helps you achieve perfect results every time.
Issues range from measurement inaccuracies to improper storage methods. Each mistake affects your sweetener’s consistency, safety, and shelf life differently.
Whether you’re mixing cocktails or sweetening desserts, precision matters. The right approach ensures your beverages have balanced taste without crystallization.
You’ll discover how to troubleshoot problems before they ruin your batch. Proper technique makes all the difference between mediocre and exceptional results.
This knowledge prepares you for the detailed breakdowns that follow. You’ll gain confidence in creating professional-quality sweetener for all your recipes.
Mastering the Correct Sugar-to-Water Ratio
Precision in measuring your components separates amateur attempts from professional-quality results.
The right balance between your sweetener and liquid creates the foundation for perfect consistency.
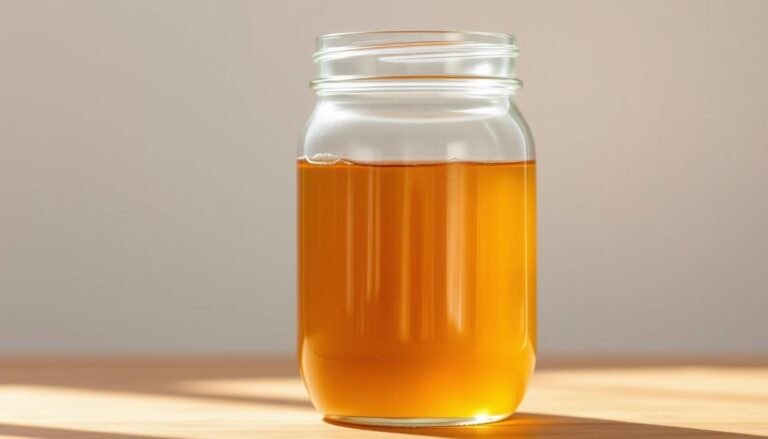
Most recipes call for equal parts sugar and water in a 1:1 ratio. This creates a versatile mixture with medium thickness.
For richer, sweeter results, use two parts sugar to one part water.
Many people measure by volume using cups, but weighing gives better accuracy. Water weighs slightly more than sugar by volume, affecting your final sweetness.
Avoid measuring both ingredients in the same container. Water seeps between sugar granules, disrupting your intended ratio.
This common error leads to inconsistent results.
Instead, measure your sugar and water separately before combining. This ensures your mixture matches professional standards every time.
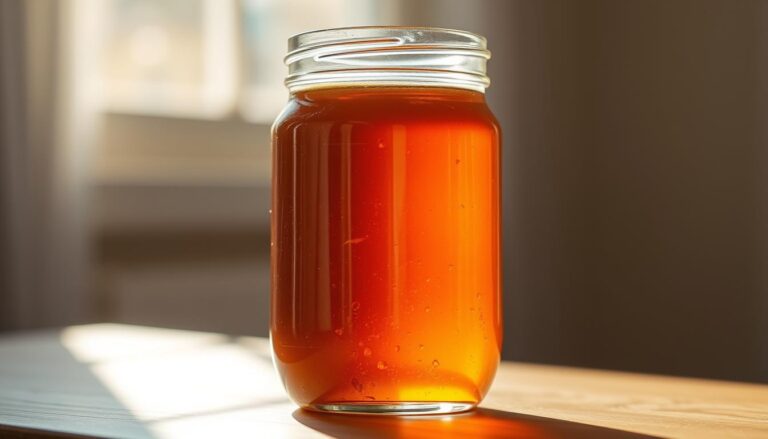
The correct ratio also impacts shelf life. Higher sugar content acts as a natural preservative. Rich simple syrup can last up to six months when refrigerated properly.
Choosing the Right Ingredients and Water Quality
Your choice of sugar and water is the first critical step toward a flawless final product. The quality of these two ingredients directly defines the taste and clarity of your creation.
Since water makes up half of the mixture, any impurities will be noticeable. Using poor-quality water can lead to an off-flavored result that affects your cocktails and desserts.
Picking the Best Sugar
The type of sugar you select dramatically changes the flavor profile. White granulated sugar offers a neutral taste, perfect for versatile use.
For richer, more complex notes, consider making a syrup using demerara or turbinado sugars.
These bring subtle molasses flavors that pair wonderfully with dark spirits like whiskey.
Avoid powdered sugar entirely. Its cornstarch content creates a cloudy mixture instead of the crystal-clear liquid you desire.
| Sugar Type | Flavor Profile | Best Pairings | Clarity |
|---|---|---|---|
| White Granulated | Neutral, clean | All-purpose, delicate cocktails | Very clear |
| Demerara/Turbinado | Rich, molasses notes | Whiskey, rum, old-fashioned cocktails | Light amber |
| Brown Sugar | Caramel, deep sweetness | Desserts, tropical drinks | Amber |
| Palm Sugar | Coconut, subtle fragrance | Tiki cocktails, Asian-inspired drinks | Dark amber |
Selecting Optimal Water
Follow a simple rule: if you wouldn’t drink your tap water straight, don’t use it for your recipe. Sugar will not mask unpleasant chemical flavors or impurities.
Filtered or bottled water provides consistent quality and a neutral taste. If using tap water, boiling it for one minute removes chlorine and microorganisms.
Always use cold water from the tap. Hot water may contain more lead from pipes. Also, avoid highly mineralized water, as it can impact the final flavor.
Temperature Control and Mixing Methods
The technique you use to combine your ingredients dramatically impacts your final product’s quality.
Your choice between applying heat or using a cold shake influences texture, clarity, and shelf life.
Understanding these two primary approaches helps you select the best method for your needs. Each technique has distinct advantages for your homemade creation.
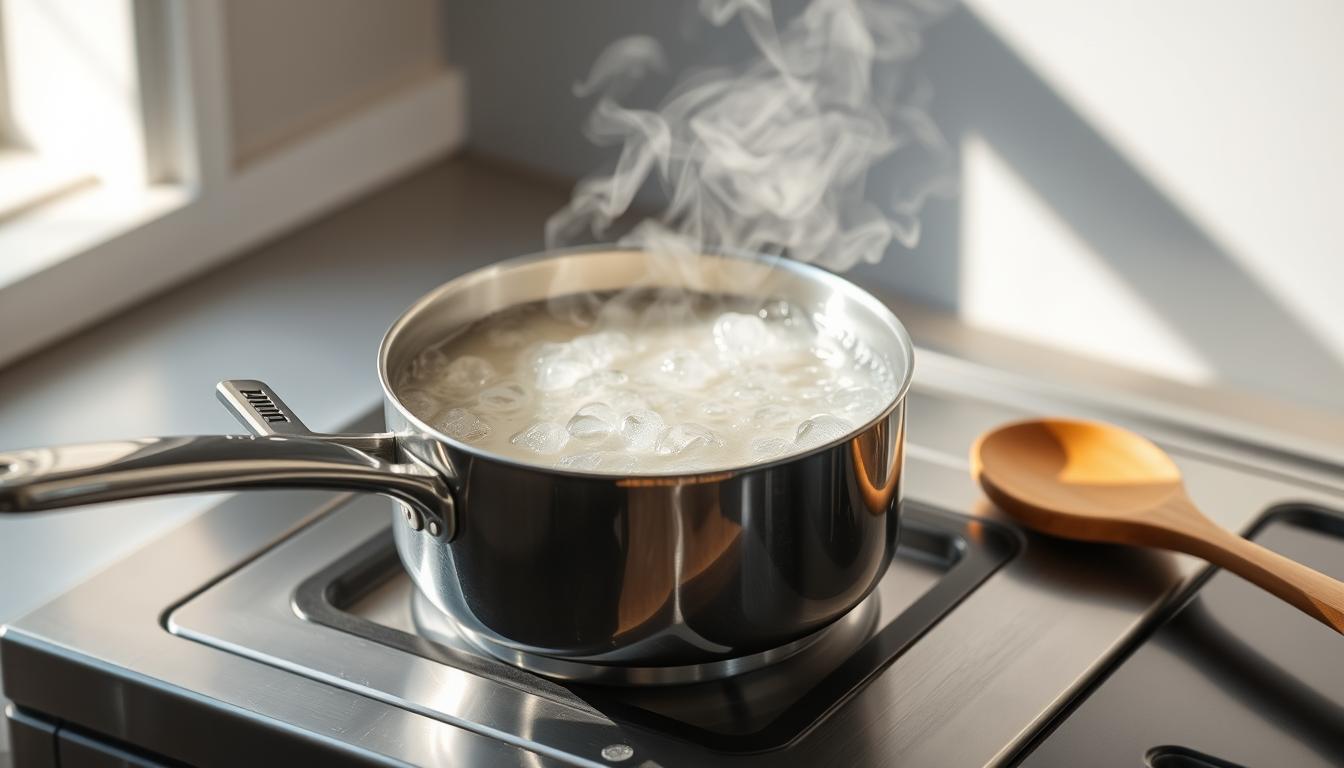
Hot Method Techniques
Applying gentle heat from your stove quickly dissolves sugar into water. This method saves you time and ensures a perfectly smooth mixture.
Use low to medium heat to avoid caramelizing the sugar. A higher temperature level alters the flavor and color of your final product.
Start by heating water until it’s nearly boiling. Then reduce the heat level before adding sugar.
This professional trick speeds up the process while giving you more control.
Stir continuously until no crystals remain at the bottom of your pan. Proper stirring prevents a gritty texture in the syrup made this way.
Cold Method Considerations
The cold technique involves shaking sugar and water in a sealed jar. This approach requires no heat but demands more of your time and effort.
Shake vigorously for up to 15 minutes until all sugar dissolves. The mixture will be thicker because heat doesn’t break down the sucrose.
Be aware that simple syrup made without heat is more prone to molding. Heating helps kill bacteria, so cold-method versions have a shorter shelf life.
- The hot method uses heat for fast dissolution and longer-lasting results.
- The cold method creates a thicker texture but requires more time and careful storage.
- Always ensure all sugar crystals are fully dissolved for a smooth consistency.
- Your choice depends on your available time and desired shelf life.

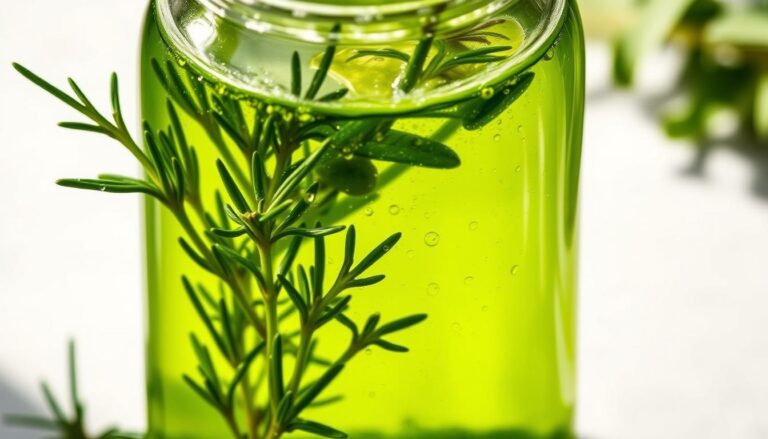
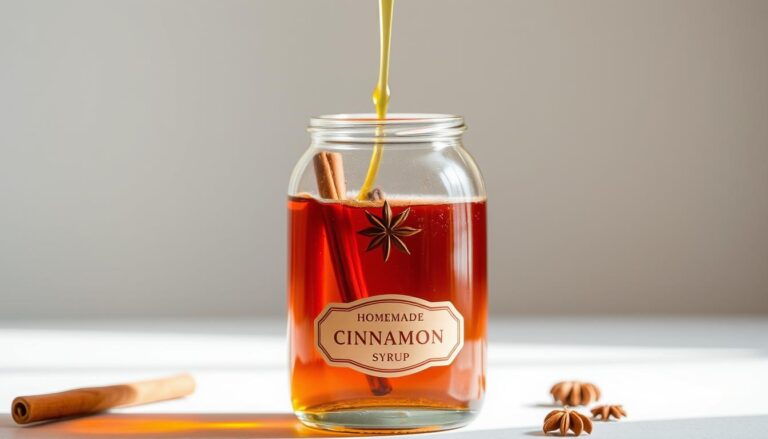
Infusing Flavors for Elevated Syrups
The true artistry in crafting your own liquid sweetener comes alive when you begin experimenting with infusions.
This process transforms a basic mixture into a sophisticated ingredient packed with custom flavor.
You can add depth using a wide array of ingredients. Fresh herbs, vibrant fruits, and aromatic spices all work beautifully.
Herbs, Fruits, and Spices
Start with the classic preparation method. Once your sugar is fully dissolved, turn off the heat.
Add your chosen flavorings and let them steep for about 30 minutes. This allows the tastes to meld perfectly without becoming bitter.
For fruit-infused versions, a 2:1:1 ratio works best. Use two parts fruit, one part sugar, and one part water. This balance lets the fruit’s natural flavor shine.
Timing is critical for a perfect result. Delicate herbs like mint need a gentler steep in hot, not boiling, liquid.
Hardy spices like cinnamon can simmer longer for deeper flavor, ideal for coffee drinks.
Key techniques for successful infusions include:
- Gentle heat application to preserve delicate herb flavors.
- Proper straining to remove all solid particles for clear syrups.
- Cold-infusion in the refrigerator overnight for subtle, complex notes.
Mastering these methods opens up a world of creative recipes. Your cocktails and desserts will reach a new level of deliciousness.
Related: Infusing herbs and spices into syrups.
Proper Storage and Sterilization Techniques
The longevity of your liquid sweetener depends heavily on proper container selection and sterilization practices.
Your careful preparation deserves equally careful storage to maintain quality.
Selecting the Right Storage Container
Glass containers provide the best protection for your homemade creations. A mason jar or glass bottle offers secure seals that prevent odor absorption.
These containers allow you to visually monitor for any changes. You can easily spot mold growth or color variations before using your sweetener.
| Container Type | Odor Protection | Oxygen Barrier | Flavor Safety | Visual Monitoring |
|---|---|---|---|---|
| Glass Bottle/Jar | Excellent | High | No flavor transfer | Easy visibility |
| Plastic Container | Poor | Low | Absorbs flavors | Moderate |
| Metal Container | Good | High | Can alter taste | No visibility |
Sterilizing Containers Properly
Always sterilize your storage containers before use. Boil glass jars in hot water for 10 minutes to kill bacteria.
Even brand-new containers need sterilization. Manufacturing processes can introduce invisible contaminants.
Time your sterilization with your preparation process. Use warm containers right after sterilization for maximum freshness.
Don’t forget to sterilize all tools used in making your sweet mixtures. Funnels, spoons, and measuring cups should all be clean.

Extending Shelf Life: Refrigeration vs Freezing
The storage method you choose directly impacts how long your liquid sweetener remains fresh and usable.
Proper preservation prevents crystallization and maintains optimal quality for your beverages.
Room temperature storage offers limited protection for your homemade creation. Your sweet mixture stays fresh for less than two weeks before crystallization begins.
Refrigeration significantly extends the lifespan of your preparation. Standard 1:1 ratio mixtures last up to one month when chilled properly.
Rich versions with a 2:1 sugar-to-water ratio offer even longer preservation. The higher sugar content acts as a natural preservative, extending life up to six months.
Flavored creations have shorter shelf lives due to added ingredients. Fruit juices, extracts, and herbs can spoil within about two weeks.
Freezing provides the longest preservation option for your batches. This technique extends usability to at least three months without quality loss.
Instead of freezing large containers, consider ice cube trays for portion control. This approach prevents repeated thawing and refreezing that affects freshness.
Thaw frozen portions gradually in the refrigerator overnight. Avoid microwave thawing, which causes uneven heating and texture changes.
For optimal freshness, prepare smaller batches you’ll use within two weeks. This balances convenience with quality since the recipe is quick to make.
Tips from Expert Mixologists and Creative Variations
After years of recipe development, experienced bartenders share their most valuable syrup-making insights. These professional tips help you create exceptional mixtures for your drinks.
Time-Saving Tricks
Add one ounce of vodka to extend your sweetener’s shelf life. This trick preserves freshness without changing the taste.
Pre-boil your water before measuring for better preservation. This technique maintains accurate ratios while improving longevity.
Rich versions with extra sugar last longer naturally. The higher sugar content acts as a preservative for extended use.
Innovative Flavor Pairings
Explore sugar-free options using erythritol or allulose. These alternatives work well for low-carb cocktails.
Different syrup types complement specific spirits beautifully. Experiment with unique combinations for personalized recipes.
| Syrup Type | Best Spirit Pairings | Shelf Life Extension | Special Considerations |
|---|---|---|---|
| Rich Version | Whiskey, Rum | 6+ months | Higher sugar content |
| Sugar-Free | Vodka, Gin | 3-4 weeks | Keto-friendly option |
| Vodka-Enhanced | All spirits | Double standard time | Neutral flavor addition |
| Herb-Infused | Tequila, Gin | 2-3 weeks | Fresh ingredients only |
Once you master these techniques, you can create custom mixtures without following exact recipes. Your cocktails will reach new levels of deliciousness.
Get the Basics Right
The art of balanced drink-making relies on getting this basic preparation right.
By avoiding the seven typical errors we’ve covered, you ensure your cocktails, desserts, and beverages achieve perfect taste every time.
Mastering how to make simple syrup elevates your skills with minimal effort. Homemade versions offer superior quality and ingredient control compared to store-bought options.
Understanding proper ratios, water selection, and storage techniques means you can create delicious syrup without following recipes.
Now you can confidently host gatherings and impress friends with professionally sweetened drinks.
Your newfound knowledge empowers you to experiment with creative flavor variations.
The fundamental combination of sugar and water becomes your secret weapon for exceptional home bartending.