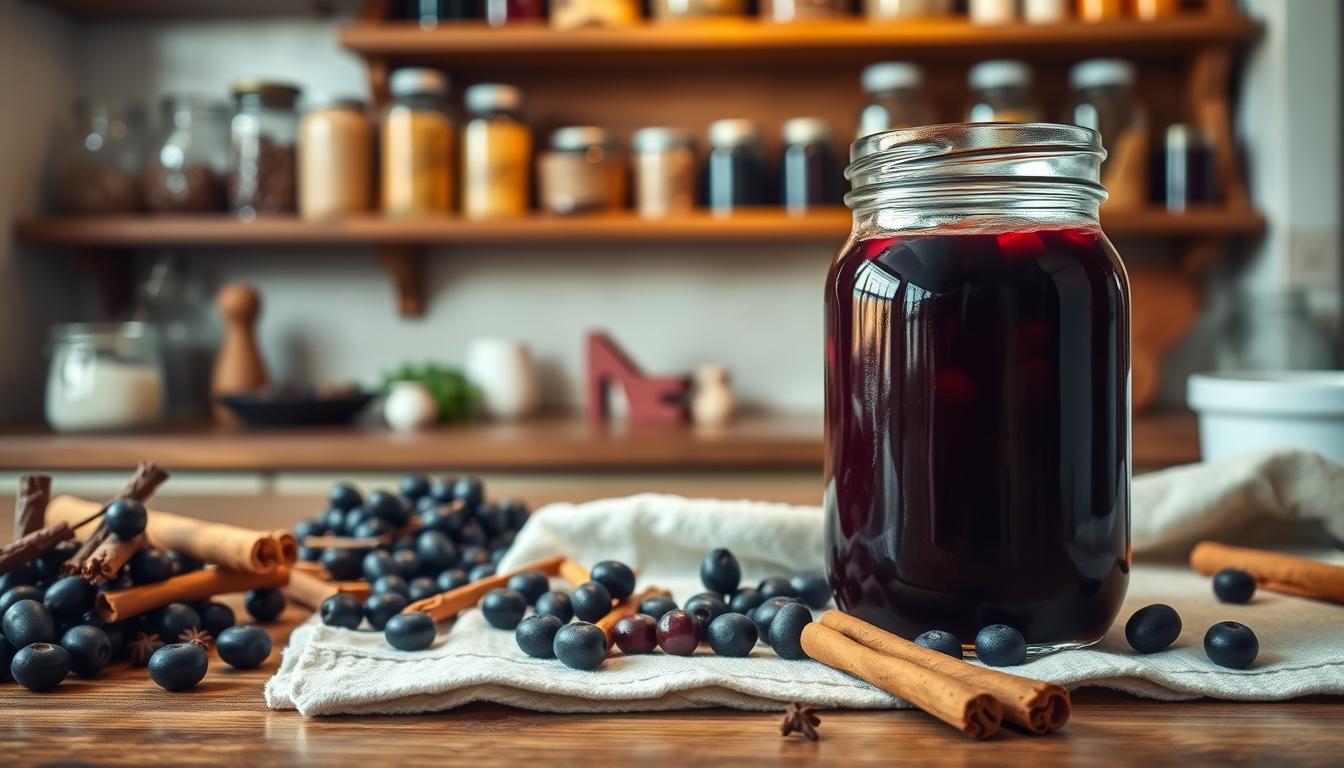
The best homemade Elderberry Syrup recipe
Want to boost your health and immune system in a sweet way? Then you have to check out our Elderberry syrup recipe.
Keeping your loved ones well all year can feel like a big job but the good news is that you can turn to a trusted natural helper.
This powerful preparation supports the body’s defenses, especially during colder months.
Parents often discover this remedy when their kids are young. They find it to be a gentle and effective part of their wellness plan.
Buying it from the store, however, can get pricey over time, so creating your own version at home is a fantastic solution.
It is surprisingly simple and much kinder to your budget. You can make a batch in under an hour, saving money while offering the same great health benefits.
This guide welcomes you to the world of DIY wellness.
Let’s get started on a path to proactive health for your entire household.
Key Takeaways
- This natural remedy has a long history of supporting family wellness throughout the year.
- It is particularly valued for providing immune support during cold and flu season.
- Many parents begin using it when their children are toddlers.
- Store-bought versions can be expensive, especially with regular use.
- Making it at home is a simple process that takes less than an hour.
- Homemade preparations are significantly more affordable than store-bought options.
- This guide offers a friendly, encouraging approach for busy families.
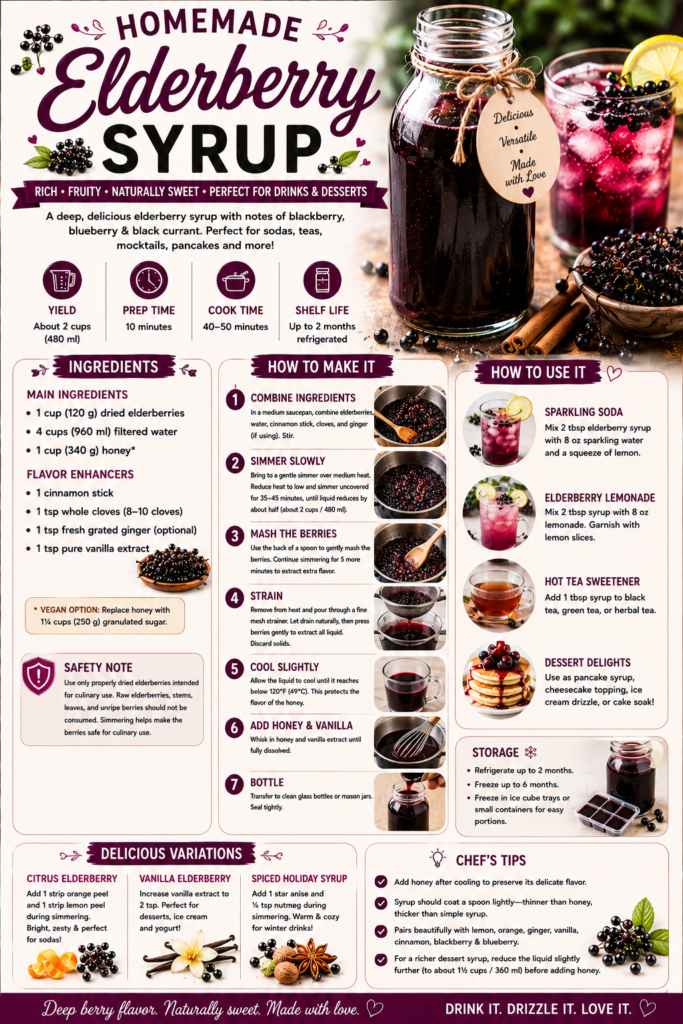
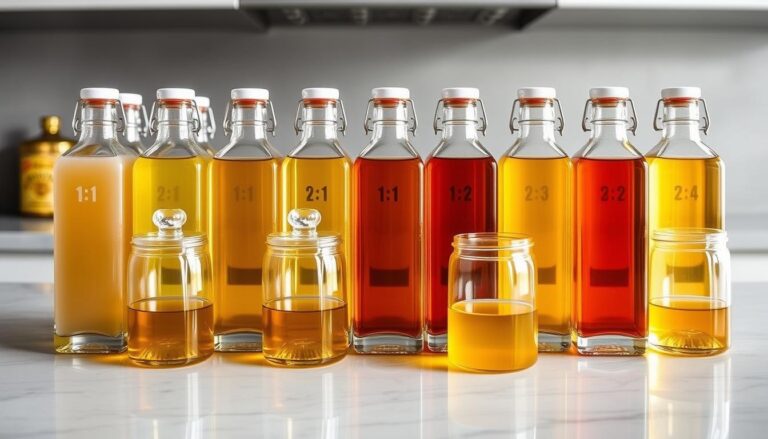
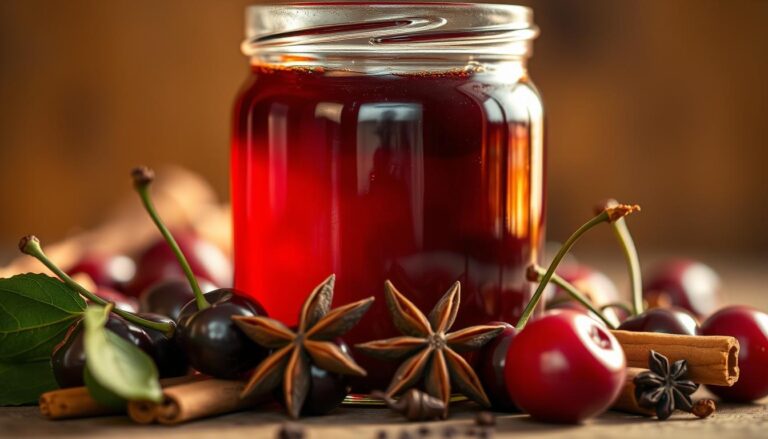
Homemade Elderberry Syrup Recipe
Rich • Fruity • Naturally Sweet • Perfect for Drinks, Desserts & Seasonal Wellness
This homemade elderberry syrup delivers a deep berry flavor with notes of blackberry, blueberry, and black currant.
Unlike many medicinal versions, this recipe is designed to be genuinely delicious while still showcasing elderberry’s distinctive taste.
Perfect for:
- Sparkling sodas
- Lemonades
- Hot teas
- Mocktails
- Pancakes and waffles
- Yogurt parfaits
- Ice cream toppings
- Cake soaking syrup
The key to exceptional elderberry syrup is a long, gentle simmer that extracts maximum flavor without creating bitterness.
Yield: Approximately 2 cups (480 ml) syrup
INGREDIENTS
Main Ingredients
- 1 cup (120 g) dried elderberries
- 4 cups (960 ml) filtered water
- 1 cup (340 g) honey*
Flavor Enhancers
- 1 cinnamon stick
- 1 tsp whole cloves (about 8–10 cloves)
- 1 tsp fresh grated ginger (optional)
- 1 tsp pure vanilla extract
*For a vegan version, substitute:
- 1¼ cups (250 g) granulated sugar
IMPORTANT SAFETY NOTE
Use only:
- Properly dried elderberries
- Commercially prepared elderberries intended for culinary use
Raw elderberries, stems, leaves, and unripe berries should not be consumed.
The simmering process helps make the berries suitable for culinary use.
EQUIPMENT
- Medium saucepan
- Fine mesh strainer
- Wooden spoon
- Glass measuring cup
- Glass bottle or mason jar
PREPARATION & METHOD
1: Combine Ingredients
In a medium saucepan combine:
- Elderberries
- Water
- Cinnamon stick
- Cloves
- Ginger (if using)
Stir briefly.
2: Simmer Slowly
- Place saucepan over medium heat.
- Bring to a gentle simmer.
Once simmering:
- Reduce heat to low.
- Simmer uncovered for:
35–45 minutes
The liquid should reduce by roughly half.
Target volume:
- About 2 cups (480 ml)
3: Mash the Berries
Using the back of a spoon:
- Lightly crush the softened berries
This extracts additional juice and flavor.
Continue simmering for:
- 5 more minutes
4: Strain
- Remove from heat.
- Pour through a fine mesh strainer.
Allow the liquid to drain naturally.
Then gently press the berries to extract remaining syrup.
Discard solids.
5: Cool Slightly
Allow the strained liquid to cool until it reaches:
- Below 120°F (49°C)
This protects the flavor of the honey.
6: Add Honey & Vanilla
Whisk in:
- Honey
- Vanilla extract
Mix until completely incorporated.
7: Bottle
Transfer syrup to:
- Glass bottles
or - Mason jars
Seal tightly.
STORAGE
Refrigerated
- Up to 2 months
Frozen
- Up to 6 months
Freeze in:
- Ice cube trays
- Small containers
for convenient portions.
USING ELDERBERRY SYRUP IN
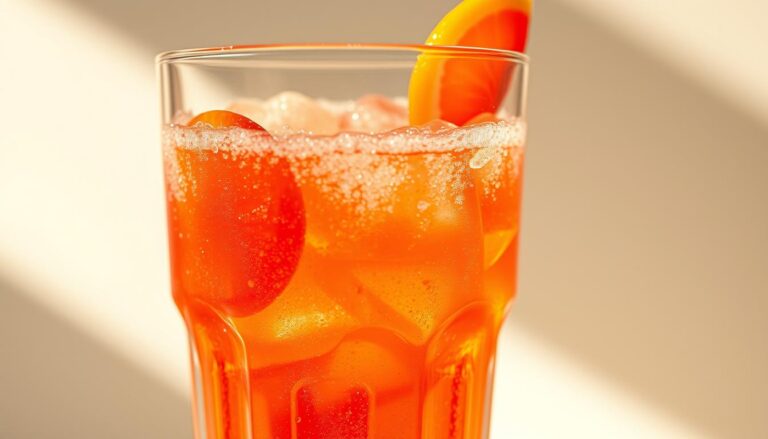
Sparkling Elderberry Soda
Mix:
- 2 tbsp elderberry syrup
- 8 oz (240 ml) sparkling water
- Squeeze of fresh lemon
Serve over ice.
Elderberry Lemonade
Mix:
- 2 tbsp syrup
- 8 oz lemonade
Garnish with lemon slices.
Hot Tea Sweetener
Add:
- 1 tbsp syrup
to:
- Black tea
- Green tea
- Herbal tea
Dessert Applications
Use as:
- Pancake syrup
- Cheesecake topping
- Ice cream drizzle
- Cake soak
OPTIONAL VARIATIONS
Citrus Elderberry Syrup
Add during simmering:
- 1 strip orange peel
- 1 strip lemon peel
Creates a brighter syrup ideal for sodas.
Vanilla Elderberry Syrup
Increase vanilla to:
- 2 tsp
Perfect for:
- Desserts
- Ice cream
- Yogurt
Spiced Holiday Elderberry Syrup
Add:
- 1 star anise
- ¼ tsp nutmeg
Excellent for:
- Winter drinks
- Holiday punches
- Mulled beverages
CHEF’S NOTES
Why Honey Is Added Later
Heating honey excessively can mute its delicate floral notes.
Adding it after cooling preserves:
- Flavor
- Aroma
- Smooth texture
How Thick Should It Be?
Finished syrup should:
- Coat a spoon lightly
- Pour easily
- Be thinner than honey
- Slightly thicker than simple syrup
Best Flavor Pairings
Elderberry pairs beautifully with:
- Lemon
- Orange
- Honey
- Vanilla
- Cinnamon
- Ginger
- Blackberry
- Blueberry
For a Richer Dessert Syrup
Reduce the liquid slightly further:
- To about 1½ cups (360 ml)
before adding honey.
This creates a thicker syrup perfect for:
- Cheesecake
- Ice cream
- Pancakes
The result is a deeply flavorful elderberry syrup with rich berry character, balanced sweetness, and complexity.
More than enough to elevate everything from sparkling sodas to elegant desserts.

Discover the Power of Elderberries
The deep purple color of these berries is your first clue to their incredible health potential. This rich hue comes from antioxidants called anthocyanins.
These compounds protect your cells from damage. They are a key reason this plant is so valued.
Nutritional Benefits and Immune Support
Elderberries offer a powerful boost for your immune system. They contain vitamins A and C, plus flavonoids.
These nutrients work together to help your body’s defenses. They can help shorten the duration of seasonal illnesses.
The berries also have natural anti-inflammatory properties. This supports overall wellness and can ease discomfort.
Traditional and Modern Uses
For generations, people have used this plant in traditional medicine. Herbalists prized it for its wide-ranging benefits.
Today, science confirms what ancient practices knew. Modern studies highlight its role in maintaining a healthy system.
This makes it a trusted ally for your family’s health throughout the year.
Why Make Your Own Elderberry Syrup Recipe
Taking charge of your family’s wellness routine can be both empowering and budget-friendly. Creating your own preparations puts you in the driver’s seat for quality and cost.
Cost-Effectiveness and Quality Control
Store-bought versions can strain your wallet, especially during peak season. When you make your own, you enjoy significant savings using bulk ingredients.
You gain complete control over what goes into the mixture. This means no artificial additives or unwanted sweeteners.
You select pure, high-quality components that match your standards.
Personalizing the Experience for Your Family
Homemade preparation lets you tailor flavors to your household’s preferences. Everyone will enjoy a custom blend made just for them.
Your creation stays fresh in the refrigerator for about two months. This provides protection throughout the colder months.
The process is simple enough for busy people to manage.
This approach benefits both your health and budget in a meaningful way. It’s a sustainable practice for the entire year.
Essential Equipment
The foundation of any successful homemade remedy starts with proper tools. Having everything prepared before you begin ensures a smooth crafting experience.
Selecting the Right Kitchen Tools
Choose a large pot made from ceramic or glass materials. These non-reactive surfaces prevent unwanted chemical interactions. Avoid synthetic nonstick coatings for safety.
A fine mesh strainer or cheesecloth helps separate solids from liquid. Wooden spoons work well for pressing berries during extraction. This maximizes your yield from each batch.
Proper storage requires airtight glass containers or amber bottles. Mason jars serve this purpose perfectly. Your creation will stay fresh for months when stored correctly.
Step-by-Step Guide to Crafting Your Syrup
Now comes the exciting part where you transform your ingredients into a powerful wellness elixir.
The process flows smoothly from start to finish, allowing you to create something truly special for your family.
| Stage | Action | Time | Result |
|---|---|---|---|
| Preparation | Combine berries and spices with water | 5 minutes | Ready for cooking |
| Simmering | Bring to boil then reduce heat | 40-45 minutes | Liquid reduces by half |
| Steeping | Let mixture rest off heat | 1 hour (optional) | Maximum flavor extraction |
| Finishing | Strain and mix with honey | 15 minutes | Ready for storage |
Simmering, Extraction, and Reduction Process
Place your dried berries and spices in a large pot with cold water. Bring everything to a vigorous boil over medium-high heat.
Once boiling, immediately reduce the heat to a gentle simmer. Cover the pot and let it cook for about forty minutes. The liquid will reduce by approximately half during this time.
This gentle cooking method extracts all the beneficial compounds from the berries. You don’t need to watch it constantly, making this perfect for multitasking.
Cooling, Straining, and Mixing with Raw Honey
After simmering, remove the pot from the heat source. Let the mixture cool naturally to just above room temperature.
Strain the liquid through a fine mesh strainer or cheesecloth. Press the berries firmly with a spoon to extract every precious drop.
Add raw honey once the liquid has cooled sufficiently. Use at least half the volume of honey compared to your final liquid amount. This preserves the honey’s natural enzymes.
Packaging Your Finished Syrup
Transfer your creation into clean, sterilized glass containers. Amber bottles work well for protecting the contents from light exposure.
Store your finished product in the refrigerator where it will stay fresh for up to two months. For extended shelf life, you can add a small amount of brandy or vodka during the mixing stage.

Safety and Considerations in Elderberry Use
Safety is the most important ingredient in any homemade wellness preparation. Understanding a few key points ensures your family enjoys all the benefits without any risks.
Neutralizing Toxins through Proper Cooking
Raw elderberries contain natural compounds that can cause stomach discomfort. These elements are completely neutralized through proper cooking.
Simmering your berries for the recommended time makes them perfectly safe. This process transforms potentially harmful fresh elderberries into a beneficial preparation.
Always ensure thorough cooking before consumption.
Honey Guidelines for Young Children
Raw honey should never be given to children under one year old. Their developing systems cannot handle certain natural spores that honey may contain.
For infants, create a simple decoction without honey or use maple syrup instead. Always consult your pediatrician before introducing any new preparation to young children.
When using honey, add it after the liquid cools to preserve its beneficial qualities. Heat can damage the enzymes that make raw honey so valuable.
This natural medicine serves as a complementary wellness aid throughout the year. For general support, adults take one tablespoon daily while children take one teaspoon.
During times of illness, this dosage can be repeated up to four times daily. Remember that this preparation supports but doesn’t replace professional medical care.

Customizing and Enhancing Your Syrup
Making adjustments to your wellness preparation can transform it from a simple remedy to a delightful family favorite.
This flexibility allows you to create something uniquely suited to your household’s preferences.
Incorporating Cinnamon, Ginger, and Citrus
You have several options when adding warm spices to your creation. Instead of cinnamon sticks, you can use dried cinnamon powder for easier blending.
Related: Learn to make Spiced Cinnamon Syrup.
Ginger offers similar flexibility. Fresh gingerroot, dried powder, or even ginger essential oil each bring distinctive warming properties.
These ingredients enhance both flavor and wellness benefits.
Citrus zest adds a bright, refreshing note that children often enjoy. Use only the colored part of orange rind, avoiding the bitter white pith. This creates a more appealing final product.
| Flavor Addition | Form Options | Beneficial Properties | Usage Tips |
|---|---|---|---|
| Cinnamon | Sticks, ground powder | Warming, sweet | Add during simmering stage |
| Ginger | Fresh root, powder, oil | Soothing, warming | Adjust amount to taste preference |
| Citrus Zest | Orange, lemon rind | Bright, refreshing | Use only colored part, no white pith |
| Vanilla | Bean slice, extract | Rich, aromatic | Adds depth to flavor profile |
| Cardamom | Pods, ground | Warming, aromatic | Use sparingly for subtle effect |
Your sweetener choice affects both taste and preservation. More honey creates longer shelf life but family-friendly versions use less sugar. Refrigeration maintains freshness for daily use.
For extended storage without refrigeration, you can double the honey content or add optional alcohol.
However, most households prefer the simpler refrigerated approach. Experiment to find what works best for your family.
Creative Ways to Enjoy Your Syrup
Your homemade wellness creation offers more possibilities than just a daily spoonful. It can become a delicious part of your family’s regular meals and a fun activity for everyone.
Using Syrup as a Topping and in Smoothies
Turn breakfast into a special treat. Drizzle this vibrant preparation over pancakes, oatmeal, or yogurt.
Related: Make delicious Blueberry Syrup for your morning pancakes.
Kids love the sweet flavor as it makes healthy foods more appealing.
For an extra health boost, blend it into smoothies. Combine it with vitamin C-rich fruits like oranges or strawberries.
This creates a powerful and tasty drink your children will ask for.
Family Bonding Through Kitchen STEM Adventures
Making this preparation is a fantastic learning experience. Your kitchen becomes a hands-on science lab.
Children can observe how berries release their color. They learn about measuring and following steps. This builds confidence and important life skills.
The process encourages teamwork and conversation. It’s a wonderful way to create screen-free memories together.
You can even package the final product in pretty glass jars to share with friends.
A powerful tool for wellness
By mastering this simple process, you’ve gained a valuable tool for maintaining your household’s wellbeing during challenging seasons.
This homemade syrup takes less than an hour to create but provides months of natural support.
You’ll enjoy significant savings compared to store-bought versions while having complete control over ingredient quality.
Your family benefits from pure, customized wellness without artificial additives.
The health advantages are impressive for your entire household.
Remember the daily guidelines: one tablespoon for adults and one teaspoon for children, increasing during illness.
Making this together creates wonderful bonding moments in the kitchen. Feel free to experiment with different spices to find flavors your family loves.
Store your creation in airtight glass jars in the refrigerator.
You’ve accomplished something truly special, a natural approach to family health that balances tradition with practical modern living.
Looking for more healthier syrups?
Then take a look at our recipe for making sugar-free vanilla syrup. It’s absolutely yummy!