Fresh Strawberry Syrup: Perfect for Summer Drinks.
Want to elevate your summer drinks in a simple, yet fun way? Then you need to learn to make this fresh strawberry syrup.
Summer is the perfect time to capture the sweet taste of ripe berries.
Imagine creating a vibrant, flavorful addition for your drinks and desserts with just a few basic items from your pantry.
This guide shows you how to do exactly that.
You can whip up this delicious concoction in about 15 to 25 minutes. It’s an incredibly simple process that yields amazing results.
The best part?
You know every ingredient that goes into it.
This homemade strawberry syrup is perfect for when berries are at their peak. It brings a burst of natural fruit flavor to anything you add it to.
From refreshing lemonades to delightful pancakes, it elevates everyday treats.
Making your own version is not only easy but also cost-effective.
You avoid the artificial flavors and high fructose corn syrup found in many store-bought options.
Plus, you can adjust the sweetness to suit your personal preference perfectly.
So, what do you say we get started?
Let’s go!
Key Takeaways
- You only need three common ingredients to make this flavorful addition.
- The entire process takes less than half an hour from start to finish.
- It uses real fruit, offering a natural and healthier alternative to store-bought versions.
- This versatile recipe can be used in countless beverages and desserts.
- You have full control over the sweetness and quality of ingredients.
- The final product can be stored in the refrigerator for up to two weeks.
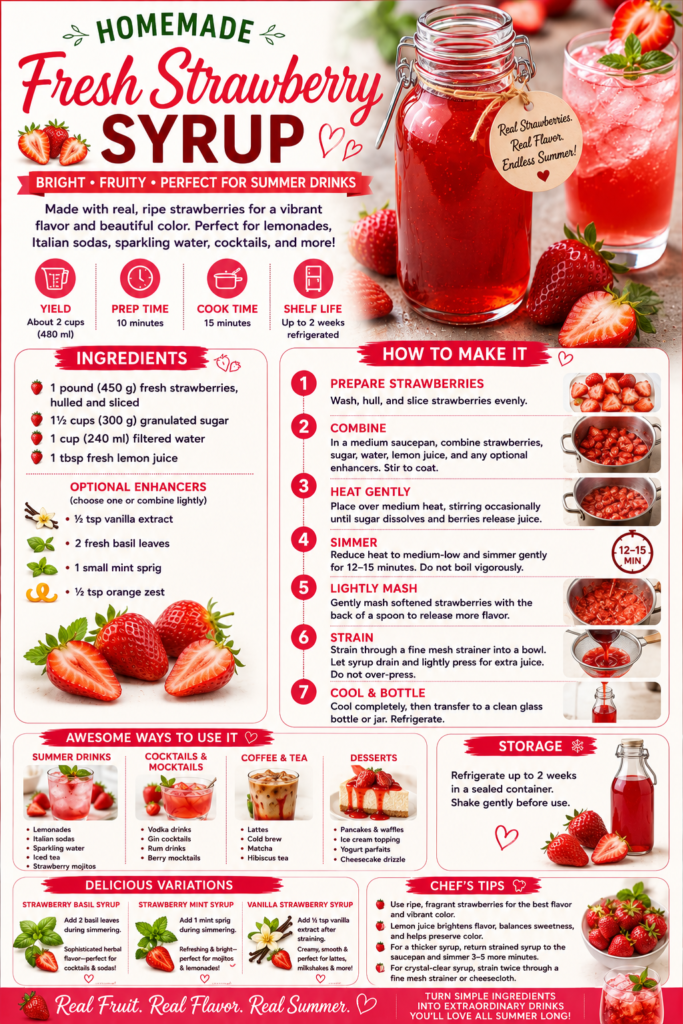
Homemade Fresh Strawberry Syrup Recipe
Bright • Fruity • Perfect for Summer Drinks
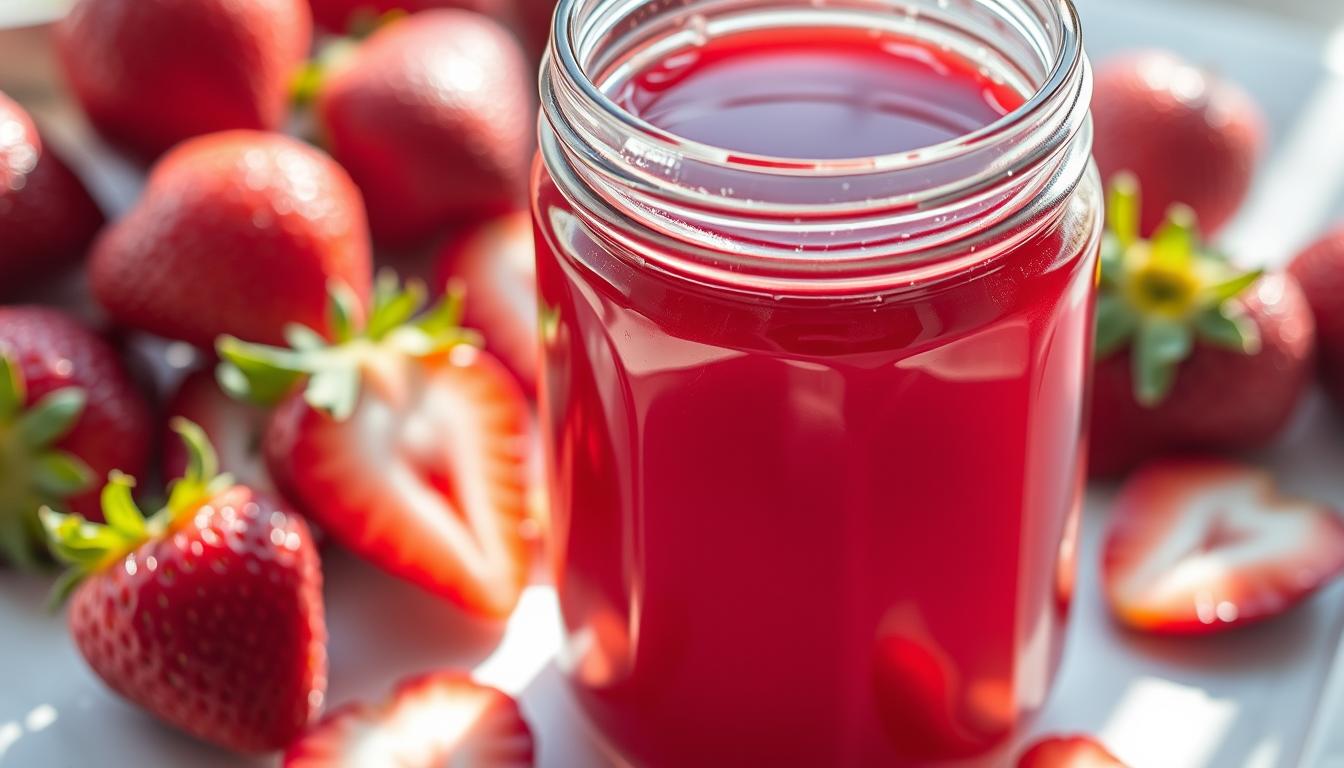
This homemade strawberry syrup is fresh, vibrant, and naturally bursting with real berry flavor.
Unlike artificial “red syrups,” this version tastes like actual ripe strawberries and creates stunning summer drinks with beautiful color and aroma.
Perfect for:
- Lemonades
- Italian sodas
- Sparkling water
- Mocktails & cocktails
- Iced tea
- Milkshakes
- Dessert drizzles
The key to exceptional strawberry syrup is:
- Using ripe strawberries
- Gentle simmering
- Straining at the right moment for smooth texture and vivid flavor
Yield: Approximately 2 cups (480 ml) syrup
INGREDIENTS
- 1 pound (450 g) fresh strawberries, hulled and sliced
- 1½ cups (300 g) granulated sugar
- 1 cup (240 ml) filtered water
- 1 tbsp fresh lemon juice
Optional Flavor Enhancers
Choose one or combine lightly:
- ½ tsp vanilla extract
- 2 fresh basil leaves
- 1 small mint sprig
- ½ tsp orange zest
EQUIPMENT
- Medium saucepan
- Fine mesh strainer
- Wooden spoon or silicone spatula
- Glass bottle or jar with lid
PREPARATION & METHOD
1: Prepare the Strawberries
- Wash strawberries thoroughly.
- Remove stems and hulls.
- Slice berries evenly for faster cooking.
2: Combine Ingredients
In a medium saucepan, combine:
- Strawberries
- Sugar
- Water
- Lemon juice
- Optional herbs or zest (if using)
Stir gently to coat berries.
3: Heat Gently
- Place saucepan over medium heat.
- Stir occasionally as sugar dissolves.
Within a few minutes:
- Strawberries will soften
- Juice will release naturally
- Syrup will turn bright red
4: Simmer
Once mixture reaches a gentle simmer:
- Reduce heat to medium-low.
- Simmer for:
- 12–15 minutes
Important
Do not aggressively boil.
Gentle simmering preserves:
- Fresh berry flavor
- Bright color
- Natural aroma
5: Lightly Mash
Using the back of a spoon or potato masher:
- Gently crush softened strawberries
This extracts maximum flavor without making the syrup cloudy.
6: Strain
- Pour mixture through a fine mesh strainer into a bowl or measuring cup.
- Let syrup drain naturally.
- Lightly press solids for extra juice.
⚠️ Do not over-press or puree.
Too much pulp creates cloudy syrup.
7: Cool & Bottle
- Allow syrup to cool completely.
- Transfer to a clean glass bottle or jar.
- Refrigerate immediately.
STORAGE
- Refrigerate up to 2 weeks
- Keep tightly sealed
- Shake gently before using
USING STRAWBERRY SYRUP IN
Summer Drinks
Excellent in:
- Sparkling water
- Lemonade
- Italian sodas
- Strawberry mojitos
- Iced tea
Recommended Amount
- 1–3 tbsp per drink
Desserts
Wonderful for:
- Pancakes & waffles
- Cheesecake drizzle
- Ice cream topping
- Yogurt parfaits
- Cake soaking syrup
OPTIONAL VARIATIONS
Strawberry Basil Syrup
Add:
- 2 basil leaves during simmering
Creates:
- Sophisticated herbal flavor
- Excellent cocktail syrup
Strawberry Mint Syrup
Add:
- 1 small mint sprig during simmering
Perfect for:
- Mojitos
- Summer sodas
- Lemonade
Vanilla Strawberry Syrup
Add:
- ½ tsp vanilla extract after straining
Excellent for:
- Cream sodas
- Milkshakes
- Dessert sauces
CHEF’S NOTES
Best Strawberries
Use:
- Deep red
- Fully ripe
- Fragrant strawberries
Underripe berries create weak flavor and pale syrup.
Why Lemon Juice Matters
Lemon juice:
- Brightens berry flavor
- Balances sweetness
- Helps preserve color
For a Thicker Dessert Syrup
After straining:
- Return syrup to saucepan.
- Simmer an additional:
- 3–5 minutes
Ideal for:
- Pancakes
- Cheesecake
- Ice cream
For Crystal-Clear Syrup
Strain twice through:
- Fine mesh strainer
or - Cheesecloth
Perfect for:
- Cocktails
- Elegant sodas
Key Ingredients and Essential Tools Overview
Before you start cooking, let’s ensure you have all the necessary items on hand. This simple recipe requires just a few core components.
Getting everything organized first makes the entire process quick and easy.
Your main ingredient is the fruit itself. You have a great choice depending on the season.
The table below helps you decide which option is best for you.
| Berry Type | Amount Needed | Best Used When | Preparation Note |
|---|---|---|---|
| Fresh Berries | 8 oz (about 2 cups) | In season for peak flavor | Hull (remove stems) before using |
| Frozen Berries | 8 oz (no need to thaw) | Year-round availability | May require a bit more simmering time |
List of Fresh and Frozen Strawberries
Granulated sugar is your next key component. You can use between 1/3 cup and 1 cup. More sugar makes a thicker, sweeter result that lasts longer.
You will also need one cup of water. Using filtered water is best for a clean taste. Lemon juice and vanilla are nice extras for more flavor depth.
Required Kitchen Tools and Equipment
For equipment, a medium-sized saucepan is perfect. A fine mesh strainer is essential for getting a smooth liquid.
A potato masher helps break down the fruit as it cooks. Finally, have a clean jar or bottle ready for storing your creation.
How to Prepare Your Strawberries
The quality of your final product begins with how you handle the main ingredient. Proper preparation ensures maximum flavor extraction and a beautiful color.
Taking a few extra minutes at this stage makes a significant difference in your results. Well-prepared fruit creates a smoother, more vibrant condiment.
Washing and Hulling Techniques
Start by rinsing your fruit under cool running water. This removes dirt and any residue from the surface.
Gently pat them dry with a clean towel. Avoid soaking the fruit as this can waterlog them.
Next, remove the green leafy tops using a sharp knife. Cut around the stem area to eliminate the white core.
This hulling process ensures no bitter flavors transfer to your creation. Some people prefer specialized tools, but a knife works perfectly.
| Preparation Step | Fresh Fruit Method | Frozen Fruit Method | Key Difference |
|---|---|---|---|
| Cleaning | Rinse under cool water | Skip washing step | Frozen fruit is pre-cleaned |
| Hulling | Remove stems before cutting | Thaw first, then hull | Timing varies |
| Cutting Size | Halves or quarters | Use as-is or cut larger pieces | Texture affects cutting |
| Moisture Control | Pat dry after washing | Drain excess water after thawing | Water content differs |
Choose berries that are uniformly red throughout for the best color. Avoid any with mold or significant brown spots.
Cut your prepared fruit into halves or quarters depending on size. Larger pieces help extract flavor while minimizing pulp.
If using frozen options, thaw them completely first. Drain any excess liquid before adding to your recipe.
Proper preparation directly impacts your final product’s quality. These simple steps ensure optimal flavor and appearance.

Enhancing Strawberry Flavor with Simple Additions
Simple flavor enhancements can take your berry-based condiment to the next level of deliciousness.
A few thoughtful additions transform the basic recipe into something truly special.
Adding two tablespoons of fresh lemon juice brightens the natural taste as it balances the sweetness without making the final product taste lemony.
This small adjustment creates a more complex flavor profile.
A quarter teaspoon of vanilla extract adds subtle depth. This optional ingredient makes your creation taste more sophisticated.
The vanilla complements the fruit notes beautifully.
Choosing Between Fresh and Frozen Options
Your berry selection significantly impacts the final result. In-season options provide the most vibrant taste.
They offer natural sweetness that reduces the need for extra sugar.
Frozen alternatives work wonderfully when local fruit isn’t available. They’re picked at peak ripeness and frozen immediately.
This preserves their excellent flavor quality year-round.
Remember that frozen fruit releases more water during cooking, so you’ll need additional simmering time to achieve the right thickness.
Taste your berries first to adjust sugar amounts accordingly.
Sweet varieties may only need three-quarters cup of sugar. Tart berries benefit from the full cup measurement.
You can also experiment with other fruits like raspberries or blueberries.
The Art of Simmering and Steeping
The transformation from simple ingredients to a rich, flavorful liquid happens during the heating phase.
This crucial step develops the depth and complexity that makes your homemade creation special.
How to Bring the Mixture to a Boil
Combine your prepared fruit, water, and sugar in a medium saucepan. Stir gently until the sugar begins to dissolve.
This prevents crystals from forming as you apply heat.
Turn your burner to medium-high to bring the mixture to a boil. Watch for large bubbles breaking the surface.
This usually takes about five minutes.
| Heat Level | Appearance | Recommended Use | Time Frame |
|---|---|---|---|
| Medium-High | Rapid bubbles | Initial boiling phase | 3-5 minutes |
| Low Simmer | Gentle bubbles | Flavor development | 10-15 minutes |
| Off Heat | No bubbles | Steeping stage | 15 minutes |
Steeping for Maximum Flavor Extraction
After simmering, remove your saucepan from the heat. Cover it with a lid and let it rest.
This steeping process continues flavor extraction without additional cooking.
The berries release their essence into the liquid during this resting period. You’ll notice the color deepening as flavors meld together beautifully.
Stir occasionally during the entire process to ensure even heating. This prevents burning and helps distribute flavors throughout your creation.
Achieving the Perfect Syrup Consistency
Getting the right thickness for your homemade creation is a simple process. It involves a few key steps after the initial cooking is complete.
The final texture is important for how it pours and mixes.
You want a result that is smooth and pourable. It should blend easily into drinks without being watery.
The goal is a rich, flavorful liquid that enhances your recipes.
Adjusting Thickness Through Simmering
After your fruit has simmered, carefully strain the mixture. Use a fine mesh strainer over a bowl. Let it drain naturally for about ten to fifteen minutes.
Resist the urge to press on the berries. Pressing forces pulp through and makes the liquid cloudy. A gentle drain yields a beautifully clear final product.
Your mixture will seem thin when it’s hot. Don’t worry. As it cools to room temperature, it will thicken naturally.
The consistency will become similar to maple syrup.
| Desired Consistency | Action Required | Approximate Time | Key Factor |
|---|---|---|---|
| Standard Pouring | Natural cooling after straining | 30-45 minutes | Cooling process |
| Thicker Result | Simmer strained liquid again | 5-10 extra minutes | Reduction by one-third |
| Too Thick (After Cooling) | Whisk in water, 1 tbsp at a time | 2-3 minutes | Gradual adjustment |
For a thicker result, return the strained liquid to a clean saucepan. Simmer on medium-low heat for a few more minutes. This reduces the volume and concentrates the flavor.
The amount of sugar you use also affects the thickness. A higher ratio of sugar to water creates a more viscous product.
Remember, it will thicken slightly more after refrigeration.
If your finished product becomes too thick, you can easily fix it. Just whisk in a little water, one tablespoon at a time.
You will quickly reach your preferred pourable consistency.
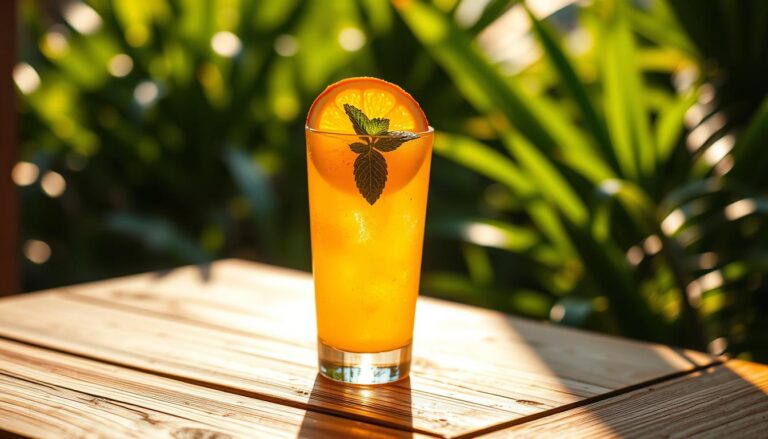
Using Fresh Strawberry Syrup in Summer Drinks
Now that you have your vibrant homemade creation, it’s time to explore the most enjoyable part: mixing it into delicious summer beverages.
This versatile condiment instantly elevates both non-alcoholic and alcoholic drinks.
It provides a natural sweetness and a beautiful pink hue. Your options are nearly endless.
Ideas for Cocktails and Mocktails
Transform everyday drinks into something special. A simple mixture with sparkling water creates a fantastic homemade soda.
It also sweetens lemonade or iced tea beautifully. For a creamy treat, try stirring it into cold milk.
| Drink Idea | Key Ingredients | Special Tip |
|---|---|---|
| Sparkling Berry Soda | Syrup, Club Soda, Ice | Use chilled ingredients for maximum refreshment. |
| Fruity Lemonade | Lemonade, Syrup, Ice | Adjust the amount to control sweetness. |
| Italian Cream Soda | Syrup, Club Soda, Cream | Layer the ingredients for a stunning effect. |
| Mojito Mocktail | Syrup, Mint, Lime, Sparkling Water | Muddle the mint gently to release its flavor. |
For parties, make flavored ice cubes by freezing the liquid. They add color and taste as they melt.
Related: Making Orange Crush Punch (Non-alcohol).
Your homemade simple syrup works wonderfully in cocktails too. Try it in a margarita or with vodka for a real fruit kick.
Related: Learn to make Orange Crush Party Punch.

Creative Ways to Use Strawberry Syrup Beyond Drinks
Your homemade berry syrup extends far beyond the glass. This flavorful addition brings sweet excitement to breakfast tables and dessert plates alike.
Transform simple desserts into gourmet experiences with minimal effort. The possibilities are limited only by your imagination.
Related: Make a delightful variation on the traditional Coke Float.
Desserts, Pancakes, and French Toast Ideas
Drizzle your creation over vanilla ice cream for an instant upgrade. The contrast between cold cream and fruity topping creates perfect harmony.
Weekend breakfasts become special occasions when you pour this over pancakes. It elevates classic morning meals with vibrant berry notes.
For French toast enthusiasts, this condiment makes an exceptional topping. Consider making a thicker version by simmering longer for better coverage.
Brush the liquid onto cake layers before frosting for added moisture. This technique infuses your baked goods with natural fruit flavor throughout.
Create impressive brunch dishes like stuffed French toast. Top with your homemade sauce for restaurant-quality presentation that wows guests.
Cheesecake receives an elegant makeover with this smooth topping. The seedless consistency provides beautiful presentation without berry texture.
Serve your creation chilled or gently warmed for different dessert experiences. Warm sauce over bread pudding creates comforting indulgence.
Tips for Storing and Preserving Your Homemade Syrup
Proper storage ensures your delicious homemade creation lasts for weeks of enjoyment.
Following a few simple steps after cooking keeps its flavor vibrant and safe to use.
Your first priority is letting the liquid cool completely. This process takes about 30 to 60 minutes at a cool room temperature.
Pouring it hot into a container can cause condensation, which dilutes your hard work.
Refrigeration vs. Freezing Guidelines
Once it reaches room temperature, transfer your syrup into a clean, airtight container. A mason jar or a bottle with a tight seal works perfectly.
You must store this homemade strawberry syrup in the refrigerator because it contains real fruit juice.
In the fridge, it will maintain excellent quality for up to two weeks. For longer preservation, freezing is a great option.
Use a freezer-safe container and leave some space for expansion.
Frozen, your creation can last between three and six months. Always label your container with the date you made it. This helps you track its freshness over time.
When you’re ready to use frozen syrup, thaw it slowly in the refrigerator overnight. Give it a good stir before using, as some separation is natural.
This method keeps your flavorful addition ready for any occasion.

Mastering Fresh Strawberry Syrup: Tips and Tricks
With the basic method down, these expert insights help you achieve perfect results every time.
Small adjustments in technique make a big difference in your final product’s quality and appearance.
Expert Advice for Consistent Results
Start with the best fruit you can find. Look for bright red color all the way through.
They should smell fragrant and taste sweet.
Avoid any with mold or large brown spots. These can create bitter flavors in your homemade strawberry syrup.
Cut your berries into pieces before cooking. This helps extract maximum color and flavor. It also minimizes pulp for a clearer liquid.
When straining, let the mixture drain naturally. Resist pressing on the fruit. Patience gives you a beautiful, clear result instead of a cloudy one.
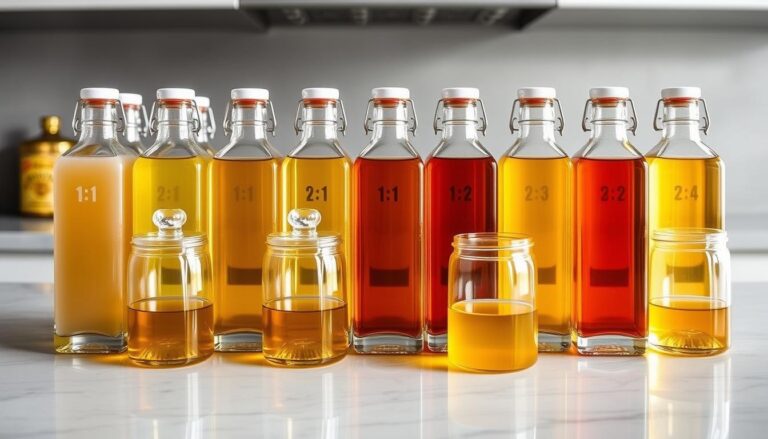
| Syrup Type | Sugar Ratio | Refrigerator Life | Best For |
|---|---|---|---|
| Plain Simple Syrup | 1:1 sugar to water | Up to 1 month | Quick sweetening |
| Rich Simple Syrup | 2:1 sugar to water | Up to 6 months | Thicker consistency |
| Fruit Simple Syrup | Varies by recipe | About 2 weeks | Natural fruit flavor |
Your creation will thicken as it cools. Don’t worry if it seems thin when hot.
Wait until it reaches room temperature before deciding if it needs more simmering.
For a thicker consistency, return the strained liquid to your medium saucepan. Simmer on medium-low heat until reduced by about one-third.
You can easily double or triple this recipe. Just use a larger pot and extend the simmering time slightly.
This is perfect when berries are at their peak.
Once you master this technique, try other fruits: Raspberries, blueberries, or citrus fruits work beautifully with the same method.
The making of a Classic Syrup
Mastering this simple recipe opens up a world of culinary possibilities. You now have everything needed to create your own delicious strawberry syrup at home.
This straightforward method puts you in complete control. You can customize the sweetness and flavor to match your personal preferences perfectly.
Making your own syrup during peak season captures the best flavors. You’ll enjoy a superior product compared to store-bought options.
Don’t hesitate to experiment with different fruits and flavor combinations. Share your creations and inspire others to try this rewarding kitchen project.
Your homemade creations will elevate drinks, breakfasts, and desserts with natural, vibrant taste.
Want to learn to make another classic, delicious syrup?
Then check out our recipe for making an amazing Blueberry Syrup. It’s perfect for cakes and drinks.