Budget Wedding Cake Ideas: Tiered White Chocolate Sprite Cake
Want to create a stunning wedding dessert that looks expensive but is actually easy to make? Then check out our White Chocolate Sprite Cake recipe.
In this guide you’ll learn to craft a beautiful, tiered dessert that will wow your guests without draining your savings account.
This approach transforms a humble soda-based batter into an elegant masterpiece perfect for your special day.
You will discover how to achieve a light, fluffy texture with a delightful hint of citrus. This method proves that sophistication doesn’t have to come with a sky-high price tag.
We will walk you through every step, from selecting ingredients to advanced decoration techniques.
Even with just a bit of baking experience, you can build a multi-tiered creation that perfectly matches your wedding theme.
Ready to get started? Let’s go then!
Key Takeaways
- Learn how a simple soda can be the secret to a light and elegant wedding dessert.
- Discover cost-effective strategies for creating a multi-tiered centerpiece.
- Master techniques for a professional finish that rivals expensive bakery creations.
- Gain confidence to customize your dessert to fit your wedding’s unique style.
- Follow a comprehensive guide covering everything from baking to final decoration.
Making White Chocolate Sprite Cake for a Wedding
Here’s the professional, cost-conscious yet elegant recipe for a White Chocolate Sprite Cake.
This cake is a low-cost wedding dessert that still looks refined, intentional, and bakery-worthy.
The recipe emphasizes accessible ingredients, clean structure, and elegant decoration, making it perfect for small weddings, dessert tables, or budget-savvy celebrations.
Yield: Two 9-inch layers (serves 18–20)
Style: Soft white layers, subtle lemon-lime aroma, understated luxury
Why it works for weddings: Moist for days, forgiving to decorate, visually light and celebratory
WHITE CHOCOLATE SPRITE CAKE LAYERS
Ingredients
- 360 g (3 cups) all-purpose flour
- 360 g (1¾ cups) granulated sugar
- 2½ tsp baking powder
- ½ tsp fine salt
- 170 g (¾ cup) unsalted butter, softened
- 4 large egg whites, room temperature
- 240 ml (1 cup) Sprite, room temperature and flat
- 180 ml (¾ cup) whole milk, room temperature
- 2 tsp vanilla extract
- 120 g (4 oz) white chocolate, finely chopped and melted, cooled slightly
Preparation
- Prepare pans & oven
- Heat oven to 175°C / 350°F
- Grease and line two 9-inch round cake pans
- Combine dry ingredients
- Whisk flour, sugar, baking powder, and salt
- Cut in butter
- Beat butter into dry ingredients on low speed until mixture resembles fine crumbs
- Prepare liquid mixture
- Whisk egg whites, milk, flat Sprite, vanilla, and melted white chocolate
- Mix batter
- Add liquid mixture to dry ingredients in two additions
- Mix on medium speed until smooth and pale (do not overmix)
- Bake
- Divide batter evenly between pans
- Bake 25–28 minutes, rotating halfway
- Cakes are done when tops spring back and a toothpick comes out clean
- Cool completely
- Cool in pans 10 minutes, then turn out onto racks
- Cool fully before frosting
SPRITE SIMPLE SYRUP (OPTIONAL, RECOMMENDED FOR MOISTURE)
Ingredients
- 120 ml (½ cup) Sprite
- 2 tbsp granulated sugar
Method
- Simmer together 3–4 minutes until sugar dissolves
- Cool completely
- Brush lightly over cake layers before frosting
WHIPPED WHITE CHOCOLATE BUTTERCREAM
(Stable, economical, and elegant)
Ingredients
- 340 g (1½ cups) unsalted butter, softened
- 600 g (5 cups) powdered sugar, sifted
- 120 g (4 oz) white chocolate, melted and cooled
- 2–3 tbsp milk or Sprite
- 1½ tsp vanilla extract
- Pinch fine salt
Method
- Beat butter until smooth and fluffy (3 minutes)
- Gradually add powdered sugar on low speed
- Add melted white chocolate, vanilla, salt
- Add liquid 1 tbsp at a time until smooth and spreadable
- Beat on medium-high 2 minutes for lightness
ASSEMBLY
- Level cake layers if needed
- Place first layer on cake board
- Brush lightly with Sprite syrup
- Spread ¾ cup buttercream evenly
- Add second layer and repeat syrup brushing
- Apply a thin crumb coat
- Chill 20–30 minutes
WEDDING-READY DECORATION (LOW COST, HIGH IMPACT)
1: Final Frosting (Minimalist Elegance)
- Apply a smooth final coat or a soft semi-naked finish
- Use an offset spatula for subtle vertical texture
2: Decorative Options (Choose ONE)
A: Fresh Greenery (Most Budget-Friendly)
- Add eucalyptus, olive branches, or rosemary
- Cluster on one side or at the base
- Use food-safe floral tape where needed
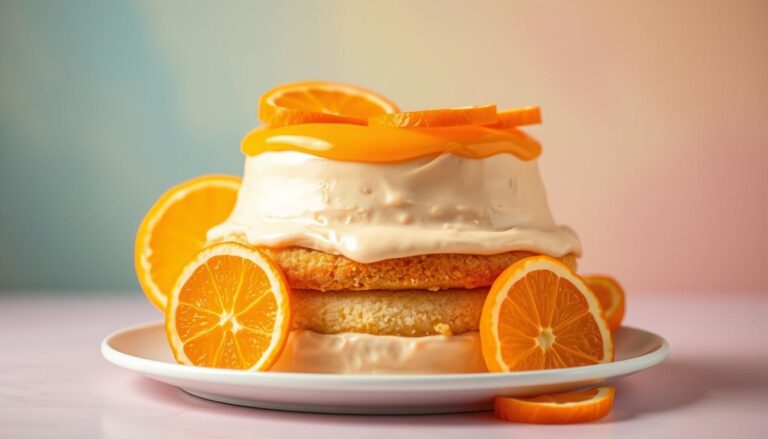
B: Citrus Pearl Accent
- Garnish with thin lemon slices, lightly candied
- Add white sugar pearls sparingly
C: White Chocolate Drip (Optional)
- Melt 60 g (2 oz) white chocolate with 1 tbsp cream
- Cool slightly, then apply a controlled drip around the edge
Step 3: Final Wedding Touch
- One cake topper (acrylic or wooden)
- Light dusting of edible shimmer or powdered sugar
- Neutral cake stand for height and presence
STORAGE & SERVING
- Refrigerate up to 48 hours
- Bring to room temperature 1 hour before serving
- Cuts cleanly and holds shape well for dessert tables
CHEF’S NOTES (WHY THIS CAKE IS IDEAL FOR WEDDINGS)
- Sprite adds moisture and subtle lift without expensive ingredients
- Egg whites keep the crumb pale and refined
- White chocolate delivers luxury flavor with minimal cost
- Decoration relies on restraint, not excess
Why a Sprite Cake is Perfect for Your Wedding
The secret to an impressive wedding dessert that won’t break the bank lies in a surprisingly simple approach:
Baking a beautiful, delicious soda cake and then decorating it so it looks stunning and perfect for such a special day.
More couples are choosing this method for their special day because it delivers professional results without the professional price tag.
Embracing a Budget-Friendly Yet Stunning Option
This approach lets you create a beautiful centerpiece while keeping costs manageable. You’ll need fewer specialty items compared to traditional recipes.
The main ingredients are easy to find and affordable.
Your shopping list becomes shorter and more budget-conscious. This means you can allocate funds to other important wedding details.
The Allure of Quick and Easy Preparation
The preparation process comes together in minutes rather than hours.
This eliminates complex techniques that often intimidate home bakers.
You can even prepare layers ahead of time and freeze them. This flexibility helps reduce stress during your wedding planning timeline.
The subtle citrus notes from the soda provide a refreshing taste that appeals to most guests.
This crowd-pleasing flavor profile makes it an excellent choice for your celebration.
Even with limited baking experience, you can achieve results that will have everyone asking for your secret.
Tiered Cake Ideas for a Stunning Wedding Presentation
Transform your dessert into a breathtaking wedding centerpiece with smart tiered design strategies.
The right approach turns simple layers into an elegant focal point for your celebration.
You can achieve professional-looking results without professional costs. Careful planning ensures your creation stands tall and beautiful throughout your special day.
Designing Multi-Layered and Tiered Cakes
Start by selecting the correct cake pan sizes for a balanced look. Classic three-tier designs often use 10-inch, 8-inch, and 6-inch round pans.
Each pan size requires different baking times. Smaller tiers need fewer minutes in the oven than larger ones. Always test for doneness with a toothpick.
Proper assembly prevents collapse during your reception. Use dowel rods and cake boards between layers for stability. This support system keeps your creation secure.
Decoration Ideas to Elevate the Wedding Look
Beautiful frosting creates a smooth canvas for decorations. Consider a rich coating that complements your wedding theme.
Fresh flowers add natural elegance with minimal effort. For more elaborate designs, try piped borders or metallic accents.
Different pan shapes offer unique presentation options. Square or hexagonal cakes provide modern alternatives to traditional rounds.
Your finished masterpiece will impress guests while staying within budget. These techniques help you create a truly memorable dessert.

Baking Techniques for a Light and Fluffy Texture
Creating the ideal crumb structure for your celebration dessert depends on two critical factors: ingredient preparation and heat control.
Mastering these techniques ensures your final creation has that perfect airy consistency everyone loves.
The Importance of Properly Creaming Butter and Sugar
Your journey to perfect texture begins with properly creaming butter and sugar together.
This step incorporates tiny air bubbles that expand during baking, creating the delicate crumb structure.
Make sure your butter is at room temperature, soft enough to indent with your finger but not greasy.
Use your mixer to beat the butter and sugar for the full 4-5 minutes. Cutting this time short results in a denser texture.
Optimizing Oven Temperature and Baking Time
Proper oven temperature control dramatically affects your final results. Always preheat oven to the specified temperature before baking begins.
For from-scratch recipes, set your oven to 325°F. Cake mix versions typically require 350°F. Baking time varies significantly based on your pan choice.
Larger pans need more minutes than smaller ones. Make sure to avoid opening the oven door frequently, as temperature fluctuations can cause collapse.
Watch for visual cues like spring-back when gently poked.
Customizing Your Sprite Cake to Match Your Wedding Theme
Your wedding dessert should be as unique as your love story, and this recipe offers incredible flexibility to make that happen.
A few simple tweaks can transform the base creation into a personalized masterpiece.
You can easily align the final look and taste with your wedding’s color scheme and style. This approach ensures your centerpiece feels truly yours.
Adding Citrus Zest and Flavor Extracts for a Unique Twist
Amplify the citrus notes by adding fresh lemon or lime zest to your batter. This adds a bright flavor and a bit of visual texture.
Experiment with different extracts to change the profile. Almond extract adds sophistication. A touch of rum extract creates a tropical flair.
Even adjusting the amount of vanilla by a small bit can create a subtle, unique variation. These changes require no major modifications to your trusted recipe.
Personalizing Frosting and Toppings to Suit Your Style
Your choice of frosting dramatically changes the dessert’s appearance and taste. Options range from a simple dusting of powdered sugar to rich cream cheese or buttercream.
Related: Soda Cake decorating ideas for weddings and showers.
Use gel food coloring to tint your frosting to match your wedding palette. Gels add vibrant color without introducing excess liquid or fat.
Top your creation with fresh berries, edible flowers, or sugar pearls. A custom cake topper adds a final, personal touch.
| Addition | Effect on Flavor | Best Paired With |
|---|---|---|
| Lemon Zest (1 tbsp) | Bright, tangy citrus boost | Cream Cheese Frosting |
| Almond Extract (1 tsp) | Sophisticated, nutty note | Simple Powdered Sugar Dusting |
| Rum Extract (2 tsp) | Warm, tropical variation | Vanilla Buttercream |
Consider using different pan shapes, like hexagons, for a modern look. This maintains stability while creating a distinctive presentation.

Creative Uses for Cake Mix and Soda in Modern Baking
Modern baking has embraced the simplicity of combining pre-made mixes with carbonated beverages to create unique flavor profiles.
This approach opens up endless possibilities for customizing your dessert creations.
You can experiment with various combinations to match different wedding events or seasonal themes. The basic concept works with almost any cake mix and soda pairing.
Exploring Alternative Soda Cake Variations
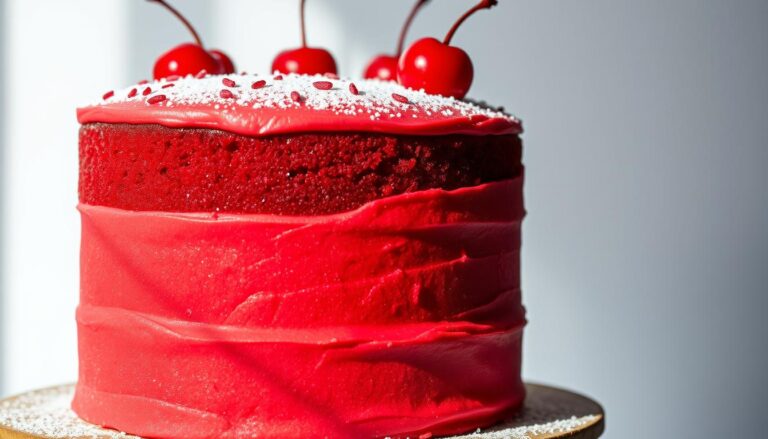
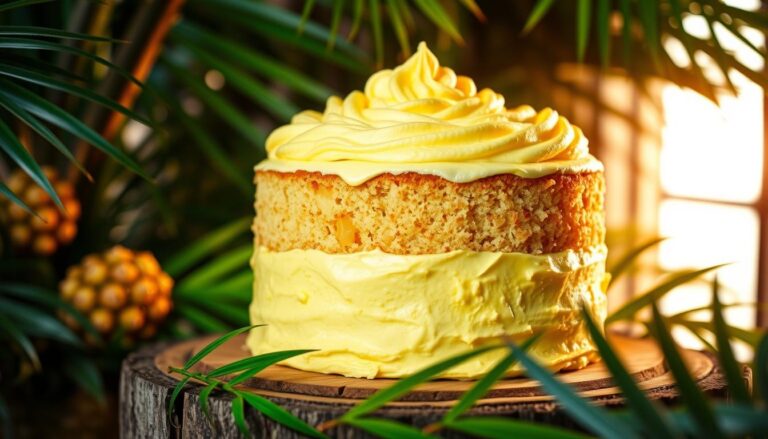
Popular combinations include vanilla cake mix with orange soda for a creamsicle flavor. Chocolate cake mix pairs beautifully with Cherry Coke for a rich, fruity twist.
The versatile yellow cake mix base works well with many soda types. You can create a foundation for various flavor enhancements using this reliable mix.
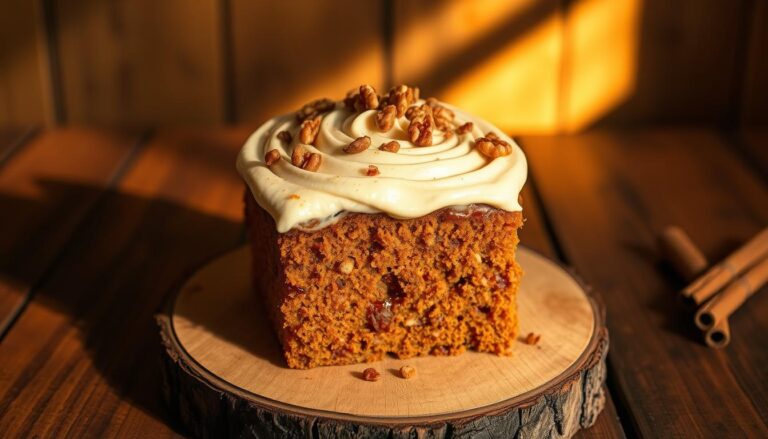
Spice cake mix with ginger ale creates a perfect fall dessert. Strawberry mix with lemon-lime soda makes a refreshing spring creation.
Soda cakes traditionally avoid using eggs or oil taking advantage of the leavening agents already within the cake mix.
Nonetheless, adding these ingredients to your soda cake recipes improves texture and reduces crumbliness.
Experimenting with regional or specialty sodas lets you create signature recipes. This personalization makes your dessert truly unique to your celebration.
Presentation and Serving Suggestions for Your Tiered Cake
With the baking complete, the art of presentation becomes your final step toward wedding dessert perfection.
Proper techniques ensure your beautiful creation looks professional from every angle.
Always allow your layers to cool completely before you begin decorating. Frosting a warm dessert causes melting and sliding. This ruins your careful work.
Stylish Frosting and Garnishing Techniques
Choose a frosting style that matches your wedding theme. Smooth buttercream creates an elegant, clean finish. Rustic swirls or semi-naked styles showcase your layers beautifully.
Garnishes add the final touch of sophistication. Fresh flowers bring natural elegance. You can also use piped borders or metallic accents.
For a quick but impressive look, consider pre-made sugar flowers. These save precious minutes before your celebration.
Tips for Perfect Cake Slicing and Display
Display your masterpiece on a sturdy stand. Choose a location with good lighting. This makes it a true focal point.
When serving, disassemble tiers carefully. Use a sharp knife for clean slices. This maintains the beautiful presentation for all guests.
Remember to prepare your pans properly before you pour batter. A well-greased pan ensures your layers release perfectly. Check doneness with a toothpick inserted into the center.
Stunning Desserts that Don’t Break the Bank
The techniques you’ve mastered extend beyond this single recipe, giving you lifelong baking skills for future celebrations.
You now possess everything needed to create a stunning dessert for a celebration that balances beauty with budget-consciousness.
This comprehensive guide has shown you how to make cake creations that rival expensive bakery options.
The simple soda ingredient makes the process accessible, even with limited baking experience.
Remember that the most important ingredients are the love and care you put into your creation.
Your homemade dessert carries personal meaning that store-bought alternatives cannot match.
Move forward with confidence, knowing you have reliable guidance for success.
A bit of creativity transforms simple ingredients into a memorable centerpiece your guests will cherish.
Embrace the satisfaction of creating not just a dessert, but a lasting memory. Your baking adventure becomes a story you’ll share for years to come.