Cupcake Cake Tutorial: Shaping Orange Crush Cupcakes into a Pumpkin
What if you could create a stunning dessert centerpiece that looks like a professional bakery creation but requires no cutting or complicated serving?
This guide shows you how to transform individual treats into one cohesive design.
The pumpkin shape is perfect for autumn celebrations and using Orange Crush flavored batter adds a festive touch.
You can customize colors to match your Halloween or Thanksgiving theme.
In addition, the pull-apart concept makes serving effortless at any gathering. Your guests simply grab their portion without waiting in line.
This method works for bakers at all experience levels.
Whether you’re hosting a birthday party or harvest festival, the result will impress everyone.
So, what do you say we get this party started?
Key Takeaways
- Pull-apart designs eliminate the need for cutting and serving traditional cakes
- Orange Crush flavor adds a seasonal twist to your autumn celebrations
- The pumpkin shape works perfectly for Halloween and Thanksgiving events
- This method requires no special baking skills or expensive tools
- Individual portions make serving large groups quick and efficient
- Customize colors and decorations to match your party theme
- Cleanup is simplified with no plates, forks, or serving utensils needed
Cupcake Cake Tutorial: Making a Pull-Apart Pumpkin Cake from Individual Cupcakes
Here’s the end-to-end process that takes you from Orange Crush cupcake batter to baked cupcakes, assembly, and decoration to create a pull-apart Pumpkin Cake.
The result is visually striking, structurally sound, and easy to serve.
Final Yield:
24 cupcakes → 1 pull-apart pumpkin (serves ~24)
Occasions:
Fall parties, Halloween, harvest celebrations, school events
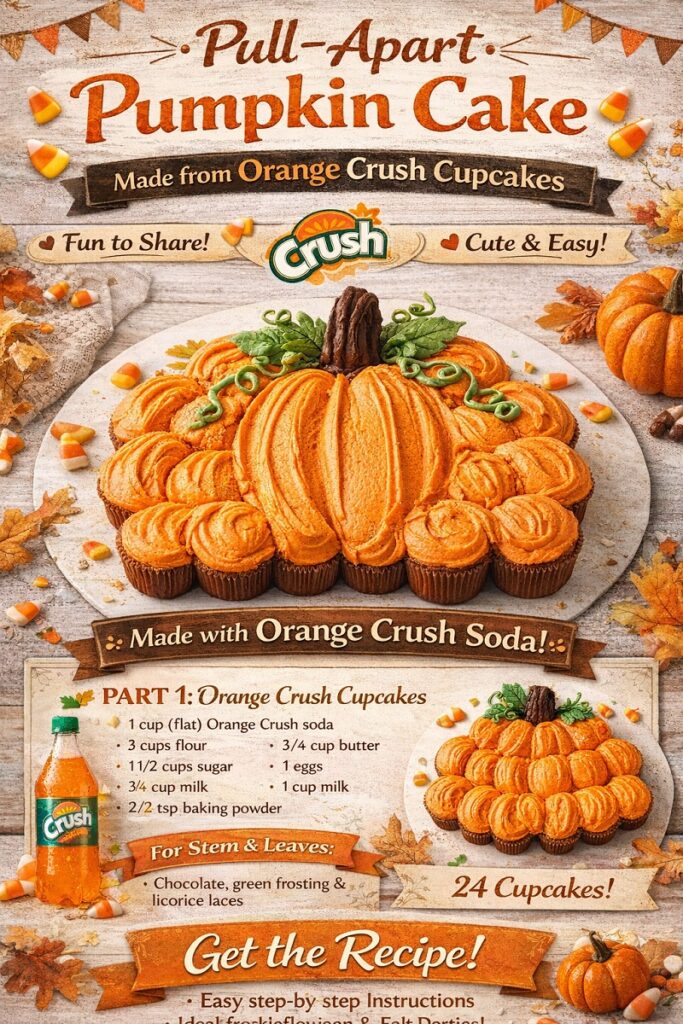
Baking the Orange Crush Cupcakes
Ingredients
- 300 g (1½ cups) granulated sugar
- 170 g (¾ cup) unsalted butter, room temperature
- 3 large eggs, room temperature
- 240 ml (1 cup) Orange Crush soda, room temperature and flat
- 240 ml (1 cup) whole milk
- Zest of 1 large orange
- 360 g (3 cups) all-purpose flour
- 2½ tsp baking powder
- ½ tsp fine sea salt
- 1½ tsp vanilla extract
- Orange gel food coloring (optional, for color boost)
Preparation & Baking
- Prep oven & pans
- Heat oven to 175°C / 350°F
- Line two 12-cup muffin tins with paper liners
- Cream butter and sugar
- Beat butter and sugar on medium speed 3–4 minutes until pale and fluffy
- Add eggs
- Add eggs one at a time, mixing well after each addition
- Mix liquids
- Stir together flat Orange Crush, milk, vanilla, and orange zest
- Combine dry ingredients
- Whisk flour, baking powder, and salt
- Finish batter
- Alternate adding dry ingredients and soda mixture to butter mixture
- Mix just until smooth (do not overmix)
- Bake
- Fill liners ¾ full
- Bake 18–20 minutes, rotating pans halfway
- Cupcakes are done when tops spring back and a toothpick comes out clean
- Cool completely
- Cool in pan 5 minutes, then transfer to racks
- Cupcakes must be fully cool before assembly
Making Pumpkin-Orange Buttercream
Ingredients
- 340 g (1½ cups) unsalted butter, room temperature
- 720 g (6 cups) powdered sugar, sifted
- 60 ml (¼ cup) heavy cream
- 1 tsp vanilla extract
- Orange gel food coloring
- Small amount of brown gel food coloring (to deepen pumpkin tone)
Buttercream Preparation
- Beat butter until smooth and creamy (2 minutes)
- Gradually add powdered sugar on low speed
- Add cream and vanilla; beat until fluffy (3 minutes)
- Tint frosting pumpkin-orange using gel colors
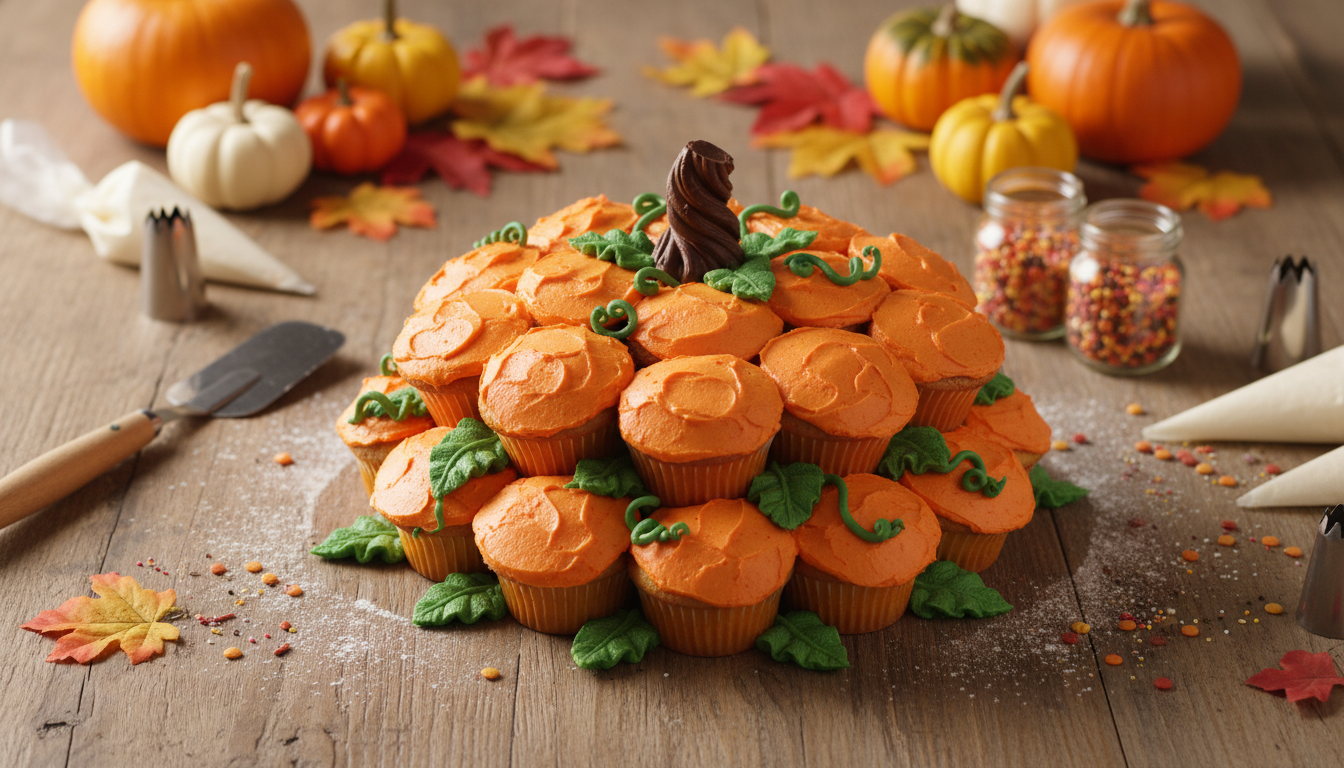
Assembling the Pull-Apart Pumpkin
Cupcake Layout (Top View)
Use 24 cupcakes arranged like this:
- Top row: 5 cupcakes
- Second row: 6 cupcakes
- Middle row: 6 cupcakes
- Fourth row: 5 cupcakes
- Bottom row: 2 cupcakes
This creates a rounded pumpkin silhouette
Pro Tip: Arrange cupcakes on a flat cake board before frosting to confirm spacing.
Frosting & Pumpkin Texture
Frosting Tools
- Large offset spatula
- Small offset spatula or spoon
- Toothpick or small palette knife
- Piping bag with round tip (optional)
The Frosting Process
- Crumb coat (optional but recommended)
- Apply a thin layer of frosting over cupcake tops to anchor them together
- Final frosting
- Add generous frosting to each cupcake
- Smooth lightly so cupcakes visually merge
- Create pumpkin ridges
- Starting at the top center, drag spatula or spoon downward in gentle curves
- Repeat evenly across entire pumpkin to mimic natural pumpkin grooves
Stem & Leaf Decoration
Stem Options
- Ice-cream cone trimmed and frosted green
- Chocolate-covered pretzel rods
- Stack of mini cupcakes frosted dark green or brown
Leaves & Vines
- Tint leftover buttercream green
- Pipe leaves using a leaf tip
- Use chocolate icing or licorice laces for vines
Storage & Serving
- Store covered at cool room temperature up to 24 hours
- Refrigerate up to 48 hours; bring to room temp before serving
- Guests simply pull apart cupcakes. No cutting required
Chef’s Notes
- Flat soda ensures consistent crumb and rise.
- Butter-based cupcakes hold shape better for pull-apart designs.
- This method works equally well with grape, cream soda, or root beer.
Understanding the Basics
Before diving into the decorative process, it’s helpful to grasp the basic principles behind these innovative dessert arrangements.
This foundation will ensure your pumpkin creation turns out perfectly.
What Is a Pull-Apart Cupcake Cake?
A pull-apart design consists of individual baked goods arranged in a specific shape. They’re frosted together to create one unified presentation.
Your guests can simply grab their portion without any cutting required.
For your autumn-themed project, you’ll need approximately 24-32 portions depending on your desired size.
The Orange Crush flavor adds authentic seasonal coloring that complements the pumpkin shape beautifully.
Essential Materials and Ingredients
Gather your supplies before beginning. You’ll need a large board for displaying your creation.
American buttercream is recommended because it crusts over time, providing excellent stability.
Choose any base recipe you prefer. Chocolate provides nice contrast, while vanilla lets the Orange Crush flavor shine through.
You can even use boxed mix if you’re short on time.
Avoid commercial canned frostings as they lack the thickness needed for proper connections between portions.
Gather piping bags and various tips for creating decorative elements like leaves and vines.

Creative Techniques: Shaping Orange Crush Cupcakes into a Pumpkin
The secret to creating a professional-looking pumpkin design lies in your frosting technique and color choices.
These methods transform individual portions into a cohesive autumn masterpiece. Your decorative skills will shine with the right approach.
Piping and Frosting Tips for Stability
Start with a thick vanilla buttercream for optimal stability. American buttercream works best because it crusts over time. This creates a solid foundation for your design.
Fill your piping bag with the proper consistency. The mixture should hold its shape without tearing.
Apply steady pressure while swirling from the outside toward the center.
| Piping Technique | Best Tip Type | Pressure Level | Resulting Texture |
|---|---|---|---|
| Swirl Method | Star Tip (1M) | Medium Pressure | Rose-like ridges |
| Dollop Application | Round Tip | Light Pressure | Segmented pumpkin look |
| Leaf Details | Leaf Tip | Varying Pressure | Realistic foliage |
Coloring and Design Inspiration
Mix orange food coloring until you achieve the perfect autumn shade. Create a separate bag with green frosting for vines and leaves.
This color combination brings your pumpkin to life.
Let your frosted creation sit for 15-20 minutes. The light crust adds structural stability. This makes transportation to your event much easier.
Add dimension with darker orange in the grooves between portions. Use a leaf tip for realistic foliage around the top. Your finished design will impress all your guests.
Tips for Assembling and Decorating Your Cupcake Cake
Proper arrangement and securing methods are crucial for creating a pull-apart design that holds together perfectly.
These techniques ensure your decorative dessert maintains its shape from preparation to presentation.
Arranging Cupcakes on the Cake Board
Start with room temperature baked goods for optimal placement. Create your own display surface by covering sturdy cardboard with festive paper.
Arrange portions in your desired shape before committing to the board. This planning step helps visualize spacing and design flow.
| Arrangement Method | Best For Shapes | Stability Level | Recommended Tools |
|---|---|---|---|
| Circular Pattern | Pumpkins, Flowers | High Stability | Offset Spatula |
| Linear Rows | Letters, Numbers | Medium Stability | Piping Bag |
| Freeform Design | Animals, Objects | Variable Stability | Multiple Tips |
Step-by-Step Decorating Process
Secure each portion with a small amount of icing at the bottom. This edible glue prevents sliding during transport.
Use an offset spatula to create a smooth base layer. Connect adjacent treats for unified appearance.
Fill your piping bag with buttercream using a star tip. Work from the bottom upward to avoid disturbing completed sections.
Add green details for stems and leaves. Refrigerate for 30 minutes to set the structure before serving.
Additional Ideas for Unique Cupcake Cake Designs
Once you master the pumpkin shape, explore other creative options. Sports themes work well with chocolate portions.
Rainbow designs bring color to spring celebrations. Letter shapes personalize messages for special occasions.
Related: Check out our pull-apart butterfly soda cake.
Take photos from multiple angles to document your creation. These images serve as inspiration for future parties.

A One-of-a-Kind Dessert
Baking and decorating soda cakes and cupcakes is a fun activity that brings a family together.
With the final touches complete, your pull-apart creation stands as a testament to your growing decorating abilities.
This guide has equipped you with essential decorating techniques that transform simple treats into stunning centerpieces.
Remember the key elements that make your dessert successful. Proper buttercream consistency ensures structural integrity.
Strategic piping adds professional-looking texture to your design.
Your pumpkin masterpiece demonstrates how versatile these methods can be. Apply the same principles to create themed arrangements for various celebrations.
Seasonal flowers or letter shapes offer endless creative possibilities.
Keep this resource handy for future baking projects. The skills you’ve developed will serve you well beyond this single design.
Share your creations and inspire others with your newfound expertise.