How to make Perfectly Layered Italian Sodas
What if you could craft a drink that’s both a feast for the eyes and a burst of flavor? The secret lies in making perfectly layered Italian sodas.
This means mastering the balance of syrup, bubbles, and cream to create a beverage that’s as stunning as it is refreshing.
This artful drink traces its roots to 1920s San Francisco, where Italian immigrants Ezilda and Rinaldo Torre reinvented soda fountain classics with their signature twist.
Today, their creation remains a beloved way to turn simple ingredients into something extraordinary.
The magic happens when you layer flavored syrups, sparkling water, and cream based on their densities.
This technique creates stripes of color that stay separated, making every sip a visual delight.
Whether you’re hosting a party or craving a sweet treat, this recipe offers endless customization: swap syrups, adjust sweetness, or skip the cream for a lighter version.
What makes these drinks so special? They blend nostalgia with modern creativity. You’re not just mixing flavors; you’re continuing a tradition that’s survived a century.
So, want to see how it’s done?
Keep on reading.
Key Takeaways
- Originated in 1920s San Francisco as a soda fountain innovation by Italian immigrants.
- Relies on density differences to create distinct, photogenic layers.
- Customizable with various syrups and toppings for personal flair.
- Combines historical tradition with modern beverage trends.
- Requires precise pouring technique to maintain layer separation.
Introduction to Layered Italian Sodas
Imagine holding a drink that looks like liquid art and tastes like summer in a glass.
This vibrant beverage combines fizzy excitement with creamy textures, creating a treat that delights all your senses.
The magic starts with fresh fruit syrups, bubbly water, and a smooth topping that stays perfectly separated.
What Makes Them Special
These drinks turn basic ingredients into something extraordinary. The secret? Each part has a different density.
Syrups sink, cream floats, and bubbles dance in between. You get stripes of color that stay crisp until your first sip.
It’s like a science experiment you can drink!
Natural flavors make all the difference. Forget artificial dyes and sugary mixes. Homemade syrups use real berries or citrus for bursts of authentic taste.
You control the sweetness, too—add more syrup for dessert-like richness or keep it light and tangy.
| Feature | Store-Bought Sodas | Homemade Version |
|---|---|---|
| Ingredients | Artificial flavors | Fresh fruit syrups |
| Customization | Limited options | Endless combinations |
| Visual Appeal | Single color | Layered stripes |
Why You’ll Love This Recipe
This isn’t just a drink, it’s an experience.
Kids giggle when they see the rainbow layers, while adults appreciate the craft behind it. Whip one up for birthdays, picnics, or just because.
Top it with whipped cream for extra fun, or skip dairy for a vegan twist.
Best part? You don’t need fancy tools.
A clear glass and steady hand create those eye-catching layers. In minutes, you’ll have a beverage that’s equal parts refreshing and Instagram-ready.
Who knew simple could be so spectacular?

Essential Ingredients and Equipment
Gathering the right components transforms ordinary drinks into striped masterpieces.
Quality matters here. Each element plays a specific role in creating those Instagram-worthy layers.
Let’s break down what you’ll need to build your bubbly creation.
Key Ingredients: Syrups, Cream, and Soda
Start with vibrant flavored syrups as your foundation. Brands like Torani or Monin offer ready-made options, but homemade syrup versions using fresh berries or citrus shine brightest.
Combine 1-2 ounces of syrup with plain sparkling water, La Croix works beautifully. Avoid flavored seltzers that clash with your chosen taste profile.
Heavy cream adds luxurious texture, though whole milk works for lighter versions.
Fill your glass with quality ice cubes first, they keep layers crisp and prevent melting dilution.
Top with whipped cream if you’re feeling fancy!
Must-Have Tools and Glassware
Tall 12-ounce glasses showcase those colorful stripes best. A cocktail spoon helps pour cream slowly over the back of the utensil to maintain separation.
Silicone straws from GIR make sipping easy without staining.
Precision matters. Use OXO measuring beakers for consistent syrup portions every time. With these tools, you’ll craft drinks that look professional while keeping cleanup simple.

Crafting Your Homemade Flavored Syrups
Why settle for store-bought when you can mix magic in your kitchen? Homemade syrups transform basic drinks into personalized creations.
The process blends science with creativity, and the results taste like liquid sunshine.
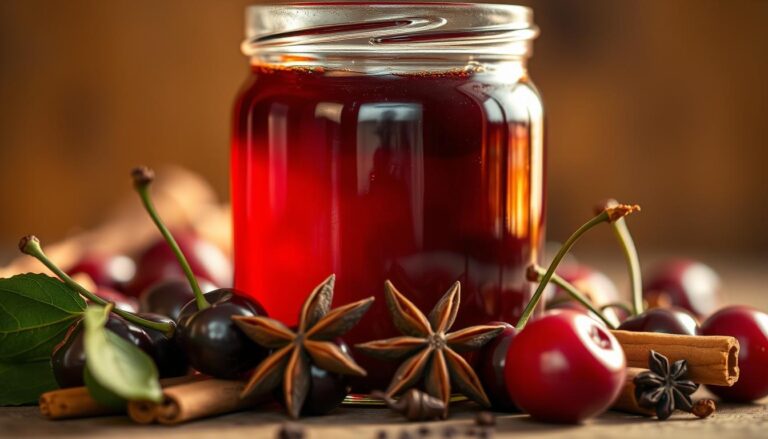
Making Simple Syrup with Fresh Fruit
Start with equal parts fun and precision. Combine 2 cups sugar and 1 cup water in a saucepan.
Warm over medium heat until crystals vanish, but never let it boil.
Pour this liquid gold over ¼ cup chopped fruit in a jar. Screw the lid tight and shake like you’re mixing confetti.
Patience becomes your secret ingredient. Let the jar sit 4 hours for subtle hints or overnight for bold bursts.
Strawberries bleed ruby red, while peaches blush sunset orange. Strain out solids, and voilà, you’ve captured summer in a bottle.
| Aspect | Homemade Syrup | Store-Bought |
|---|---|---|
| Sweetness Control | Adjustable | Fixed |
| Flavor Intensity | Customizable | Standardized |
| Shelf Life | 14 days | 6+ months |
Refrigerate your creation for up to two weeks. Use it in drinks, drizzle over pancakes, or stir into yogurt.
Experiment with blackberries for tartness or mango for tropical vibes. Each batch becomes your signature.

Step-by-Step Process for Creating Perfect Layers
Transform your kitchen into a beverage lab where science meets style.
The magic happens when you stack ingredients by weight, creating stripes that dazzle before blending into creamy sweetness.
Follow these steps to turn ordinary components into a striped masterpiece.
Preparing Your Glass and Ice
Start with a tall, chilled glass straight from the freezer. Fill it nearly to the top with fresh ice cubes. This frosty base keeps layers crisp.
Cold surfaces allow for slow melting, preventing watery dilution that muddies colors.
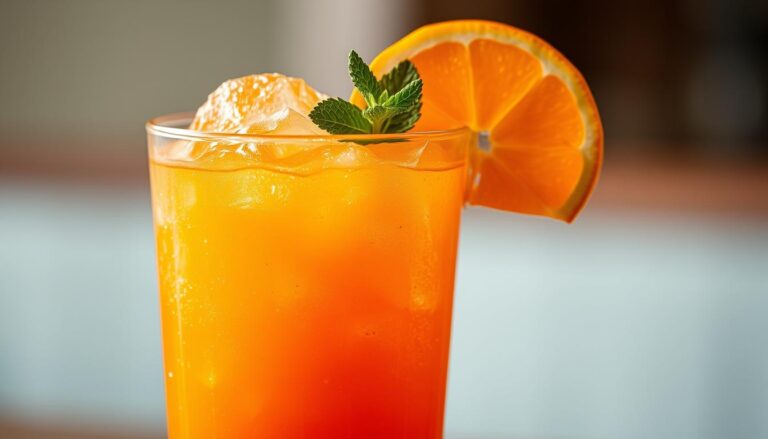
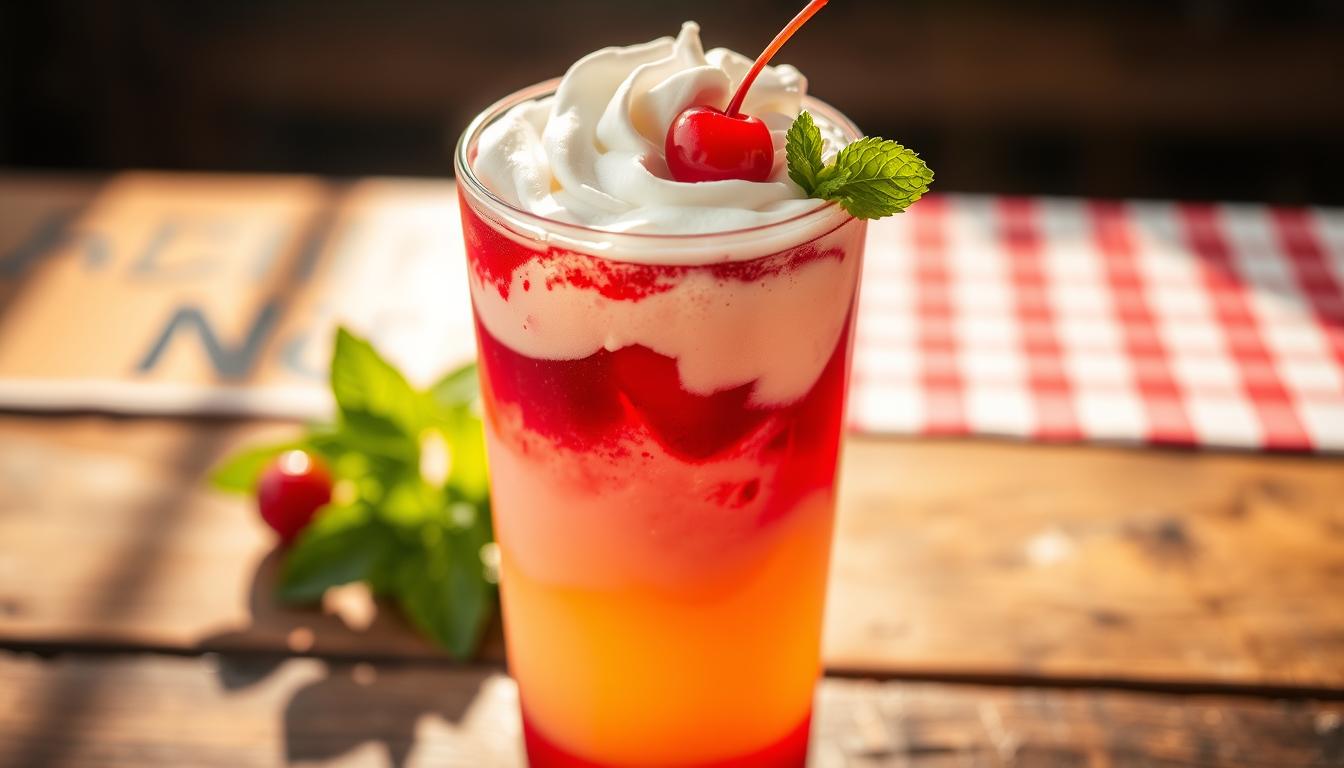
Layering Technique for a Stunning Look
Pour 1 ounce of syrup directly over the ice. Watch it sink through the cubes, painting the glass bottom with vibrant color.
Slowly add soda water down the side using a tilted spoon. This gentle pour lets bubbles rise without disturbing the syrup.
Here’s the secret: heavy syrup stays low, light cream floats high. Drizzle milk or cream over the spoon’s back just above the soda.
The white ribbon will spread like liquid clouds. Finish with whipped cream peaks and a strawberry crown.
Serve immediately through a straw that pierces all layers.
You’ll taste syrup first, then fizz, then cream. A flavor journey matching the visual spectacle.
From start to sip, this refreshing creation takes under five minutes.
Creative Customizations and Variations
Unlock endless possibilities by reimagining your favorite bubbly drink.
The base recipe serves as your canvas, now it’s time to paint with bold flavors and unexpected twists.
Swap components based on seasons, diets, or pure whimsy to make each creation uniquely yours.
Exploring Different Fruit Flavors
Think beyond raspberry and peach. Try blood orange syrup for winter gatherings or dragon fruit puree for tropical flair.
Mix herbs like basil into strawberry mixtures for garden-fresh complexity.
Frozen blueberries? They double as ice cubes that bleed color slowly.
Spiked and Non-Dairy Options
Add vodka or rum to adult versions for backyard parties.
Coconut milk creates lush vegan layers, while oat milk offers nutty undertones.
Top with dairy-free whipped cream and edible flowers for Instagram-worthy elegance.
Your Italian soda journey doesn’t end here. It evolves with every experiment.
Share new combinations at potlucks or invent family-exclusive recipes.
Remember: the best versions reflect your personality in liquid form.
FAQ
Can I use store-bought syrup instead of homemade?
Absolutely! Store-bought flavored syrups work well for convenience. Just ensure they’re high-quality for the best taste. If you want less sugar, try sugar-free options or adjust the amount to your preference.
What’s the secret to keeping the layers from mixing?
Pour slowly over the back of a spoon to control the flow. Start with syrup, then ice, followed by club soda, and finish with cream. The density differences help maintain separation for that eye-catching look.
Can I make this dairy-free?
Yes! Swap heavy cream with coconut milk, oat milk, or a non-dairy whipped topping. These alternatives still add richness without compromising the layered effect.
How do I prevent the ice from melting too quickly?
Use large ice cubes—they melt slower than small ones. Chill your glassware beforehand to keep everything cold longer, especially on hot days.
Are there low-calorie options for this drink?
Opt for zero-calorie syrups, replace cream with almond milk, or use sparkling water instead of club soda. You’ll still enjoy the flavors without the extra calories.
Can I add alcohol to this recipe?
For a spiked version, try adding a splash of rum, vodka, or flavored liqueur. Mix it into the syrup layer before topping with soda and cream for a fun twist.
How long do homemade fruit syrups last?
Store them in airtight containers in the fridge for up to two weeks. For longer shelf life, freeze portions in ice cube trays and thaw as needed.
What’s the best glass to use for layering?
Tall, clear glasses like highball or mason jars showcase the layers best. Wide rims also make it easier to pour ingredients slowly and evenly.