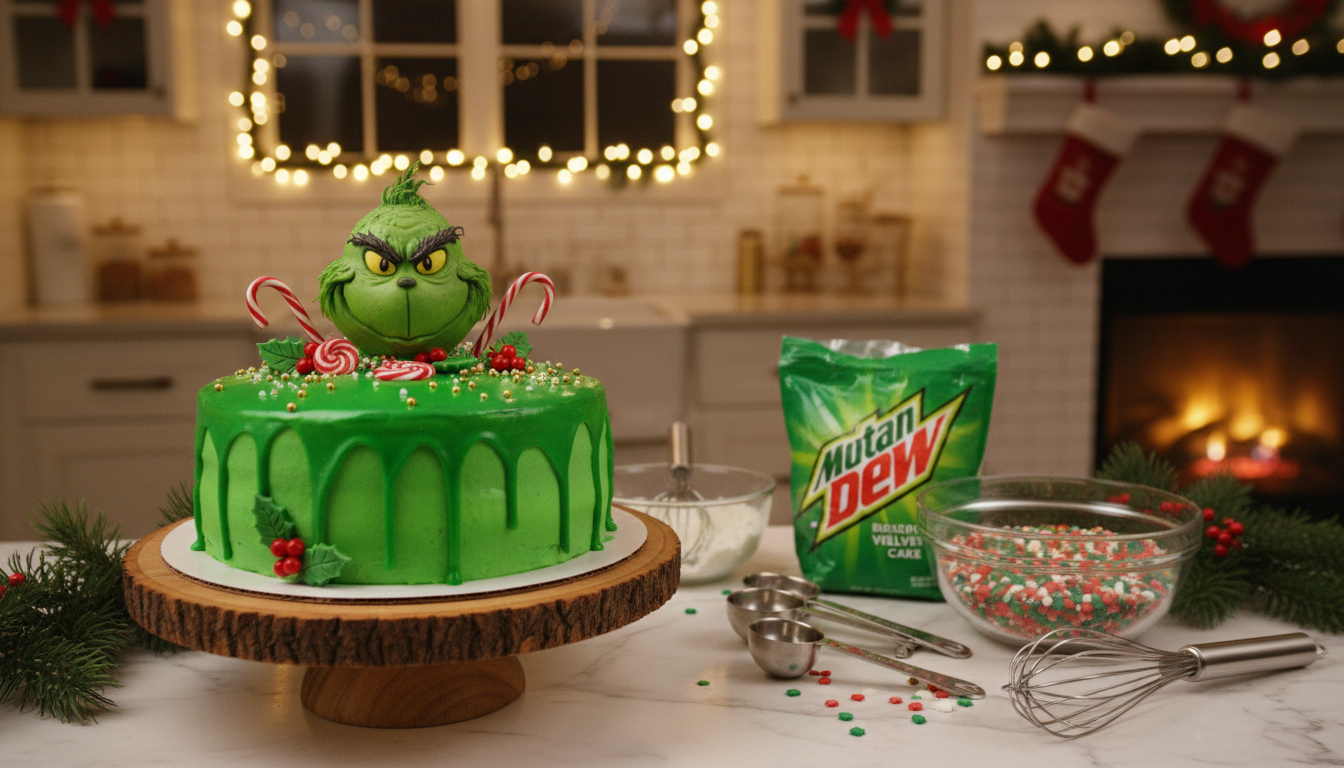
Mountain Dew Grinch Cake – Neon Green
Want to make a bold dessert that emulates the personality of one of our favorite characters of the season? Then check out our Mountain Dew Grinch cake and its neon green flare.
Welcome to a Christmas tutorial where you’ll learn to make something truly special.
This dessert combines creative techniques with a unique flavor profile that will surprise your guests.
Our guide takes you through every step of the process. You’ll learn professional baking tips that apply to other seasonal projects too.
While this creation requires some time, the impressive result is absolutely worth the effort.
Perfect for family gatherings or Christmas parties as this dessert brings smiles and holiday cheer.
It’s designed for anyone who loves classic seasonal stories and memorable treats. This vibrant creation will become the star of your seasonal celebrations, without a doubt.
Key Takeaways
- Learn to create a vibrant holiday dessert that captures seasonal spirit.
- Master professional baking techniques applicable to other projects.
- Discover creative decorating methods for impressive results.
- Understand the time investment required for this special recipe.
- Create a perfect centerpiece for Christmas celebrations.
- Combine unique flavors with visual appeal.
- Apply these skills to future holiday baking endeavors.
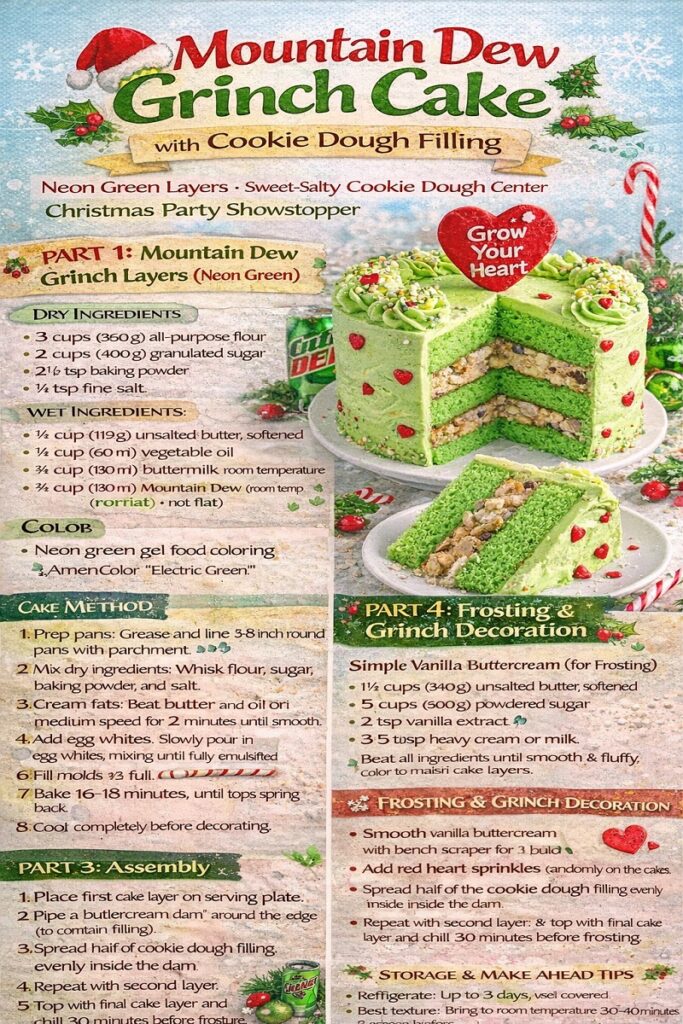
🎄 Mountain Dew Grinch Cake with Cookie Dough Filling
Neon Green Layers • Sweet-Salty Cookie Dough Center • Christmas Party Showstopper
Absolutely 😄🎄
Here’s the bakery-level recipe for a Mountain Dew Grinch Cake with Cookie Dough Filling—neon green, playful, and perfectly outrageous for Christmas parties.
Yield: 1 three-layer 8-inch cake (serves 12–14)
Oven Temperature: 350°F / 175°C
🧁 Mountain Dew Cake Layers (Neon Green)
Dry Ingredients
- 3 cups (360 g) all-purpose flour
- 2 cups (400 g) granulated sugar
- 2½ tsp baking powder
- ½ tsp fine salt
Wet Ingredients
- ½ cup (113 g) unsalted butter, softened
- ¼ cup (60 ml) vegetable oil
- ¾ cup (180 ml) carton egg whites, room temperature
- 1 tbsp vanilla extract
- ¾ cup (180 ml) buttermilk, room temperature
- ¾ cup (180 ml) Mountain Dew (room temperature, not flat)
Color
- Neon green gel food coloring (AmeriColor “Electric Green” recommended)
Cake Method
- Prep pans: Grease and line three 8-inch round pans with parchment.
- Mix dry ingredients: Whisk flour, sugar, baking powder, and salt.
- Cream fats: Beat butter and oil on medium speed for 2 minutes until smooth.
- Add egg whites: Slowly pour in egg whites, mixing until fully emulsified.
- Flavor: Add vanilla extract.
- Alternate liquids: Add dry ingredients in 3 additions, alternating with buttermilk and Mountain Dew (begin and end with dry).
- Color: Add gel coloring a little at a time until bright Grinch green.
- Bake: Divide batter evenly. Bake 22–26 minutes until a toothpick comes out clean.
- Cool: Cool 10 minutes in pans, then turn out and cool completely.
🍪 No-Bake Grinch Cookie Dough Filling
Sweet, salty, crunchy, and safe to eat
Ingredients
- ¾ cup (165 g) light brown sugar, packed
- ½ cup (113 g) unsalted butter, softened
- 2 tsp vanilla extract
- 1 tsp instant espresso powder
- ¾ cup (90 g) graham cracker crumbs
- ½ cup mini white chocolate chips
- ½ cup crushed potato chips
- ½ cup chopped pretzels
- ¼ cup rainbow sprinkles
- ⅓ cup butterscotch chips
- 2–4 tbsp milk (as needed for texture)
Cookie Dough Method
- Cream base: Beat butter and brown sugar until fluffy (2–3 minutes).
- Flavor: Add vanilla and espresso powder.
- Structure: Mix in graham cracker crumbs.
- Texture mix-ins: Fold in white chocolate chips, potato chips, pretzels, sprinkles, and butterscotch chips.
- Adjust: Add milk 1 tbsp at a time until dough is soft, scoopable, and spreadable.
- Chill: Refrigerate 20 minutes before assembling.
🎂 Assembly
- Place first cake layer on serving plate.
- Pipe a buttercream dam around the edge (to contain filling).
- Spread half of the cookie dough filling evenly inside the dam.
- Repeat with second layer.
- Top with final cake layer and chill 30 minutes before frosting.
❄️ Frosting & Grinch Decoration
Simple Vanilla Buttercream (for Frosting)
- 1½ cups (340 g) unsalted butter, softened
- 5 cups (600 g) powdered sugar
- 2 tsp vanilla extract
- 3–5 tbsp heavy cream or milk
- Pinch of salt
- Neon green gel food coloring
Beat all ingredients until smooth and fluffy. Color to match cake layers.
Grinch-Style Decoration Ideas
- Smooth buttercream with a bench scraper for a bold neon finish
- Add red heart sprinkles randomly on the cake sides
- Pipe playful swirls or fur-like texture using a grass tip
- Finish with a red fondant or candy heart topper that says “Grow Your Heart”
🎄 Storage & Make-Ahead Tips
- Refrigerate: Up to 3 days, well covered
- Best texture: Bring to room temperature 30–40 minutes before serving
- Make ahead: Cake layers can be baked and frozen up to 2 weeks
Overview & Inspiration for Your Mountain Dew Grinch Cake
Before you start baking, exploring the rich history of this beloved character will enhance your creative process.
The story has become a cherished tradition for many families during the holiday season.
Watching the different adaptations can provide wonderful inspiration for your dessert. Each version offers unique visual elements that might influence your design choices.
Celebrating the Grinch: A Holiday Tradition
This character’s journey resonates with people worldwide. His transformation from having a small heart to experiencing tremendous growth mirrors the joy of sharing treats.
The story warms people’s hearts during festive gatherings. It reminds us that holiday spirit can transform even the grumpiest of characters.
| Adaptation Year | Visual Style | Cake Decorating Suitability | Key Characteristics |
|---|---|---|---|
| 1966 | Classic Cartoon | Excellent – Simple lines | Whimsical Dr. Seuss design |
| 2000 | Live-Action | Moderate – Complex details | Realistic facial features |
| 2018 | Animated CGI | Good – Defined features | Modern interpretation |
Influences from Classic and Modern Grinch Versions
The classic 1966 version remains the most iconic way to visualize this character. Its simpler design works beautifully with buttercream frosting techniques.
While newer interpretations offer different looks, the original cartoon provides the clearest inspiration. Choosing the right version is an important first step in your baking journey.
This approach ensures your creation captures the spirit of the holiday grump. It becomes a centerpiece that tells a story through edible art.
Gathering Ingredients and Tools for Christmas Baking Magic
Proper preparation with quality ingredients and tools sets the stage for a fantastic dessert.
Having everything measured and at room temperature before starting saves time and ensures better results.
This approach makes your baking process much smoother.
Begin by organizing your workspace and gathering all ingredients. This preparation gives you time to focus on creative aspects.
Your kitchen setup should include clear counter space for efficient work.
Essential Ingredients and Food Coloring
Your dry ingredients form the foundation of perfect cake texture. You’ll need all-purpose flour, granulated sugar, baking powder, and fine salt.
These basic components create the structure for your layers.
For wet ingredients, use unsalted butter, vanilla extract, carton egg whites, buttermilk, and vegetable oil.
Make sure these items are at room temperature for proper mixing. This ensures a smooth, even batter consistency.
Gel food coloring creates vibrant, deep green shades without affecting your mix. Unlike liquid options, gel doesn’t add excess moisture. This maintains the perfect balance in your recipe.
The unique cookie dough filling requires special ingredients. You’ll need light brown sugar, instant espresso, graham cracker crumbs, and mini white chocolate chips.
Add crushed potato chips, chopped pretzels, rainbow sprinkles, and butterscotch chips for texture.
Food safety is crucial when making edible cookie dough. Heat-treated flour eliminates potential bacteria.
You can microwave regular flour for one minute until it reaches 160°F.
Must-Have Kitchen Tools and Setup Tips
Your baking pans create the tiered effect for this special dessert. You’ll need two 7-inch pans, one 6-inch pan, and two 4-inch pans. Line them with parchment paper for easy removal.
A stand mixer with paddle attachment makes mixing efficient. Piping bags help with precise decorating later. An acetate sheet creates smooth sides, while a small fork adds texture.
Having ingredients at room temperature is essential for proper incorporation. Butter, egg whites, and buttermilk mix better when not cold.
This simple step improves your final result significantly.
Organize your workspace before beginning the recipe. This preparation makes the entire process more enjoyable. You’ll have everything within reach when needed.

Step-by-Step Guide to Baking Your Mountain Dew Grinch Cake
Getting your oven ready is the first exciting step in this hands-on baking process. This part of the recipe is where your preparation pays off.
Follow each instruction carefully for the best results.
Baking the Layers and Preparing the Batter
Begin by preheating your oven to 350°F. Line your baking pans with parchment rounds and grease them well. This ensures your layers release perfectly at the end.
Combine your dry ingredients in a stand mixer. Slowly mix in room-temperature butter until the texture is crumbly.
Next, pour in the egg whites and mix just until they are incorporated.
Add the buttermilk in two parts. Then, mix in the vanilla and oil on a low speed. Be careful not to overmix the batter at this stage.
Now, add the green gel food coloring. Use a rubber spatula to fold it in by hand. This gives you an even color throughout your mix.
Divide the batter evenly between your prepared pans. Make sure each pan has the same height of batter. This is key for even baking in the oven.
Bake the layers for 32-35 minutes. They are done when a toothpick comes out with a few moist crumbs.
Let the pans cool for 10 minutes before moving the layers to the freezer for 45 minutes. This cooling time makes them easy to handle.
Making the Edible Compost Cookie Dough Filling
While the layers cool, you can make the special filling. Start by creaming together butter and brown sugar. This creates a smooth, rich base for your dough.
Add the salt, baking powder, instant espresso, and vanilla. Then, mix in the graham cracker crumbs and all the tasty additions.
This includes white chocolate chips, potato chips, pretzels, sprinkles, and butterscotch chips.
Finally, mix in heat-treated flour and pasteurized egg whites on low speed. This makes the dough safe to eat raw. You can bake any extra dough into cookies for another treat.
Decorating Tips: Piping, Texture, and Finishing Touches
Now comes the creative part where your dessert takes on its distinctive personality.
This stage transforms your baked layers into a festive masterpiece that will wow your holiday guests.
Achieving the Perfect Grinch Fur Finish with a Fork
Begin by preparing your vanilla buttercream frosting. Beat the butter until smooth, then gradually add powdered sugar alternating with cream.
This creates the perfect consistency for decorating.
Divide your frosting into three portions. Use gel food coloring to create bright yellow, deep black, and vibrant green shades.
Making the frosting in advance allows the colors to deepen beautifully.
Stack your layers in the correct order, securing each with a dab of frosting. Apply a generous cookie dough filling between each tier.
Then add a thin crumb coat of green frosting around the entire creation.
Chill your dessert for 20 minutes in the fridge or 5 minutes in the freezer. This sets the frosting before you apply the final, thicker layer.
Smooth the sides with an acetate sheet for professional curved edges.
Piping the Grinch’s Face and Adding Colorful Details
The signature fork technique creates the perfect fuzzy texture. Dip a small fork in hot water, dry it off, then lightly run it over the green frosting.
This adds just a touch of fuzz without making the character too hairy.
Before piping, trace the face outline with toothpicks for guidance. Anchor your arm on the counter or cake stand to keep your hand steady.
This ensures precise control while piping the facial features.
Use yellow and black frosting to pipe the mischievous eyes and sly grin. Add tall strands of hair at the top using toothpicks for that iconic look.
Step back occasionally to admire your work and make small adjustments.
Consider adding colorful sprinkles for extra festive appeal.
The finishing touches bring your creation to life, capturing the playful spirit of the holiday season.
Related: Take your baking skills to a new level making our Galaxy Design Cake. Perfect for a space fan’s birthday.

A Show-stopper of a Dessert
As you admire your finished masterpiece, take pride in the skills you’ve developed throughout this process.
Remember that this recipe gives you room to be creative. You can adjust the food color intensity and experiment with different mix ingredients based on your pantry.
Make sure to capture photos before slicing as the reveal is spectacular.
Leftover cookie dough can be frozen for two months or baked into delicious cookies after chilling for about an hour.
While this project involves many things, breaking it down part by part makes it achievable.
Baking brings joy to people, and this whimsical treat captures the heart of the holiday season.
Next: Learn to make mini soda cakes with big decorating impact.