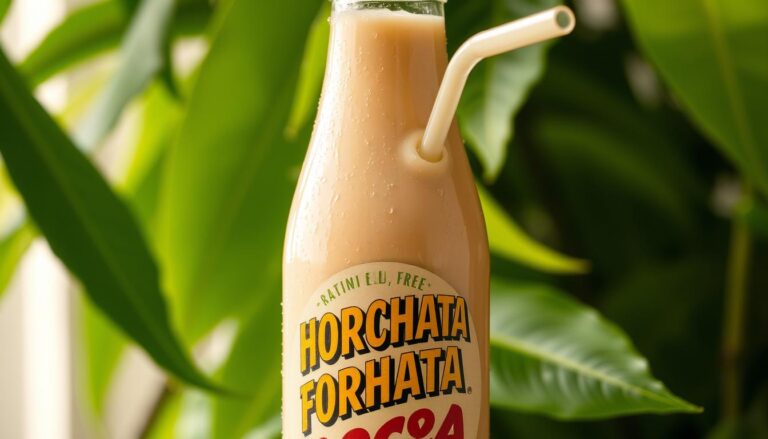
DIY Cake Topper Ideas for a Root Beer Float Birthday Cake
In this article you will learn to make a delicious root beer float cake for a birthday celebration and topper ideas you can make yourself.
Welcome to your complete guide for crafting a memorable and personalized centerpiece.
We focus on designs that capture the fun, nostalgic spirit of a classic root beer float. This transforms a simple baked good into a spectacular showstopper.
Making your own decorative piece is a fantastic budget-friendly option. It gives you total creative freedom.
You can match the theme perfectly without relying on store-bought selections.
This article explores a wide range of techniques and materials. You will find projects for beginners and more advanced methods.
Whether planning a child’s party or an adult’s nostalgic gathering, the right decorative element ties everything together beautifully.
We will walk you through everything from basic supplies to pro tips. Your creation is sure to become the highlight of the party.
You do not need professional decorating experience to achieve amazing results.
Key Takeaways
- Personalized toppers elevate a simple dessert into a thematic centerpiece.
- DIY projects are cost-effective and allow for full creative control.
- Techniques range from simple to advanced, suitable for all skill levels.
- The right design can beautifully unify a root beer float themed party.
- Success is achievable without professional baking or decorating skills.
- This guide provides a complete walkthrough from supplies to finishing touches.
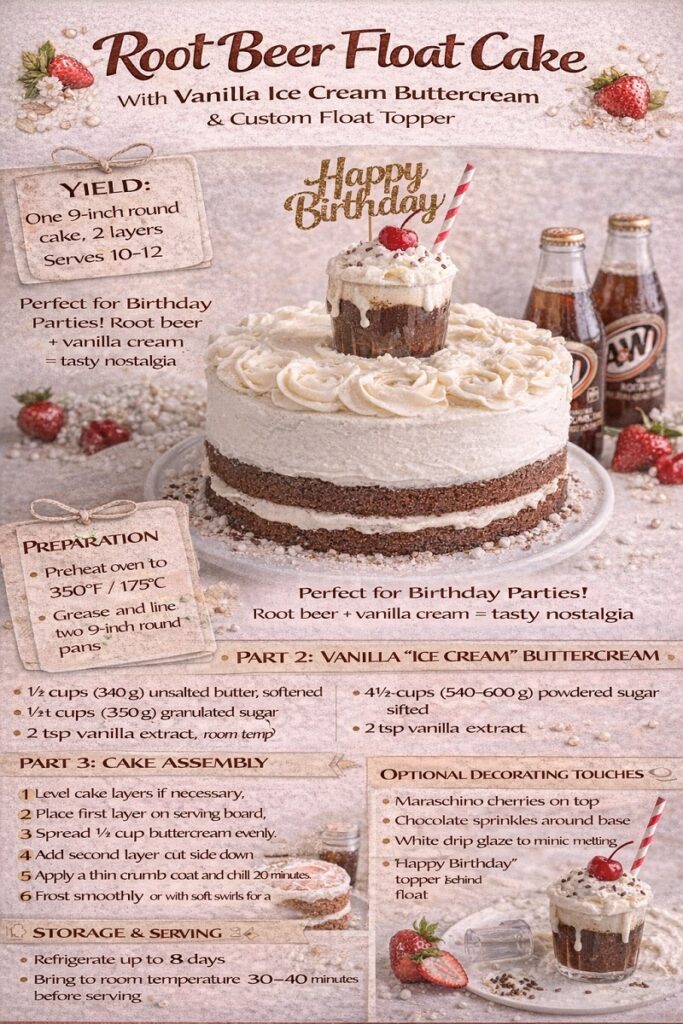
Root Beer Float Cake with Vanilla Ice Cream Buttercream and Custom Float Topper
Here’s the recipe for making a Root Beer Float Cake that is perfect for a birthday celebration, followed by step-by-step instructions to create a custom cake topper.
This dessert feel playful, nostalgic, and truly one-of-a-kind.
Yield: One 9-inch round cake, 2 layers
Serves: 10–12
Flavor Profile: Warm root beer spice, vanilla cream, subtle caramel notes
ROOT BEER CAKE
Ingredients
- 2½ cups (315 g) all-purpose flour
- 2 tsp baking powder
- ½ tsp baking soda
- ½ tsp fine salt
- ¾ cup (170 g) unsalted butter, softened
- 1¾ cups (350 g) granulated sugar
- 3 large eggs, room temperature
- 2 tsp vanilla extract
- 1½ cups (360 ml) root beer, room temperature and flat
- Optional: 1 tsp root beer extract (for stronger flavor)
Preparation
- Preheat oven to 350°F (175°C)
- Grease and line two 9-inch round pans with parchment
- Whisk flour, baking powder, baking soda, and salt together
Method
- Cream butter and sugar on medium speed 3–4 minutes, until light and fluffy.
- Add eggs one at a time, mixing well after each addition.
- Mix in vanilla and root beer extract (if using).
- Add dry ingredients in three additions, alternating with root beer, beginning and ending with dry ingredients.
- Mix just until smooth—do not overmix.
- Divide batter evenly between pans.
Bake
- Bake 28–32 minutes, until a toothpick comes out clean.
- Cool in pans 10 minutes, then cool completely on racks.
VANILLA “ICE CREAM” BUTTERCREAM
(Designed to mimic melted vanilla ice cream)
Ingredients
- 1½ cups (340 g) unsalted butter, softened
- 4½–5 cups (540–600 g) powdered sugar, sifted
- ¼ cup (60 ml) heavy cream
- 2 tbsp sweetened condensed milk
- 2 tsp vanilla extract
- Pinch of salt
Method
- Beat butter on medium-high 2–3 minutes until smooth.
- Add powdered sugar gradually on low speed.
- Add cream, condensed milk, vanilla, and salt.
- Beat 2 minutes until fluffy, smooth, and scoopable.
CAKE ASSEMBLY
- Level cake layers if necessary.
- Place first layer on serving board.
- Spread ¾ cup buttercream evenly.
- Add second layer, cut side down.
- Apply a thin crumb coat and chill 20 minutes.
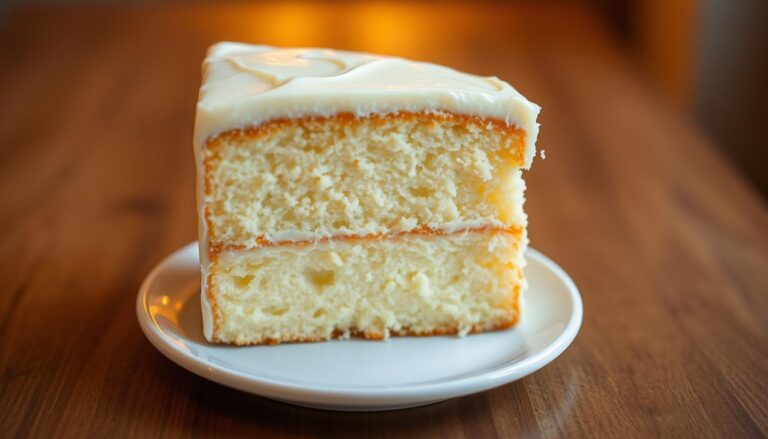
- Frost smoothly or with soft swirls for a float-inspired look.
ROOT BEER FLOAT CAKE TOPPER (EDIBLE + NON-EDIBLE)
Option A: Mini “Float Glass” Topper (Non-Edible)
Supplies
- Clear plastic shot glass or mini dessert cup
- Brown cardstock
- White cardstock
- Wooden skewer
- Glue or tape
Assembly
- Cut brown cardstock into a rectangle; roll into a “root beer” insert.
- Cut white cardstock into a rounded scoop shape (ice cream).
- Stack scoop on top of root beer piece.
- Insert skewer through center and secure with glue.
- Place topper gently into cake center.
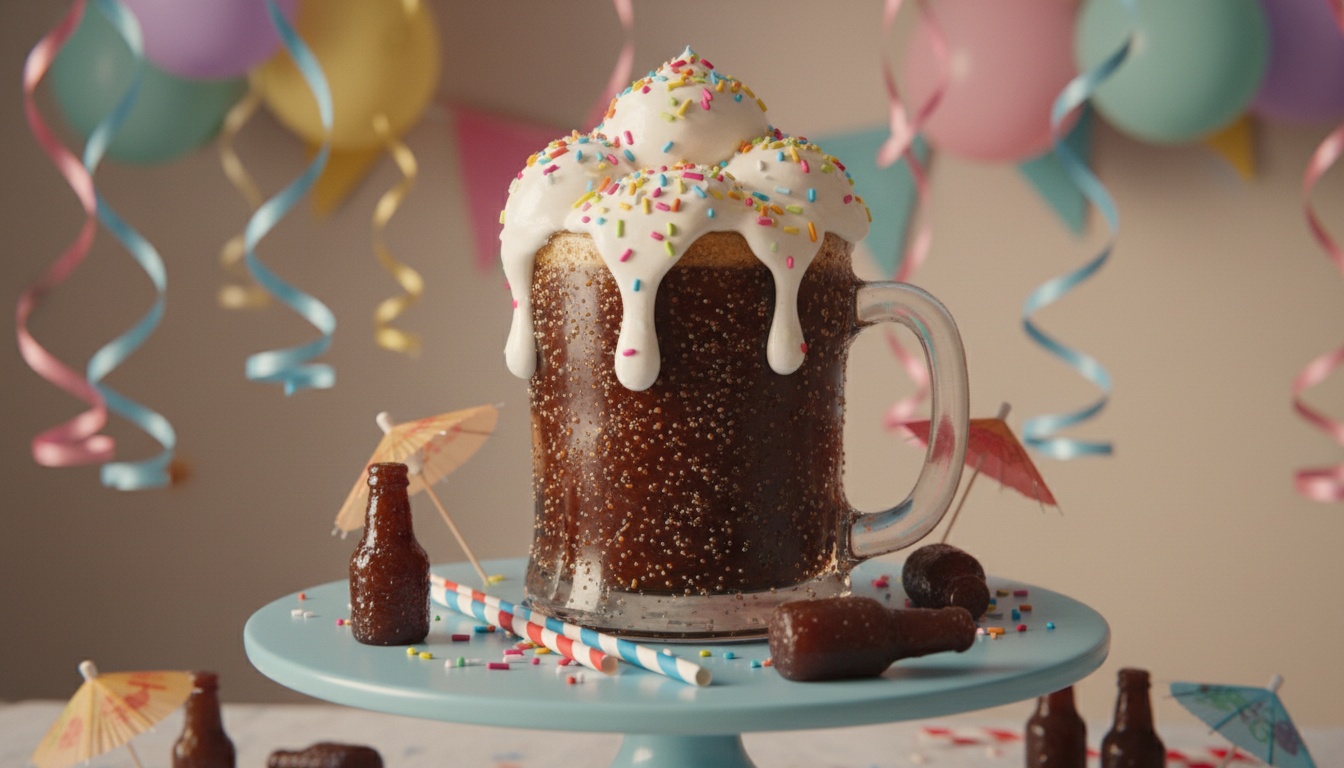
Option B: Fully Edible Float Topper
Ingredients
- 1 cake pop or cupcake truffle (vanilla or chocolate)
- White candy melts
- Dark brown candy melts
Assembly
- Dip cake pop halfway in dark brown melts (root beer).
- Chill until set.
- Dip top portion in white melts (ice cream).
- Optional: drizzle white melts for “foam.”
- Insert into cake just before serving.
OPTIONAL DECORATING TOUCHES
- Maraschino cherries on top
- Chocolate sprinkles around base
- White drip glaze to mimic melting ice cream
- “Happy Birthday” topper behind float
STORAGE & SERVING
- Refrigerate up to 3 days
- Bring to room temperature 30–40 minutes before serving
- Best texture and flavor within 24–48 hours
CHEF’S NOTES
- Flat root beer prevents uneven crumb and sinking.
- Condensed milk gives true “ice cream” sweetness.
- Topper adds height and instant birthday drama.
- This cake photographs exceptionally well for celebrations.
Setting the Stage for Your Root Beer Float Celebration
A personalized decorative piece brings your party theme to life in the most delicious way possible.
This finishing touch transforms your celebration dessert into something truly special.
Root beer floats capture vintage Americana charm perfectly. The theme works wonderfully for all ages with its crowd-pleasing flavors.
Your birthday party gains instant nostalgic appeal.
The right decorative element sets the entire tone for your celebration. It communicates your theme clearly from the moment guests arrive.
This creates fantastic visual interest for photos too.
Social media has made root beer float parties incredibly popular. Creative decorative pieces ensure your dessert gets that Instagram-worthy moment.
Your creation will stand out beautifully online.
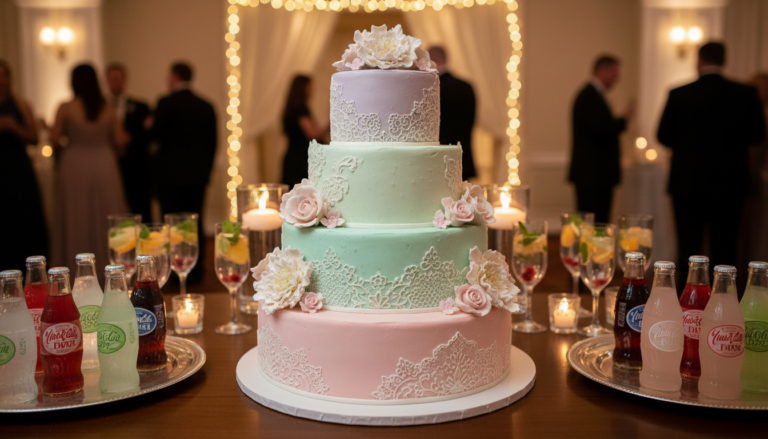
Whether you’re making and decorating a multi-tiered masterpiece or a simple sheet soda cake, the decorative piece makes it uniquely yours.
It adds that personal touch that store-bought options lack.
This celebration theme offers wonderful flexibility. You can embrace retro diner aesthetics or choose sleek, modern designs. Either approach creates a memorable experience.
Planning your decorative piece early helps coordinate colors and materials. This ensures everything works together cohesively. Your overall design will feel more polished.
Creating impressive decorative pieces doesn’t require professional skills. Your enthusiasm and willingness to follow instructions are all you need. Amazing results are within your reach.
Understanding Your Cake Topper Project
Proper preparation is the secret ingredient that transforms a simple craft into a professional-looking masterpiece.
Before you begin creating your decorative piece, understanding the fundamentals ensures success.
Materials Needed Overview
Most DIY projects require basic supplies that are easy to find. Essential items include cardstock, hot glue guns, toothpicks or skewers, and scissors.
Decorative elements like glitter, ribbons, or small charms add personal flair. Having these materials ready before starting prevents interruptions.
| Feature | DIY Approach | Professional Version |
|---|---|---|
| Cost Range | $5-20 | $30-60 |
| Customization Level | Complete creative control | Limited to designer’s options |
| Time Required | 1-3 hours | 2-4 week lead time |
| Skill Level Needed | Beginner to intermediate | Professional expertise |
Planning and Budgeting Your DIY Approach
Consider your skill level and available time when choosing a design. This prevents last-minute stress and ensures you select an appropriate project.
Creating a materials checklist helps you avoid emergency craft store runs. Planning your design in advance allows for technique testing and mistake correction.
If making this as a gift, allow extra time for personalization. Detailed work creates a more meaningful presentation for the recipient.
With proper planning, you’ll be able to achieve professional results even as a beginner. This builds confidence for future creative projects.
Exploring Unique Cake Topper Ideas for Birthday Cake
Discover how ordinary materials can become extraordinary focal points for your celebratory dessert.
This section explores creative approaches that blend traditional crafting with modern resources.
Drawing Inspiration from Milestone Designs
Repurpose a Hallmark Signature milestone card with large numbers into an instant decorative accent.
Simply open the card and hot-glue two toothpicks to the bottom for support.
Add whipped cream and sprinkles around the base to conceal the toothpicks. This technique works perfectly for significant celebrations requiring prominent numbering.
Mixing DIY with Printable Decorations
Free printable designs offer accessible decorating ideas for achieving professional results. Print pineapple-themed elements on cardstock, cut them out, and tape to skewers.
These printable decorations create cohesive presentations when used across multiple desserts.
You can adapt popular movie-inspired themes by incorporating brown and cream colors.
Add dimensional elements like glitter or sprinkles to elevate flat paper cutouts. This approach combines the convenience of printables with handmade customization.
Step-by-Step Guide to Creating a DIY Cake Topper
Creating a stable decorative element requires attention to both structural support and visual design. This systematic approach ensures your creation stands proudly on your dessert.
Follow these steps to build a professional-looking accent piece. You’ll achieve beautiful results with careful planning.
Preparing the Base and Support
Start with sturdy supports like wooden skewers or food-safe toothpicks. These anchor your creation securely in the dessert.
Choose the right base material for your design. Cardstock works well for flat accents while Styrofoam balls create dimensional pieces.
| Base Material | Best For | Preparation Needed | Stability Level |
|---|---|---|---|
| Cardstock | Flat designs, silhouettes | Cut to shape, reinforce edges | Medium |
| Styrofoam balls | 3D floral arrangements | Paint, insert support sticks | High |
| Chocolate disks | Edible accents | Melt, pipe, refrigerate | Low (fragile) |
Layering the Decorative Elements
For paper accents, sandwich support sticks between two identical cutouts. This creates stability and a finished look on both sides.
Create dimensional petals by cutting tissue paper to your desired shape. Use Mod Podge to make them rigid and durable.
Arrange elements symmetrically by starting with opposite sides. Add top and bottom pieces, then fill gaps for balanced design.
This systematic way of building ensures structural integrity. You’ll be able to transport and display your creation confidently.
Personalizing Your Cake Topper for a Root Beer Float Theme
The true magic of a custom decorative accent lies in its ability to tell a personal story. Start by weaving in classic root beer float details.
Think about adding a tiny paper straw or creating fluffy white “bubbles” from cotton batting.
Vintage-style lettering for a name or age adds a wonderful nostalgic touch. Your color palette is key for making the theme clear.
Use rich browns for the soda, creamy whites for ice cream, and a pop of red for a cherry. These choices instantly communicate your delicious concept.
For a baby’s first birthday, simplify your approach. Use softer colors and larger, safer shapes. Chunky elements are easier for little eyes to see and are less of a choking hazard.
Embrace a vintage diner feel with checkerboard patterns or miniature signage. This strengthens the overall party theme beautifully.
The most memorable touches are deeply personal. Include the birthday person’s favorite root beer brand or a meaningful inside joke.
This level of detail makes your creation incredibly special.
Creative Use of Materials for DIY Cake Toppers
The right materials can transform simple household items into stunning decorative accents. Your creativity is the only limit when you understand how to use common supplies effectively.
This exploration focuses on maximizing the potential of accessible items. You can achieve professional-looking results without a huge investment.
Utilizing Paper, Cardstock, and Edible Accents
Paper and cardstock are incredibly versatile foundations for your projects. They are affordable, easy to cut, and accept color beautifully.
You can layer different colors of paper for a dimensional effect. Printing a free printable design onto quality cardstock creates an instant, professional element.
For an edible touch, consider making chocolate decorations. Brush melted chocolate onto real leaves, refrigerate, and peel the leaf away.
This leaves a beautifully textured, natural shape.
You can also use fondant to create custom shapes. Mixing color mediums like acrylic paint for non-edible parts and food coloring for edible ones creates a cohesive look.
Alternative Techniques with Hot Glue and Toothpicks
Toothpicks and skewers are the hidden heroes of structural support. They allow your decorative elements to stand upright with simple engineering.
A hot glue gun provides instant, strong adhesion for non-edible components. This method is food-safe as long as the glue does not contact the dessert surface directly.
Add a luxurious finish with edible gold paint or luster dust. A touch of gold can elevate toppers made from paper, fondant, or even chocolate.
These techniques empower you to build sturdy, beautiful accents. Your creations will be both visually appealing and structurally sound.
Enhancing Your Cake with Edible Gold and Fun Add-Ons
Transform your celebration centerpiece into a luxurious masterpiece by incorporating shimmering details and playful candy elements.
These finishing touches elevate your dessert from simple to spectacular.
Incorporating Edible Gold Details
Edible gold paint works magic on ordinary components. Brush it onto wooden skewers for elegant support sticks. Apply it to fondant shapes or chocolate accents for a luxurious finish.
Use food-safe brushes for smooth application. Allow proper drying time between coats. Layering creates deeper metallic effects that catch the light beautifully.
| Decoration Type | Best Application | Drying Time | Visual Impact |
|---|---|---|---|
| Gold-painted skewers | Structural support | 30 minutes | Subtle elegance |
| Gold-dusted fondant | Themed shapes | Instant | High shimmer |
| Gold-leaf chocolate | Edible accents | 15 minutes | Luxurious finish |
Adding Sprinkles, Candies, and Additional Flare
Sprinkles offer both function and beauty. Press them into frosting sides for colorful texture. Swirl them through buttercream for hidden surprises.
Crushed root beer barrel candy makes perfect thematic borders. Create candy rings by threading mini sweets onto food-safe cord.
Drape these across your dessert’s top for dimensional interest.
Coordinate matching cupcakes using similar gold accents and sprinkles. For a baby’s first celebration, use larger, safer candy pieces.
This creates a cohesive dessert presentation everyone will love.

Balancing Practicality and Aesthetics in Your Design
The most successful decorative accents seamlessly blend beautiful design with practical considerations for serving.
Your creation should look impressive without compromising the dessert’s structural integrity.
Elaborate, beautiful designs catch attention. However, overly heavy pieces can topple during transport or cutting, so finding the right balance is essential for stability.
Consider how easily your decorative element can be removed before slicing. This ensures clean cuts and smooth serving for guests.
The best way to approach this is planning for easy removal.
Your decorating choices should complement rather than overwhelm the dessert itself. The overall look should remain cohesive and appetizing.
Certain elements work better on specific styles.
Delicate chocolate work suits smooth frosted cakes better than heavily textured buttercream. Test your design on a similar-sized dessert beforehand.
This ensures proportions look right and the piece stays stable.
Naked cakes with minimal frosting work well with natural decorative accents. If you prefer more frosting, spread it thick instead.
Balance the aesthetic with what actually tastes good.
The ideal approach considers both visual impact and practical function. Create something that looks like a showpiece but serves efficiently.
Sprinkles and decorative elements should enhance rather than complicate serving for all types of cakes.
Tips from Top Cake Decorating Experts
Learning from experienced bakers gives you access to techniques that make complex designs surprisingly simple.
These professional methods can transform your homemade creations.
Experts share valuable insights that save time and improve results. You can achieve gallery-quality pieces with the right approach.
Expert Advice on Working with Fondant and Icing
Proper kneading prevents fondant from cracking during shaping. Work with small pieces to maintain smooth finishes.
For buttercream frosting, aim for spreadable consistency that holds shapes. Royal icing needs proper stiffness for detailed piping.
Color dusting adds realistic shadows to fondant creations. Brush edible dust after shaping for dimensional effects.
Build up features by placing small fondant pieces underneath the main layer. This creates natural contours for facial features.
Related: Apply a minimalistic decoration style to your soda cake.
Using Mod Podge for Sturdy Paper Toppers
Mod Podge creates rigid, durable paper elements. This craft adhesive laminates tissue paper around supports.
Sandwich toothpicks between two tissue paper petals. Paint toothpicks white first to prevent wood tone from showing through.
Place one petal on scrap paper, apply Mod Podge, center the toothpick, and smooth another petal over top. Let it dry completely for sturdy results.
| Technique | Best Use | Skill Level | Results |
|---|---|---|---|
| Color Dusting | Fondant sculptures | Intermediate | Realistic shadows |
| Mod Podge Lamination | Paper decorations | Beginner | Rigid elements |
| Chocolate Templates | Edible accents | Advanced | Clean lines |
| Frosting Consistency | All decorations | All levels | Proper hold |
Professional decorators pipe chocolate designs onto parchment paper before freezing. This ensures clean transfer to your dessert’s top surface.
These expert tips help you create stunning decorative elements. Your creations will look professionally crafted with proper technique.
Seasonal Inspiration and Variations for DIY Toppers
Adapting your decorative style to match the time of year creates celebrations that feel perfectly timed.
Seasonal changes offer fresh decorating ideas that keep your presentations current and Instagram-worthy.
Your root beer float theme provides a versatile foundation for seasonal twists. Simple material swaps and color adjustments can transform your decorative approach.
Adapting Designs to Fit Different Celebrations
Seasonal fruits and herbs offer natural decorative elements. Summer celebrations might feature fresh berries, while autumn parties could incorporate figs or cherries.
Herbs like lavender or mint can substitute for traditional floral decorations. These touches add aromatic appeal to your dessert presentation.
| Season | Color Palette | Material Swaps | Thematic Elements |
|---|---|---|---|
| Spring | Pastels, fresh greens | Edible flowers, mint | Floral patterns, baby themes |
| Summer | Bright vibrant colors | Fresh berries, pineapple | Beach themes, movie nights |
| Autumn | Warm browns, oranges | Figs, chocolate leaves | Pumpkin spice, harvest |
| Winter | Icy blues, silvers | Peppermint, candied citrus | Holiday themes, elegant gold |
Different celebration types call for specific adaptations. Baby showers might feature miniature bottle decorations, while anniversaries could use elegant gold accents.
Movie night parties work well with popcorn and candy decorations. Holiday-specific cake ideas can incorporate patriotic colors or Halloween-themed variations.
Your decorative choices should complement the overall party theme. Coordinating colors and materials creates a cohesive presentation that impresses guests.
Budget-Friendly DIY Cake Topper Ideas
Creating stunning decorative accents doesn’t need to drain your wallet. Your creativity and time investment often matter more than expensive materials.
Free printable designs offer the ultimate budget-friendly way to achieve professional results. You only need printer ink and cardstock to create impressive elements.
Look around your home for unexpected items you can repurpose. Birthday cards with large numbers make instant decorative pieces.
Wrapping paper, ribbons, and even children’s toys can become unique accents.
DIY approaches typically cost $5-20 versus $30-60 for professional versions. This significant saving lets you allocate more budget to other party elements or the gift itself.
Dollar stores yield fantastic materials like tissue paper and wooden skewers. You can find hot glue and other supplies for a fraction of specialty store prices.
Plan your project well in advance when you have extra time. This allows you to shop sales, use coupons, and avoid last-minute premium pricing.
Budget-friendly doesn’t mean cheap-looking. With proper techniques, your homemade sheet creation can rival expensive alternatives while keeping costs minimal.

Integrating Party Themes with Cake Decorations
Your decorative accent should feel like a natural extension of your party’s visual story rather than a separate element.
When planning your celebration, think about how the piece on top connects to everything around it.
Matching colors creates a professional, well-planned aesthetic. Use the same palette for tablecloths, balloons, and your decorative piece.
This coordination makes your entire space feel intentional.
Coordinating Your Topper with Overall Party Decor
Repeat decorative elements across multiple desserts for cohesion. Use identical sprinkles on both your main dessert and cupcakes.
Create candy rings that appear throughout your sweet table.
Movie-themed celebrations benefit from specific references. Incorporate characters, scenes, or iconic elements from the film.
This attention to detail impresses guests who recognize the connections.
For vintage root beer float themes, extend the retro diner aesthetic everywhere. Coordinate invitations, table settings, and serving ware with your decorative choices.
This amplifies the impact of your themed creation.
Create a cohesive color story where the top piece serves as the focal point. When guests see thoughtful connections between decorations, it elevates the entire celebration.
Your gathering transforms from simple to Instagram-worthy.
Creative Presentation Ideas for Your Cake Topper
Strategic presentation transforms your homemade creation into a professional-looking centerpiece.
The way you arrange supporting elements makes a huge difference in your dessert’s final appearance.
Extend your decorative theme beyond the main accent piece. Scatter fresh berries or edible petals around the base. This creates a complete scene rather than just a topped dessert.
Use flowers to cleverly conceal structural supports at the base. Position three or five daisies strategically around the main decorative element.
This odd-number arrangement creates visual harmony.
Consider lighting when presenting your finished creation. Natural light or soft spotlighting makes chocolate work and candy decorations sparkle beautifully.
| Presentation Technique | Best For | Visual Impact |
|---|---|---|
| Flower concealment | Hiding support bases | Natural, elegant |
| Berry scattering | Extended theme | Colorful, fresh |
| Platter decorations | Professional styling | Complete scene |
| Odd-number grouping | Visual balance | Harmonious arrangement |
Thoughtful presentation elevates even simple decorative pieces. Your final cake look will impress guests with its professional styling.
Handling Common Cake Topper Challenges
When your homemade creation starts to wobble or sag, quick troubleshooting can save the day.
Understanding common issues helps you build more stable decorative pieces from the start.
Troubleshooting Design and Stability Issues
Proper support prevents tilting. For wide desserts, use three or four skewers instead of two. This creates a stable foundation.
If elements feel loose, add a dot of craft glue. Space decorative components evenly by placing two opposite each other first. Then add top and bottom pieces before filling gaps.
Ensuring Durability Throughout the Celebration
Timing matters with certain materials. Allow modeling clay to dry 12-24 hours for proper hardness. Chocolate and fondant need adequate setting time before assembly.
Test your finished piece gently before placing it. Identify weak points that need reinforcement. Heat can soften certain materials, while humidity affects paper elements.
Learning from professional tutorials helps achieve clean edges and symmetrical shapes. These techniques ensure your decorative work survives the entire celebration beautifully.
Wrapping Up Your DIY Cake Topper Journey
Your path from beginner to confident creator has been filled with practical techniques and artistic discoveries. Each project builds your skills and creative confidence.
Start with simple paper designs before moving to complex chocolate work. This gradual approach ensures success at every level.
| Skill Level | Recommended Projects | Key Techniques | Expected Results |
|---|---|---|---|
| Beginner | Paper cutouts, basic shapes | Cutting, gluing, simple assembly | Clean, functional decorations |
| Intermediate | Layered designs, edible elements | Fondant work, color mixing | Professional-looking pieces |
| Advanced | 3D sculptures, chocolate art | Structural engineering, fine details | Gallery-quality creations |
| Expert | Multi-element masterpieces | Advanced planning, precision work | Show-stopping centerpieces |
Document your progress with photos to see your improvement over time. Your second attempt will show noticeable growth in technique and design.
Handmade decorations carry special meaning that store-bought versions cannot match. They transform ordinary desserts into personalized celebrations.
The skills you learn extend beyond dessert decorating. You can apply them to party crafts and other creative projects. Experimentation often leads to your best innovations.
From Ordinary to Memorable
Making your own decorative accent transforms ordinary desserts into memorable centerpieces.
Your personal touch adds meaning that guests will remember long after the party ends.
Whether you’re working with an elaborate tiered creation or a simple sheet dessert, the right decorative element makes it special.
The techniques shared here empower anyone to achieve impressive results.
These same skills work beautifully for cupcakes, cookies, and other sweet treats.
With practice and guidance, you can create bakery-worthy desserts that look stunning and taste delicious.
Your handmade touches reflect thoughtfulness that elevates every celebration.